
Raised Fishbone Stitch is also known as
Punto Pasado Encontrado [ES], Gehöhter Grätenstich [DE]
About the Raised Fishbone Stitch
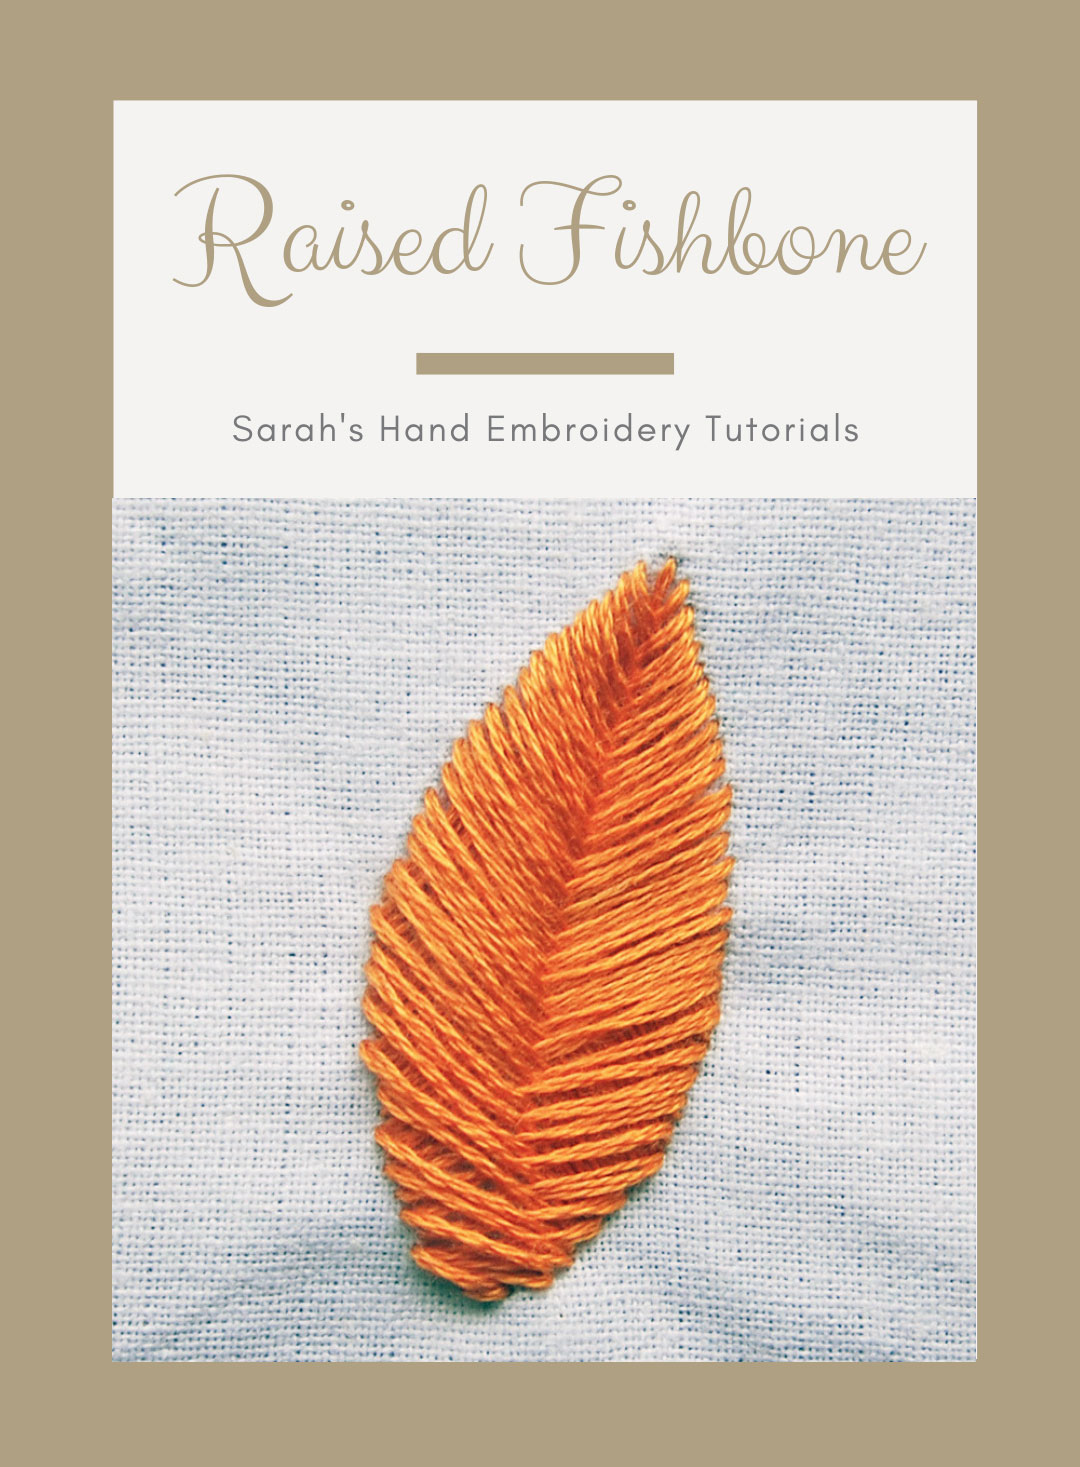
The Raised Fishbone Stitch is typically used for leaf patterns. It throws out a padded effect on the motif. The stitch looks a bit difficult but has no complications when you start to stitch. In fact, you will enjoy it as you see a beautiful, richly filled leaf emerging as you go along.
How to do the Raised Fishbone Stitch
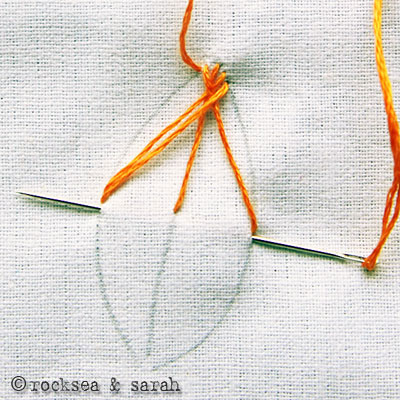
I have used a leaf pattern to illustrate. It is divided into three lines, namely, A, B and C, which will act as the respective stitch lines.
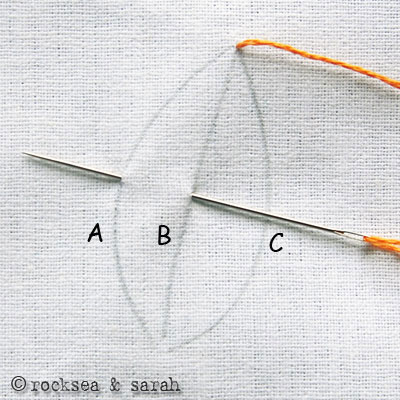 |  |
| Fig 1: Bring the needle out through the topmost tip of the leaf. Now, take the needle in through B at a point that lies halfway in the stitch line. Bring the needle out through A at a point that lies horizontally parallel to the point on B. | Fig 2: After pulling the needle out, take the needle through C and out through A, as shown in the picture. Pull the needle out. |
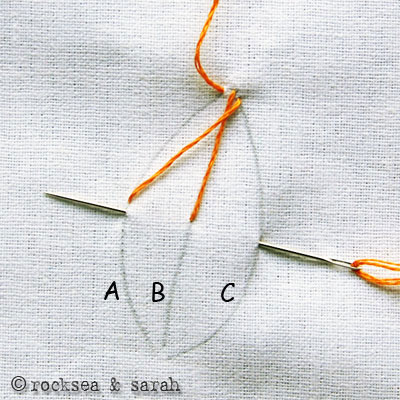 | 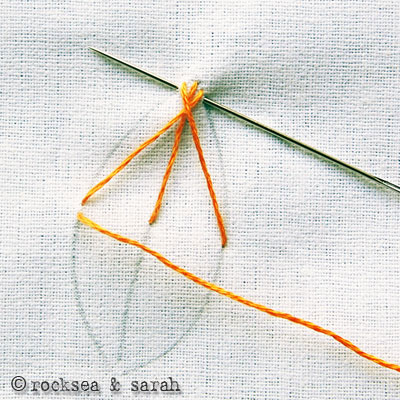 |
| Fig 3: We again put the needle through C and pull it out through A, only this time from the bottom of the stitch on B. | Fig 4: Continue this process of stitching. Each new stitch between C-A falls right under the previous stitch. |
 | 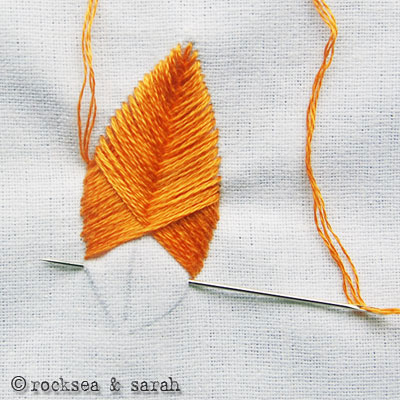 |
| Fig 5: The padding effect takes place as we keep stitching. | Fig 6: Halfway through, our stitch would look like this. Continue the process to finish the leaf. The stitches done over the other half of the leaf would fall over the existing threads from previous stitches. This adds to the raised effect of the leaf. |
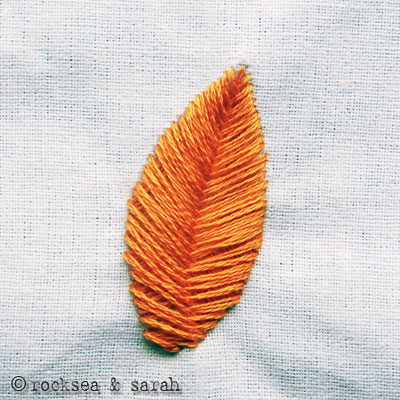 | |
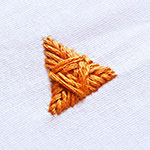
| Fig 7: Your finished leaf looks more or less like this. |
Learn to do Raised Fishbone Stitch in 2 minutes!
Learn this stitch along with 305 other stitches from our 600-page eBook.

Learn more stitches from the Fishbone Stitch Family
Sprat’s Head |
Crow’s Foot | |


I’m a real beginner when it comes to embroidery and have really enjoyed the tutorial on this stitch. It’s so very clear and yet concise. I wonder if it would be okay to neaten the edges by running split stitch along the perimeter? Your work is already neat so doesn’t need it, but mine could do with a little tidy up. 🙂
Hi Melinda,
Of course, you can! It is OK to work along the edges with an outline when the edges seem a little rugged. Use fewer strands of thread if you do not want the outline to be prominent.
Just want to say thanks! my mom burned a big hole on our sofa which made her very upset. so I searched on Chinese internet then got the pics. you explained it so clearly even the chinese posters dont speak english they can do it well. I fixed both the cover and the blanked, thank you for saved my mom’s sofa(and the cover too).

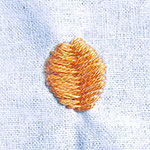
Wow! 😍 Thank you, Anran for taking the time to share this work with us. Love the way you have made the leaf.
Lovely
Thank you, Jolene.☺️