
Kamal Kadai – the basics
|
|
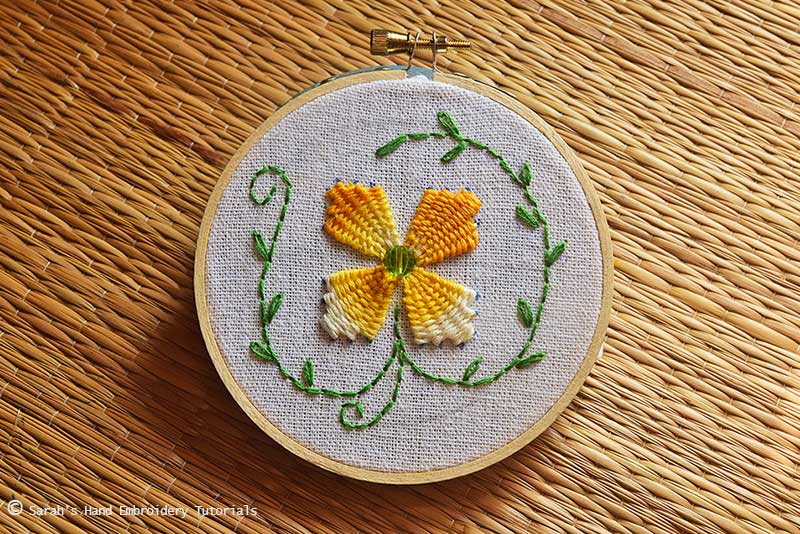
Kamal Kadai literally means ‘Lotus Embroidery‘ in Hindi/ Urdu languages. The name must have come about from the way the shape of the petals is made using the weaving technique. The petals are longest in the middle with a step-like descending formation on either side, which resembles a lotus flower.
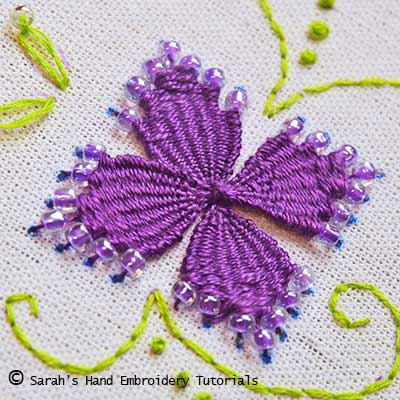
Kamal Kadai is a very simple form of embroidery used over traditional Indian garments like the saree. The patterns are mostly floral with swirly stems, and embellishments with beads and gemstones. It is often stitched with polyester threads with high sheen giving the embroidery a very rich look.
Stitches used
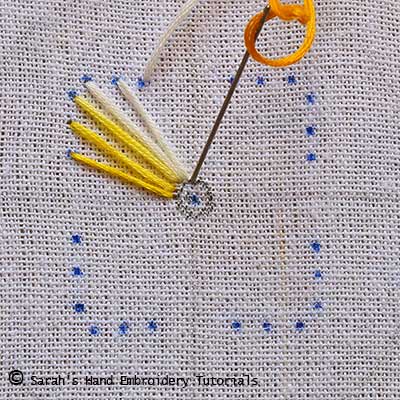
The main stitch used in Kamal Kadai is the Woven Trellis Stitch for the flowers and leaves, in combination with other stitches to complete the pattern.
A similar kind of thread work can be found in the western embroidery world, like the Teneriffe Lace Work. It is not sure if these two embroideries have inspired each other at some point in time, but my assumption is that they have originated independently. Teneriffe Lace Work uses the Woven Trellis Stitch in elaborate patterns, unlike Kamal Kadai which stays humble and simple in its use and form.
Patterns
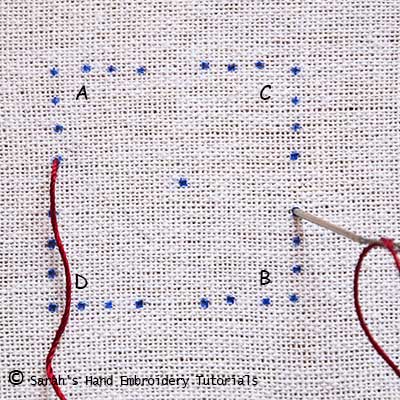
Kamal Kadai uses floral patterns with flowers of four or five petals. Often leaves are also stitched using the Woven Trellis Stitch. The first part to understand this stitch is to know how to make the flowers. A flower with four petals can be made using a square shape. I will show two ways to get your flower pattern ready. For further lessons on how to stitch the different variations of Kamal Kadai flowers, just click on the links at the end of the page.
Making the pattern
#1 Making flower petals using an odd number of spokes
 |
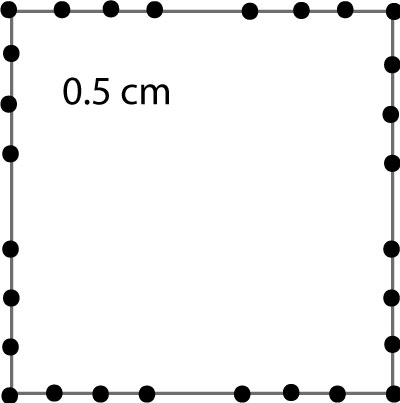 |
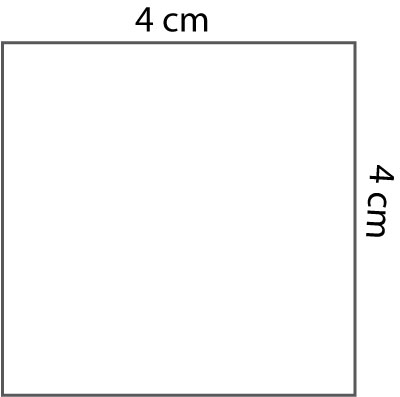
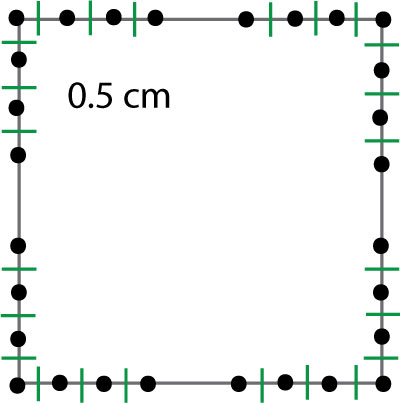
| Fig 1: On a piece of paper, make a square of the size which you want your flower to be. I prefer working with a 4 cm x 4 cm square. | Fig 2: Now, mark points at a distance of 0.5 cm starting from the corner, on either side. Do this on all 4 corners. I mark 3 points on either side of each corner. |
 |
 |
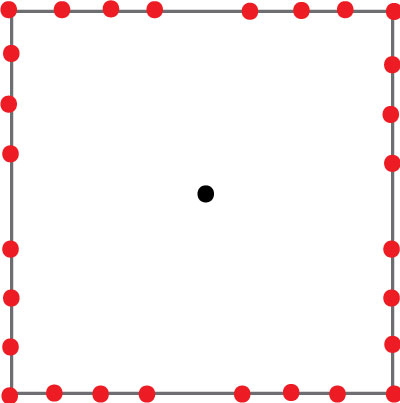
| Fig 3: These points will be your stitch points to make the petals. I have marked the points with a red dot. | Fig 4: You just need to transfer the red stitch points onto the fabric to start stitching. It’s as easy as that! Keep the pattern for future use. |
#2 Making flower petals using an even number of spokes
 |
|
| Fig 1: An odd number of spokes leaves a small elongated part of the foundation stitch exposed after the weaving. To avoid that, we can use an even number of spokes. Here is how to make the pattern. | Fig 2: On a piece of paper, make a square 4 cm x 4 cm and mark points at 0.5 cm distance from each other, starting from the corner point, as you would make the odd number of spokes. |
 |
 |
| Fig 3: Then, mark between each point to define the stitch points. I have marked them using green lines. Now, you have an even number of stitch points that will translate to an even number of spokes! | Fig 4: Again, you just need to transfer these green stitch points onto the fabric to start stitching. |
Next, learn the different variations of Kamal Kadai:


 Sarah has been researching and sharing hand embroidery lessons for over 18 years, making it accessible to everyone around the globe.


I love learning different techniques of most any craft. The results are beautiful using this style of embroidery. Thanks for taking the time to share!👍♥️😃
Thank you for dropping by, Tammy! Love to know that you enjoyed this technique!
Nice work♥️
Glad that you liked! 🩷
Thanks a ton. It’s well explained and so easy to follow😊
Great to know you liked it! 🙂
Beautiful and thanks for giving step by step pictures. Thanks a lot
Thank you, Nirmala! 🙂
Recieved a post from you after a long time. Thanks for d beautiful tutorial. Looking forward for more. Plz keep posting! Regards.
Hi Humera,
Thank you so much! I love making these pages….hope to get more to you.😊
That´s a beautiful stitch. Thanks for teaching it.
Thanks, Isabel. ❤️ It was fun making this tutorial.