
About the Surface Satin Stitch
The Surface Satin Stitch is an ‘economical’ way of doing the Satin Stitch. Unlike in the Satin Stitch, the back of the fabric will reveal significantly less of the thread. Instead of doing the Satin Stitch in a whipping manner, each stitch is made by making a tiny jump to the previous stitch’s side. The tutorial will, of course, will make it clearer. This stitch is used in Kantha Work, where small motifs are filled using the Surface Satin Stitch. It is also used in Bayeux Embroidery, a laid work of English origin, to cover the ground surface without using up a lot of thread.
How to do the Surface Satin Stitch
 |
 |
| Fig 1: Start from the top stitch line and go down the bottom stitch line to make the first straight stitch. | Fig 2: Next, pluck just about a tiny bit of fabric very close to where you went down previously, and pull out the needle. |
 |
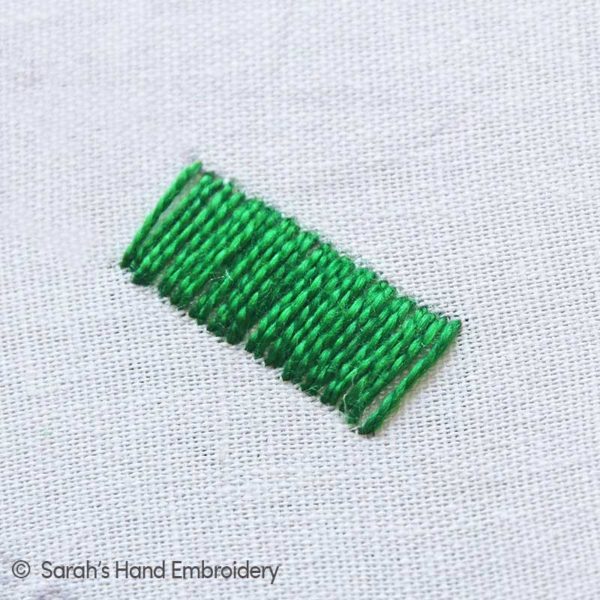 |
| Fig 3: Go in through the top stitch line to create the second stitch. Come back up to its side by plucking a tiny amount of fabric. | Fig 4: Continue this process to cover the area with a smooth texture. |
 |
|
| Fig 5: This is how the backside would look like! |
Learn this stitch along with 305 other stitches from our 600-page eBook.

Other stitches from the Satin Stitch Family
|
Surface Satin
|
Back Stitched Satin
|
|
|
Trailing Stitch
|
Double Satin
|


 Sarah has been researching and sharing hand embroidery lessons for over 18 years, making it accessible to everyone around the globe.


THANK YOU. A few days back,.. you taked about tying knots. The first photo is of the back of my embroidery. NO KNOTS TIE. I WEABED THE LOOSE ENDS INTO THE BACK OF EACH ITEM I EMBROIDERED. The second photo is the finished bouquet. Hope you like it. Again * THANK YOU VERY MUCH FOR BEING THERE. Your site is so easy to learn from. If you notice * I have used several different kind of stitches. YOU ARE A GREAT TEAHER. Oh! one more thing * I found a site n the internet that may be of interest to everyone * 123 Stitch * The site has lots of different DMC #8 embroidery thread to choose from. PLASE FEEL FREE TO SHARE THE INFO * ALWAYS. HAVE A GREAT DAY. ❤️❤️❤️❤️❤️
Thank you, Sylvia, for sharing all your beautiful work. I am always happy to see them and appreciate how you improve each time!
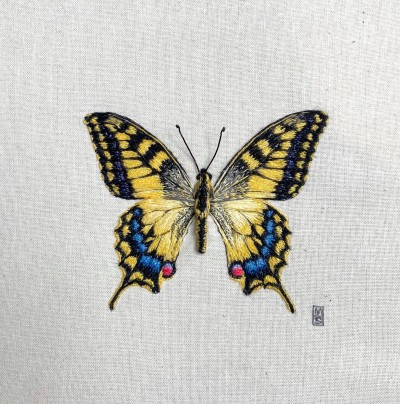
I’m completely self taught and use this stitch all the time, but I do it one way to fill a section then go back the other way to fill in the gaps. I don’t use this stitch for economical reasons, I need to do it this way to keep the thickness of the back to a minimum as my work requires mixing in lots of different coloured threads (like painting), the back can become too thick and affect the flatness of the piece making it look clumsy and less refined.
Hi Mieke,
What a gorgeous piece of work! Thank you for sharing it here. It is unbelievably beautiful.
It is a great idea to use this stitch when you want to keep the back of the fabric light. Since you do a return journey of the stitches, does it not increases the stab load on the edges of the pattern?
Thanks for your reply 🙂
I’d never really thought about the increased stab load, I imagine there is more stabbing through the stitches on the back, especially as I may go back and forth a few times or see a small gap further away and reach across the back to fill it. I only ever use 1 floss, and if I just went one way, I’d have to put the stitches so close together to avoid gaps that I’m very likely to come back through the hole I’ve just made and undo the stitch.
I work in a very organic way and am always looking to see if it needs a bit of this or that, here or there. Sometimes small ridges can appear on the back in high traffic areas, but generally, as I’m a 1 floss embroiderer, it doesn’t make much of an impact on the back. As long as I can still get my needle through, I’m happy.
I don’t really see it as traditional embroidery, I’m an artist and it’s another medium to express that, I see it more as painting with thread.
I started out embroidering butterflies 4 years ago with no experience. I didn’t even look anything up, I just picked up a needle and thread and did it the way I thought, learning from my mistakes along the way. I soon learned you need a hoop, then I learned that I needed to iron a stabilising piece at the back to stop the material crinkling and stretching around the edges. (It’s only now that I’m here googling satin stitch to see why so many think it’s more correct to bring the thread all the way round the back, I can now see that a puffier effect may be desirable in many cases). But I am loving this media and there is always more to learn, and it’s great to see sites like yours for ideas on different finishes and stitches I may want to use later on. Thank you 🙂
Hi Mieke,
I love the way you stitch. I would love to see more butterflies if that is okay with you. My husband has photographed a lot of insects and butterflies, and when he saw your work, it delighted him too. We were talking about the details of your work. Beautiful!
As a newbie, I too started with no hoop. 😀 We learn so much on our journey and I think it is probably the best way to learn- organically. Thank you for dropping by on our website and sharing your comments. It is valuable.
If you ever want to check out some butterfly photographs by my husband, here is a sample: https://www.rocksea.org/oriental-plain-tiger/
Warm regards,
Sarah
THAT Surface Satin Stitch is really neat. I find I have a tendency to want to do things that take a lot of that type stitch so I will remember that. Thank you again for your knowledge You are VERY helpful. I just tried to download my latest embroidery, which could have really used this stitch. Thank you again. I’ll send you the photo in another way.
excellente méthode, merci!
Thank you, Marie! 🙂