
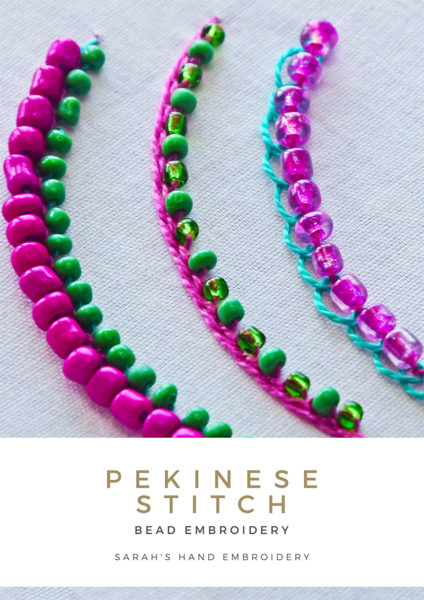
How to do Bead Embroidery with the Pekinese Stitch
The Pekinese Stitch is wonderful to play around with beads. The weaving of the thread over a base stitch gives us enough room to experiment with different kinds of beads and looks. Try out different variations with different sized and colored beads. Each time, it will fascinate you!
Variation 1: Beads on either side
 |
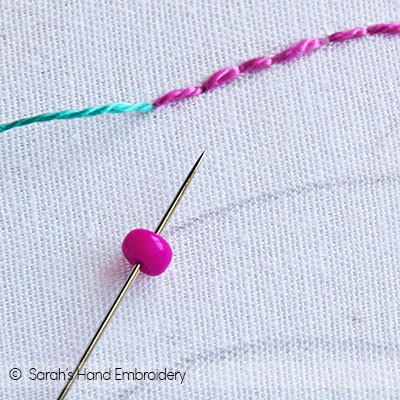 |
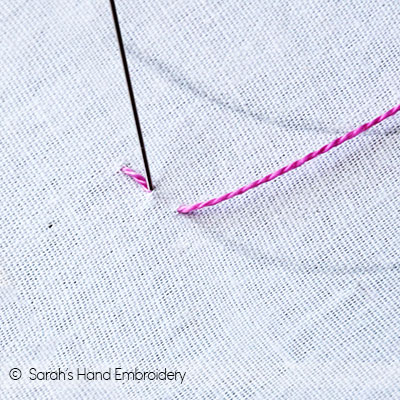
| Fig 1: Start by making a row of Back Stitches. | Fig 2: Next, come out with another thread from one end of the Back Stitch row. Slip in a bead. |
 |
 |
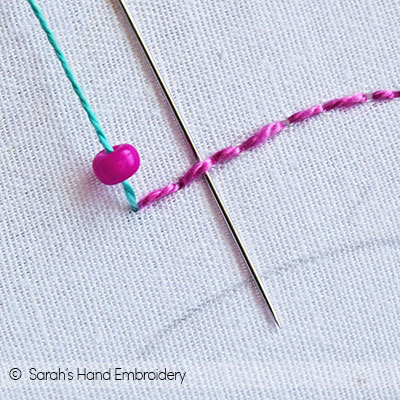
| Fig 3: Push the bead to the base and pass the needle under the Back Stitch, as shown. | Fig 4: Next, slip in another bead. I have used a smaller one. |
 |
 |
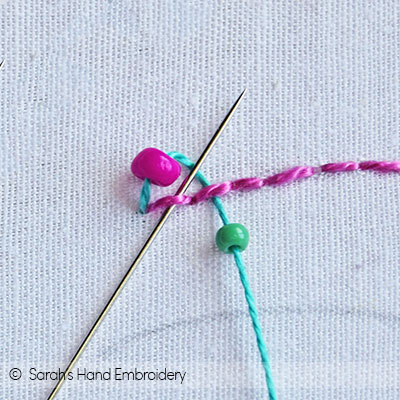
| Fig 5: Push the bead down and pass the needle under the Back Stitch, as shown. | Fig 6: Again, slip in a bead. |
 |
 |
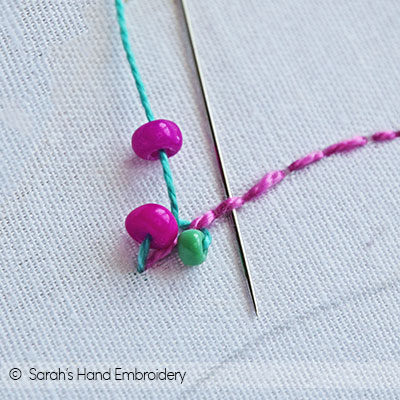
| Fig 7: Push the bead to the base and pass the needle under the Back Stitch, as shown. | Fig 8: Slip in another bead, and continue the process. |
 |
 |
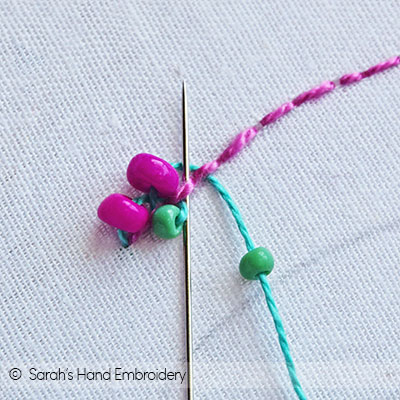
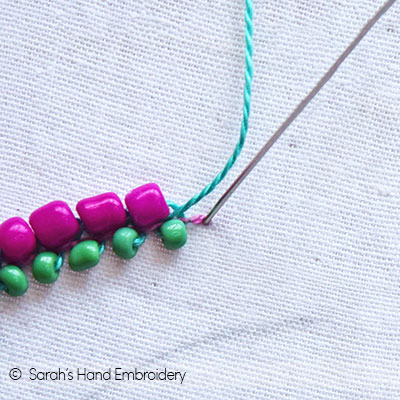
| Fig 9: End the stitch by passing the needle on the last stitch point of the Back Stitch | Fig 10: This is a row of this variation. |
Variation 2: Beads on one side
 |
 |
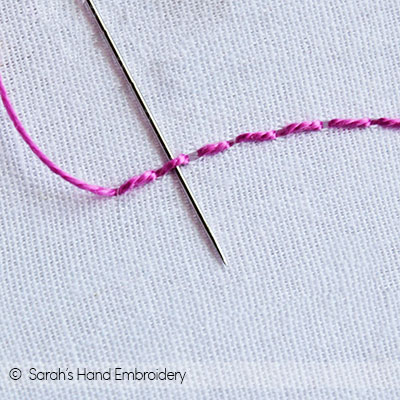
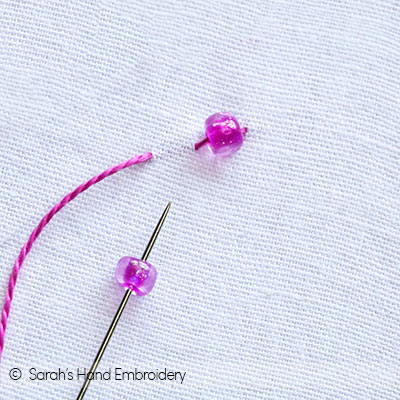
| Fig 1: Start by making a row of Back Stitches. Come out from the end of the row and pass your needle under the Back Stitch, as shown. | Fig 2: Next, slip in a bead before passing under the Back Stitch again. |
 |
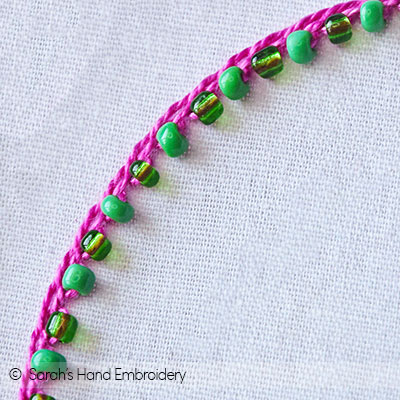 |
| Fig 3: Pass under the Back Stitch from the top. Slip in a bead before passing under the stitch from the bottom. Keep up with this routine. | Fig 4: This variation will look like this. Experiment with the beads only on the left side of the row too. Play around with different colors to create various looks. |
Variation 3: Beads on the base stitch
 |
 |
| Fig 1: Start by making a row of Back Stitches. Slip in a bead as you make each stitch. | Fig 2: The stitch will be big enough to accommodate the bead snuggly. But, you can always make a bigger stitch and add more beads for a variation. |
 |
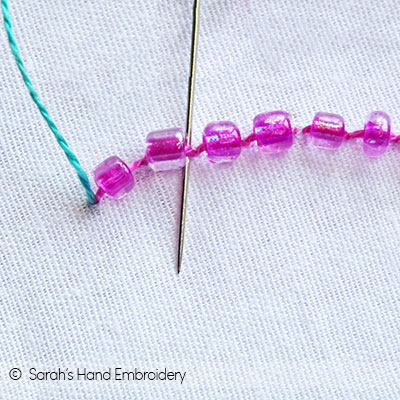 |
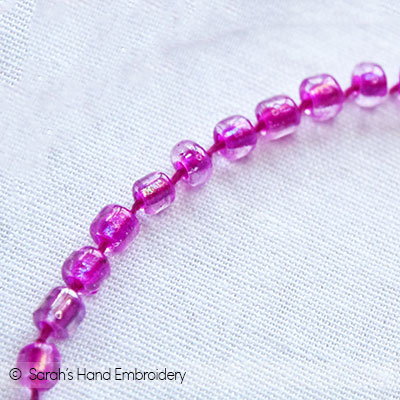
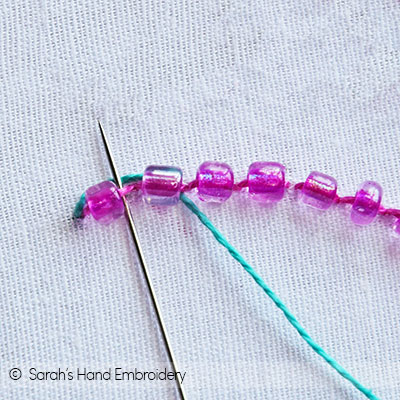
| Fig 3: The Back Stitch row with beads will look like this. | Fig 4: Now come out from one end of the row, preferably with another colored thread, and pass under each stitch from the top, then the bottom. |
 |
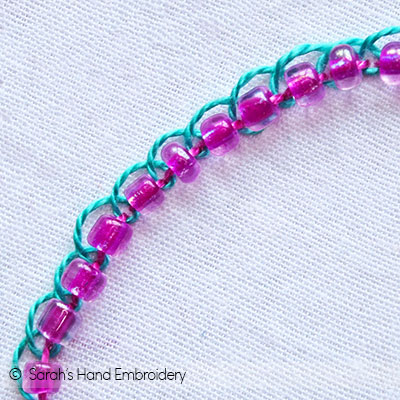 |
| Fig 5: You may leave the woven thread slightly loose to show more prominently. | Fig 6: This variation will look like this. |
Stitch used in this project

 Sarah has been researching and sharing hand embroidery lessons for over 18 years, making it accessible to everyone around the globe.


Would this be the perfect way to create a brooch?
Hi Hallibee,
You can use this stitch on a brooch. Check out this page to see other ways to attach beads: https://www.embroidery.rocksea.org/projects/bead-embroidery/
The brooch sample you see in this page uses the Back Stitch to attach beads. The tutorial is not available yet, though.
Warm regards,
Sarah
Very nice..i like it will try definitely 😊
Thank you, Sailaja.
Adorei seus pontos.Lindo!Obrigada por nós proporcionar este aprendizado tão diferente de bordar.Eu amo bordar e aprender novos pontos
Gracias. Estoy muy feliz de que te hayan gustado nuestros tutoriales. 🙂
Very beautifully done and explained. Thank you.
Thank you, Sumita! 🙂
Thanks for the tutorial! Beadwork interests me, and these are great stitches to try!
Thank you, Richa! 🙂