

How to do Bead Embroidery with the Coral Stitch
The Coral Stitch gives at least three totally different ways to anchor down beads to the fabric. The little knots formed between its linear structure can be used to space out the beads in your own creative ways. I have also shown a dimensional variety that can be used on edgings or in 3 D embroideries. Which one do you like the most?
Sample 1: With single beads
 |
 |
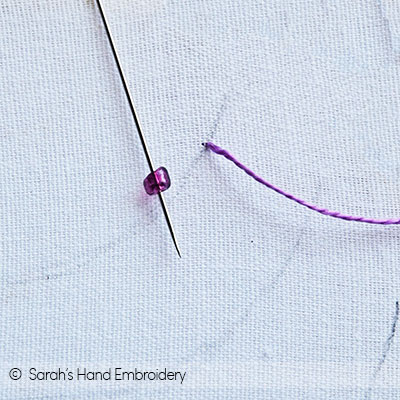
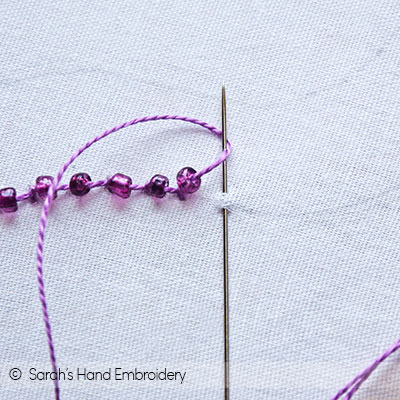
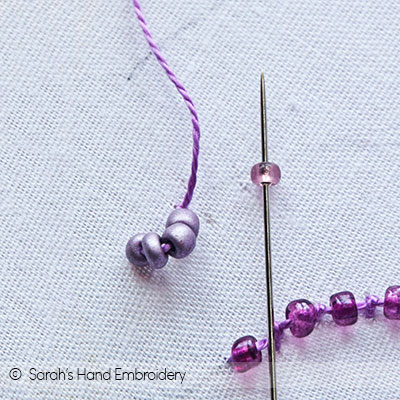
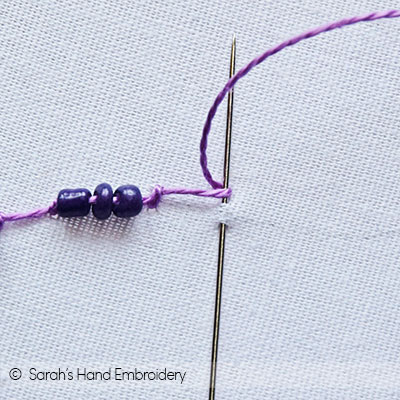
| Fig 1: Come out with your needle from one end of the stitch line. Slip in a bead and push it to the base. | Fig 2: Pluck a bit of fabric on the stitch line. The distance of this stitch from the first one should be roughly the size of the bead. |
 |
 |
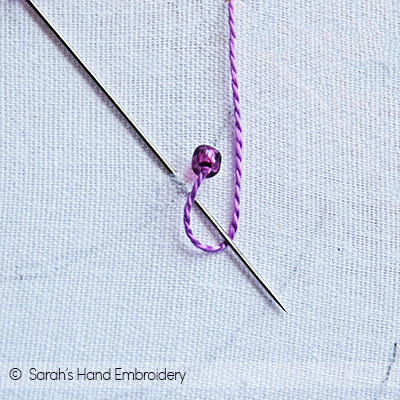
| Fig 3: Keep the bead closer to the fabric and take the working thread over the needle. Loop it under the needle, as shown. | Fig 4: Pull out the needle to form a knot. Continue the process. |
 |
 |
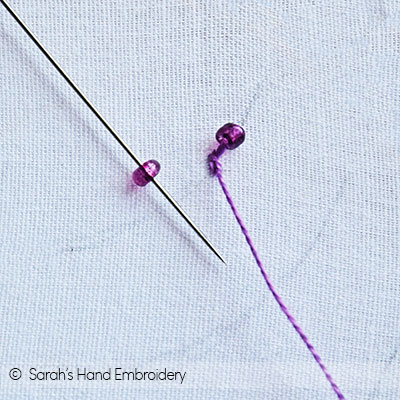
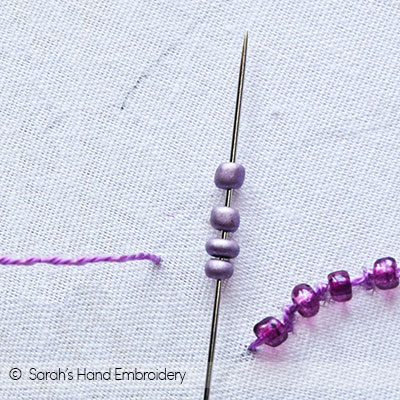
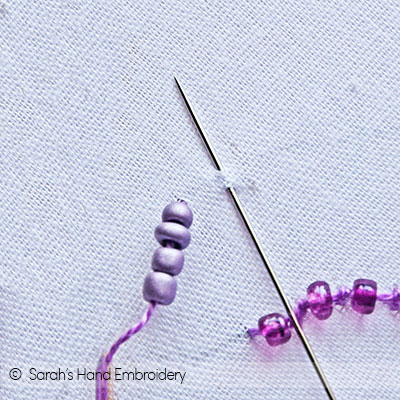
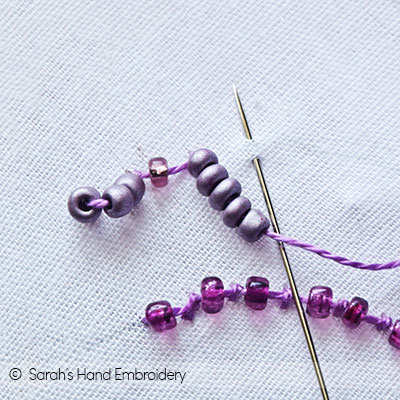
| Fig 5: I find working the other way much comfortable. Slip in the bead. | Fig 6: Pluck a bit of the fabric on the stitch line. |
 |
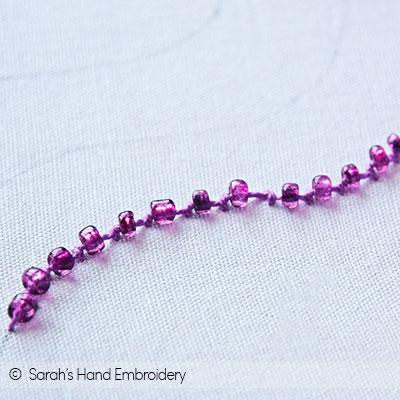 |
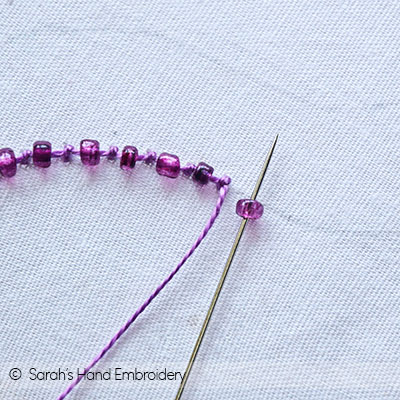
| Fig 7: Loop the working thread over the needle and then under it. Pull it out to form the knot. | Fig 8: The beads sit snug and secure between each knot. |
Sample 2: For dimensional edges
This is a great method to use on the edges of the fabric material. It creates a beautiful decoration with its dimensional features.
 |
 |
| Fig 1: Come out with your needle from one end of the stitch line. Slip in a few beads into the needle. I have used 4 beads to begin with, but then I continue with 5 beads later. | Fig 2: Pluck a bit of fabric on the stitch line. Note that the space from the first stitch point is not much. In fact, the lesser space, the more dimensional effect you create with the beads. |
 |
 |
| Fig 3: Loop the thread around under the needle and pull it out to form the knot. The beads rise up to fit into the small space creating a beautiful arch. | Fig 4: For the next one, I slip in a single bead. This will give a break between each arch you will make with the beads. |
 |
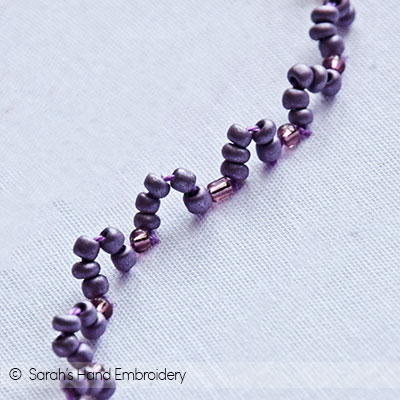 |
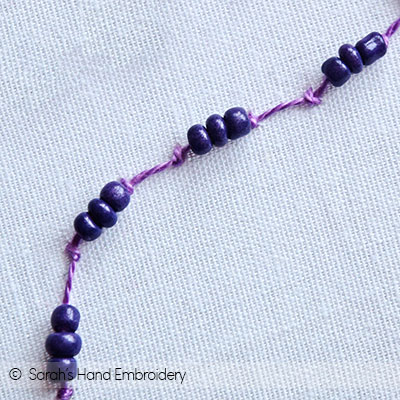
| Fig 5: I alternate between single beads and 5 beads. | Fig 6: The final effect is perfect! |
Sample 3: Alternating beads
 |
 |
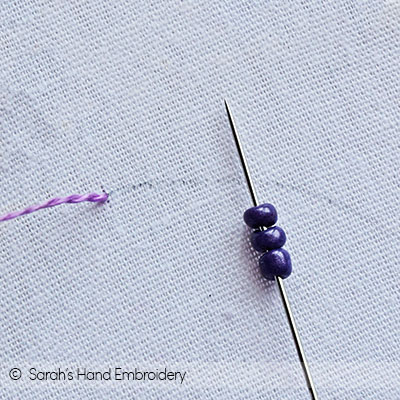
| Fig 1: Come out with your needle from one end of the stitch line. Slip in a few beads and push it to the base. | Fig 2: Loop the thread under the needle to form the knot. I leave the next stitch empty. |
 |
|
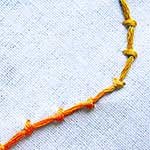
| Fig 3: Continue with alternating between 3 beads and an empty stitch to create a pattern like this. |
Stitch used in this project
 Sarah has been researching and sharing hand embroidery lessons for over 18 years, making it accessible to everyone around the globe.


Sarah, I have paid for your Hand Embroidery book (€28) via your bookstore but it has not downloaded onto my iPad. What to do? Thanks!
I also purchased the left hand embroidery book and got an error page despite payment coming from my card
Hi Alana,
Looks like an unusual technical issue to me. Please give me some time to see what’s going on. I see your order as completed, but have not received a confirmation email yet. We will get back to you as early as we can with a solution. Thank you.
Sarah
Hi Alana,
Looks like you were able to download the eBook! Please let us know if you have any other trouble with it. Will be glad to help you further.
Hi Janet,
Thank you for purchasing our eBook. You must have received an email with the invoice and the link to download the ebook. Please check your spam/ junk folders for the email, in case you do not find it in your inbox. Click on the link to download the ebook. I hope this helps. Let me know if you have any trouble with it; I will be happy to help you further.
Sarah
That sample 2 looks like a caterpillar 😍
Yes! ☺️ It makes a good variation for 3D Embroidery!