
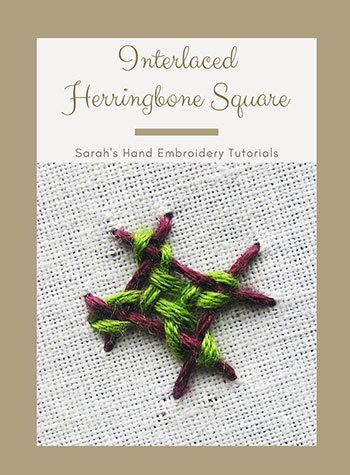
This stitch is an example of how a base of Herringbone Square Stitch can be used for weaving. The result is a beautiful tight Stitch that allows experimenting with colors and can be used for scattered filling.
 |
 |
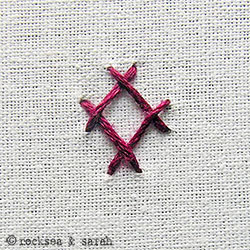
| Fig 1: Make a base of Herringbone Square Stitch. | Fig 2: Now bring the needle out through the inside of one corner and pass it under the top intersection, as shown. |
 |
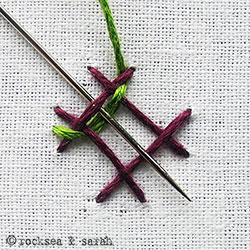 |
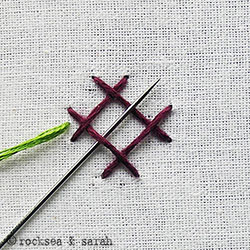
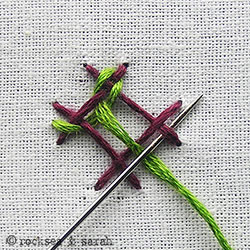
| Fig 3: Now, pass the needle under the right intersection. Do not pluck the fabric underneath at any time. | Fig 4: Continue by passing the needle under the bottom intersection. |
 |
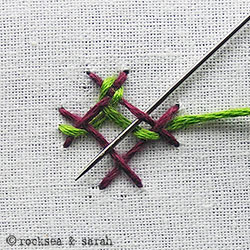 |
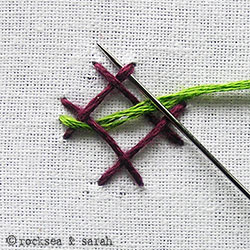
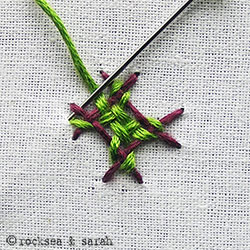
| Fig 5: Then, pass under the last intersection on the left. | Fig 6: Now, take the needle through the fabric on the top right corner, and come out from the lower left corner, as shown. |
 |
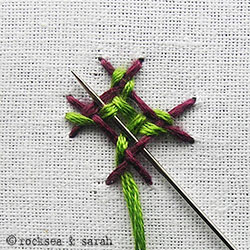 |
| Fig 7: Pass it under the top intersection without plucking the fabric beneath. | Fig 8: Again, pass it under the tight Stitch as shown. Do not pluck the fabric underneath. |
 |
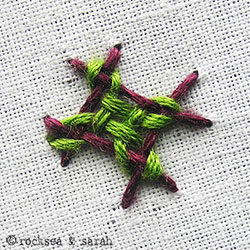 |
| Fig 9: Now, take the needle in through the fabric, as shown. This finishes one laced Herringbone Square Stitch. | Fig 10: The finished look will throw out a star like-pattern. |
 Sarah has been researching and sharing hand embroidery lessons for over 18 years, making it accessible to everyone around the globe.


Your tutorials are so easy to understand. Thank you. So you have an ebook in the future? Really look forward to it’s release.
Thank you, Cookie! Yes, the Ebook is due to be published in a couple of weeks and will be available on our website. 🙂
Love this tutorial. Looking forward to your e-book.Thank you Sarah
Thank you, Raji. The E-book will be available in a few days!
I enjoy your designs and look forward to your book release.
Thank you, Carolyn. The ebook will be available in just a couple of weeks right here on our website!
Love you tutorials, thanks for sharing your gift! And, free! Thanks again.
Anja
Carthage, MO
Hi Anja,
I am only happy to share what I know. Responses like yours keep us going! 🙂
Fabulous tutorial .. LOVE the quality of your tutorials. Easy to follow
Thank you, Colleen. Happy that you like our pages! 🙂