

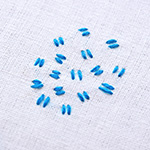
About the Sheaf Stitch
The Sheaf Stitch is a beautiful variation made using bundles of Straight Stitches. The ‘sheaves’ can either be scattered around to fill the area. They can also be placed in neat vertical or horizontal rows to create beautiful borders and patterns. Try it out in other shapes like the circle, or combine it with embellishments like beads and sequins. I will illustrate this stitch in a horizontal row.
How to do the Sheaf Stitch
 |
 |
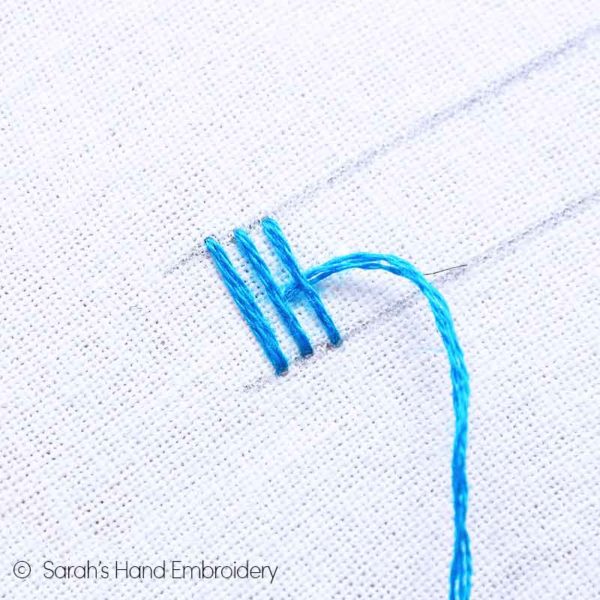
| Fig 1: Stitch three Straight Stitches close to each other. | Fig 2: Bring the needle up from under the middle stitch, as shown. |
 |
 |
| Fig 3: Then, pass the needle under the third stitch and pull it out. | Fig 4: Now, go over the three stitches and pass it under the first stitch and take the needle in through the same point from where you had come out earlier. |
 |
 |
| Fig 5: The three stitches will be pinched together in the middle, forming a sheaf shape! | Fig 6: A row of sheaf stitch will look like this. |
Learn to do Sheaf Stitch in 2 minutes!
More stitches from the Straight Stitch Family
|
|


Learn the Sheaf Stitch along with 305 other stitches from our 600-page eBook.

 Sarah has been researching and sharing hand embroidery lessons for over 18 years, making it accessible to everyone around the globe.


trying sheaf stitch
What a beautiful application! Nice!
thanks mam
Hi Sarah, I am well behind with my stitches but have all saved for a catch up.
I love Sheaf stitch for it’s look and simplicity. I have used it many times.
I have really enjoyed Toseefa’s fabulous designs above. All are excellent in execution and lovely tones.
Wonderful, Maureen. I love the way this stich adds texture to the fabric…maybe I will try something monochromatic! Do share your samples as you catch up on the stitches. ☺️
Monochromatic sounds good, I will do as you suggest and post when I catch up. Enjoy your day.
Dear maam I’m trying to learn this crochet hand made neck design, it is also very interesting and easy. Have a look please
Hi Sayeda! I think you missed toadd the image. Can you upload it again? ☺️
Love your emails and the “Stitch Family” concept. That way it’s much easier to choose when you want to use them. Planning on making samples of the family soon.
Thanks Lakshmi! Share your samples as you do them. Will look forward to seeing all of them!
I enjoy your emails and stitch tutorials. Thank You.
I also have switched my email address. The OLD Address is ikeleenla@cox.net.
My NEW email Address is ikeleenla@gmail.com
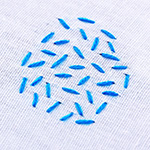
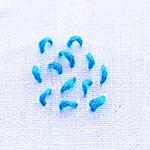
Dear ma’am I am tried to make sheaf stitch, as my straight stitch’s family is completed as sheaf stitch and seed stitchs are left… one is done but the other is under progress…. kindly have a look and send me suggestions regarding this stitch.

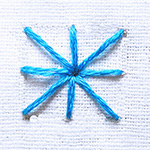
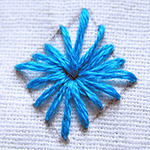
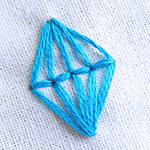
I love the way you try to use these stitches. It is beautiful how you have tried to apply this isolated stitch in the form of a flower. I have made the tutorials live, just inspired by your samples! Thank you for sharing. You can try smaller Sheaf Stitches to scatter and fill an area, or make flowers in circles?
Thank you Ma’am for your reply… I will try soon as you are guided…. stay blessed and safe.
Nicely done! This is a stitch borrowed from Needlepoint (where you use aida or Matty cloth). So, in needlepoint, it is easy to make this stitch symmetric. On a regular cloth, you have done great by marking the cloth with a pencil. With more stitching and practice, your stitches will get better and more refined.
Beautiful work. Keep stitching and keep sharing.
Thank you so much for your reply and guidance….. may Allah bless you with everything. Thank you once again
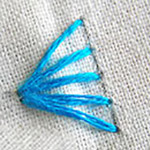
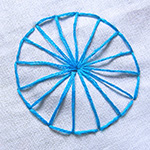
This is a great way to use the Radiating Stitch. At first, I thought it is the Sheaf Stitch. 😁 It’s a nice waybto add texture and color. Also, I liked the way you have jumped from one Radiating Stitch to the other.
Thank you for your appreciation….
A. O. A hello everyone! Sarah I’m sending you my straight stitch family, I followed your instructions and pattern. Kindly have a look when you get time tell me whether I need more improvement or whatever you think I will good for me. Thank you.
I’m send via email because file is not attached.
Hi Syeda,
Thank you for sharing your work. I am so excited to see your stitching! Beautiful! I, particularly, like the bird and the wonderful way in which you have applied the Ray Stitch. ❤️
I will send other stitches but due to busy routine couldn’t send all work is done by me. I’m a beginner and I need guidance. In Pakistan all academic studies are going online, so daily routine is become hard for moms, I will send you all work soon. Please guide me as you are an expert. Take care. Thank you
Thank you so much sarah….. it is really helpful for me because I’m a learner, I done mba in human resource management from a Pakistani university, embroidery is a quiet different field for me. But it is very interesting when you are a housewife. Thank you sarah for your kind response regarding my worry and confusion.
Always welcome, Syeda! ❤️
a. o. a maam i have prepared “straight stitch family” and i want to bind those peices of cloth in a shape of book, how can i make them…..
Hi Toseefa,
Congratulations, on doing the Straight Stitch Family. There will be more stitches added soon. You can cut all those pieces in the same size and layer them together and use the Gut Raincoat Stitch to bind them together. You need to work a single row of the running stitch binding all the pieces together at the edge that you want to bind (usually, the left side). Now, if you see, the stitches will be alternating on both sides, just like the two stepped rows shown in the tutorial. Then, lace the thread between these stitches that fall on either sides. Here is the link: https://www.embroidery.rocksea.org/stitch/running-stitch/stepped-running-stitch/
If that looks tricky to you, just work the closed blanket stitch or just the simple blanket stitch. https://www.embroidery.rocksea.org/stitch/blanket-stitch/closed-blanket-stitch/
Before you bind all the layers, you can work the blanket stitch to decorate and secure the edges of each piece on the three open sides.
I hope this helps. Do share your work. It will be great to see it!