

How to do Bead Embroidery with the Seed Stitch
Stitching beads using the Seed Stitch or the Rice Stitch can create wonderful textures on the pattern or fabric. There are many ways you can create different looks by using beads of different colors, sizes, and combinations with the Seed Stitch itself. If you are new to using beads in embroidery, this would be a good page to start with. It is super easy and mistakes can easily be hidden ;). The other page you can try out is the Running Stitch Bead Embroidery. I have shown the basic technique of how to use the Seed Stitch and a few variations here. Try developing your versions and don’t miss uploading your samples here!
Sample 1: Short stitches in a single color
In this sample, I have tried to keep the stitch as short as possible to not show on the sides of the bead. It is a perfect way to work when you want to add an isolated bead to your project, like using it for an eye.
 |
 |
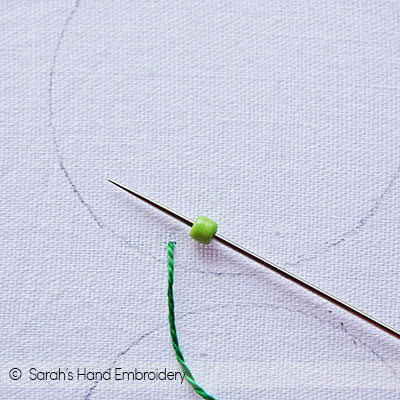
| Fig 1: Come out with your needle at a point in your fabric. Slip in a bead in the needle. If your bead is small to hold in your fingers, then just pick it up with the tip of your needle. | Fig 2: Slip down the bead all the way down to the base. Pass your needle back in through the fabric with a small stitch. This ensures that the stitch does not show outside the bead. |
 |
 |
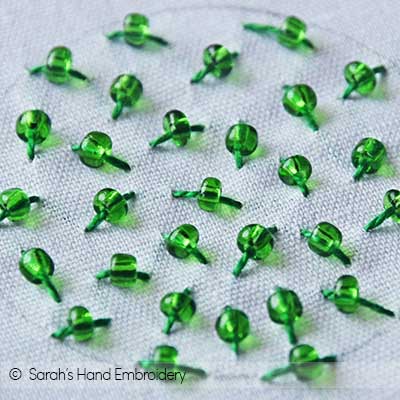
| Fig 3: Now, come out at a random angle and slip in another bead. Secure it in place. Keep doing this for the entire space you want to fill. | Fig 4: A finished patch looks like this. You can adjust the space between the beads. |
Sample 2: Long stitches in a single color
Here, I show you how you can add a bead using a long stitch. This allows the bead to move and run through the stitch.
 |
 |
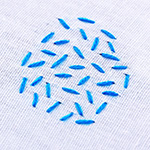
| Fig 1: Stitch the beads onto the fabric as in the above variation. Only this time, your stitches will be longer and spill out from the sides of each bead. | Fig 2: A finished patch looks like this. Using beads and threads of contrasting colors can add a different effect to this variation. |
Sample 3: Combination of Seed Stitch and Seed Stitch with beads
 |
 |
| Fig 1: Start by filling the patch with Seed Stitch. Leave enough space between each stitch to accommodate beads between them. Then, you can stitch on the beads in the gaps. | Fig 2: A finished patch looks like this. Adjusting the lengths of the Seed Stitch, the space between the stitches, the colors of threads and the beads, and even the size of the bead can create various effects. |
Sample 4: Combination of two different beads
 |
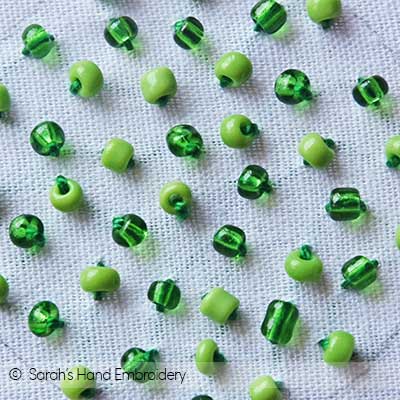 |
| Fig 1: Stitch on the beads as you would in the first variation. Only this time, you are using two different colors randomly. You may use long stitches too. | Fig 2: This is my finished patch. You can work one color first and then add the next color if that feels more convenient to you. |
Stitch used in this project
 Sarah has been researching and sharing hand embroidery lessons for over 18 years, making it accessible to everyone around the globe.


Me agrado mucho ver sus bordados.Cogi clases a finales de la década del 1980 y me gustó muchísimo. En mi retiro he vuelto a realizar trabajos de bordado y ahora utilizando piedras por lo que me ha ayudado muchísimo. Le deseo mucho éxito en tan hermosa tarea. Gracias.
Another excellent demonstration
Thank you! This is a new project, and your comment helps me in making more pages on bead embroidery. 🙂