About the Maltese Cross
The Maltese Cross is not really used in any form of embroidery but forms a structure or base for intricate weaving. However, you can use this stitch’s base to create your own weaving! The Maltese Cross itself has a rich history, symbolizing strength and honor in various cultures, most notably in the medieval era as the emblem of the Knights of Malta. The Maltese Cross Stitch takes inspiration from this iconic design, forming a beautiful, symmetrical cross shape that stands out in embroidery.
How to do the Maltese Cross
 |
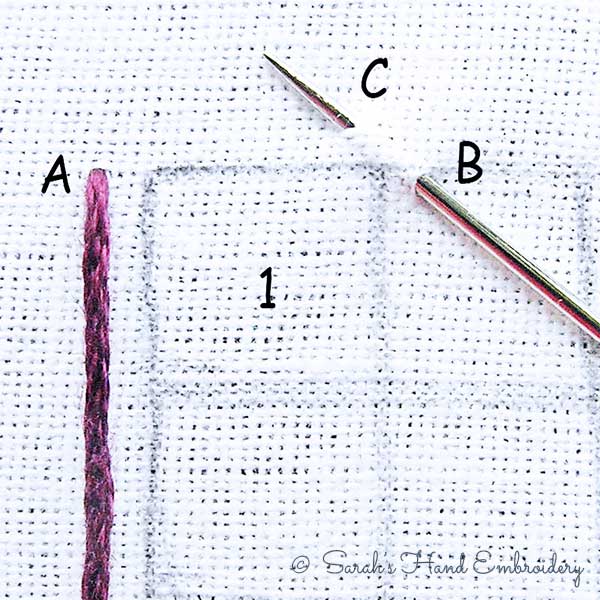 |
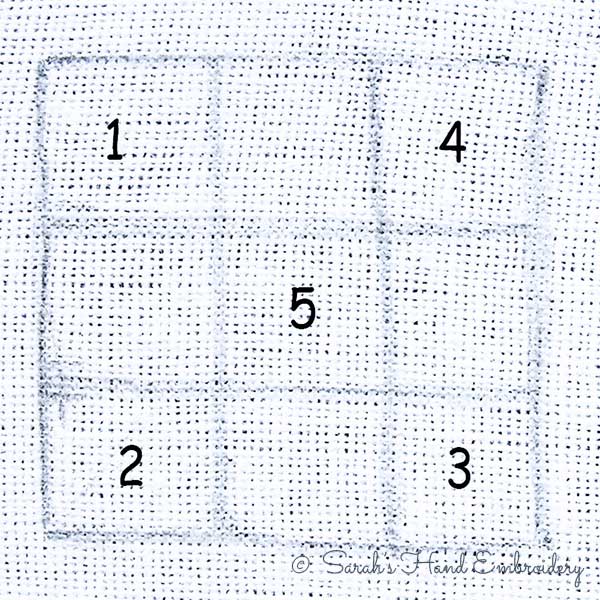
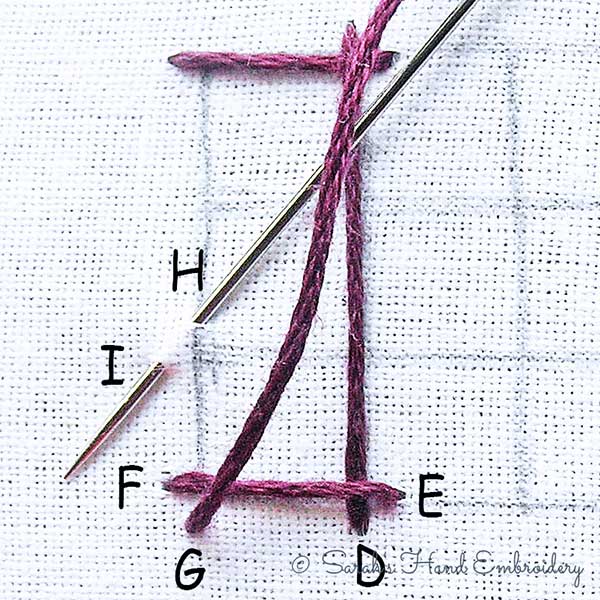
| Fig 1: Let us make a square pattern, divided further into nine squares, as shown. The numbered squares are the ones we will be making. | Fig 2: Come out from A, a point a little away from the corner of square #1. Now, go in through B and out from C, as shown. Note that the stitch points are a little away from the corners of the square. |
 |
 |
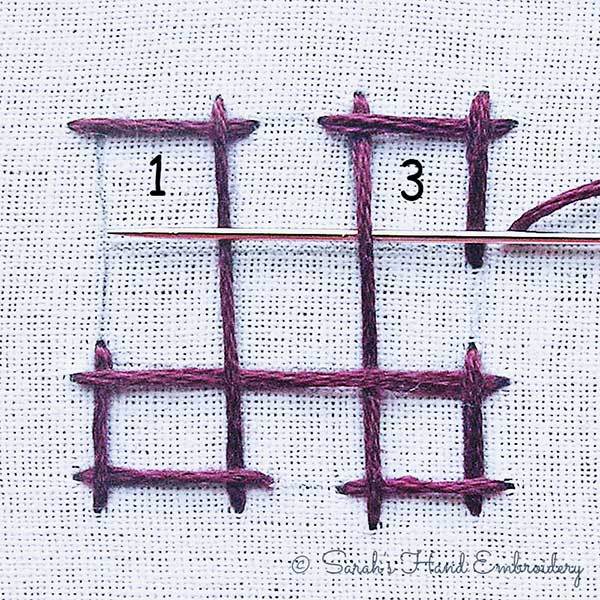
| Fig 3: Next, come down to square #2 and use the Herringbone technique, as shown. | Fig 4: Follow the markings to stitch the square #2. |
 |
 |
| Fig 5: Pass the needle under C-D and move to square #3. Continue with the Herringbone Square Stitch technique. | Fig 6: Again, pass the needle under the longer stitch and move to square #4. |
 |
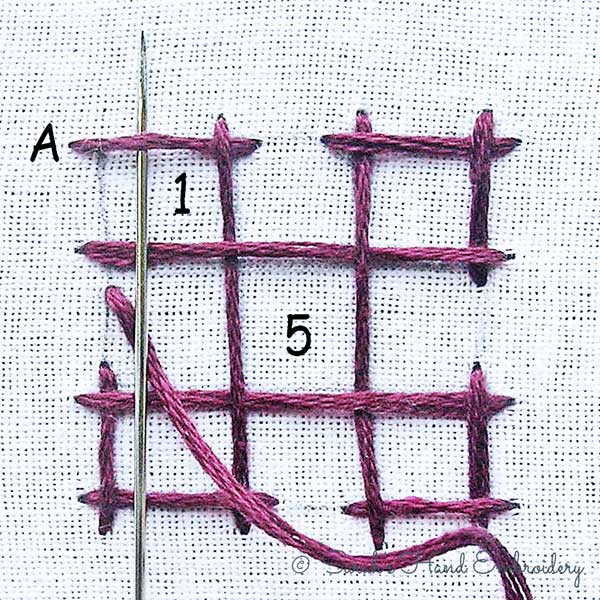 |
| Fig 7: By now, you have a fair idea of how to make the squares. Finish with the last square, before passing the needle under the first long stitch, then over the next one and coming back to square #1. | Fig 8: Complete the first square, as shown. You will see that the square #5 is created while we made the 4 corner squares. Pass the needle one final time under the very first stitch and take it into the fabric to finish it up. |
 |
|
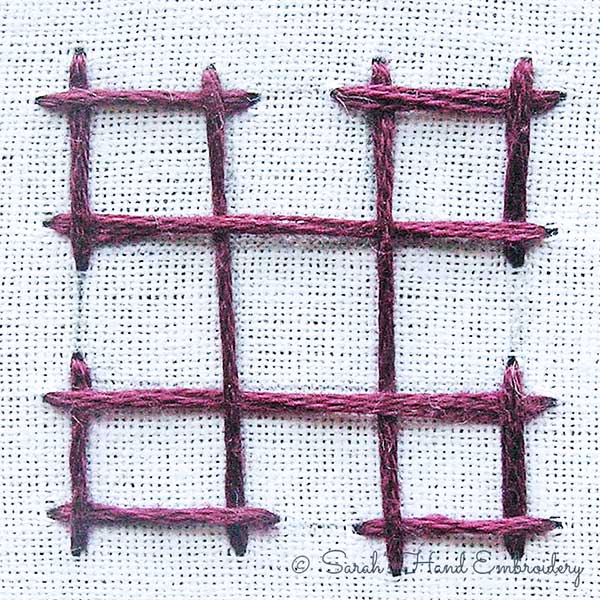
| Fig 9: A finished Maltese Cross looks like this. It forms a perfect base for intricate weaving. |
Learn this stitch and 305 more in our 600-page eBook!

 Sarah has been researching and sharing hand embroidery lessons for over 18 years, making it accessible to everyone around the globe.