
Holy Point Stitch is also known as
Hollie Point Lace, Hollie Stitch, Hollie Point [EN].
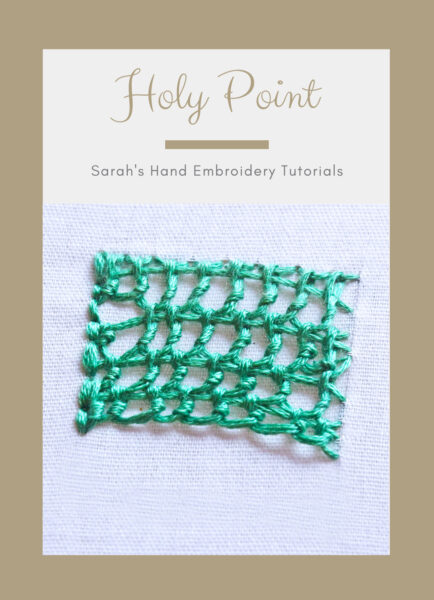
How to do the Holy Point stitch
The Hollie Point Lace is a form of lace stitch popular in England during the 18th century. This is a detached form of stitch that touches the ground fabric only on the edges with supporting stitches like the Back Stitch or the Chain Stitch. This stitch was used in ‘church-related embroideries. It was made in nunneries and monasteries, earning it the name Holy Point. The stitch is made using twisted Blanket Stitches. This is made more comfortable with the use of both hands. You can work this stitch from the bottom-up too.
 |
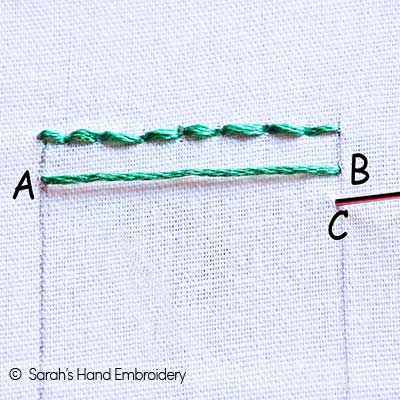 |
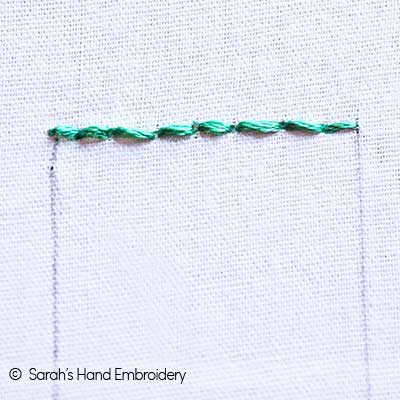
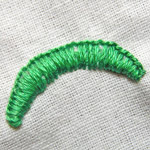
| Fig 1: Outline your pattern with the Back Stitch or the Chain Stitch. I have worked this only on the top for the sake of the tutorial. | Fig 2: Now, lay a straight stitch A-B right under the row of the Back Stitches. Then, come out right under this row, from C. |
 |
 |
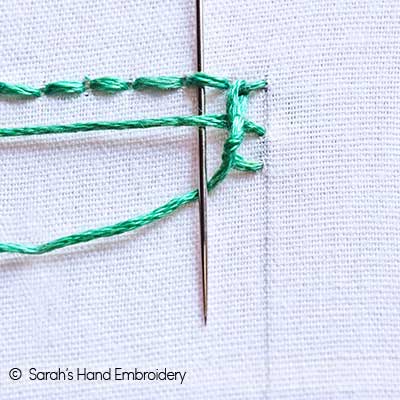
| Fig 3: Pass the needle under the Back Stitch and the laid stitch, as shown. Keep the working thread under the needle. | Fig 4: Now, pick the working thread in your finger. |
 |
 |
| Fig 5: Twist it to create a twisted loop of this kind. | Fig 6: Slip in the needle through this loop. |
 |
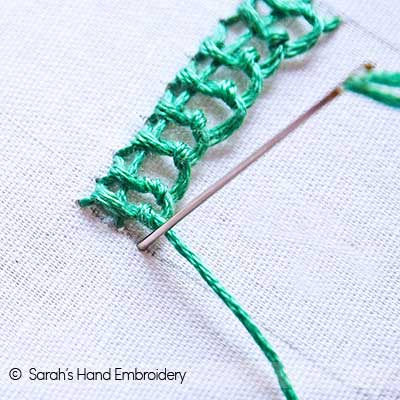 |
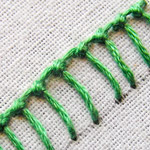
| Fig 7: Pull out the needle to tighten the loop. You might want to keep your left thumb over the loop while pulling out the needle. This creates a kind of loop with a tiny noose. Continue the process. | Fig 8: When you reach the end of the row, pass your needle through the fabric to pin down the edge. |
 |
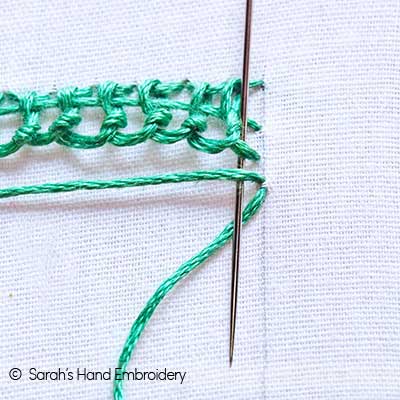 |
| Fig 9: Next, lay another straight stitch and come out right under it. | Fig 10: Continue to make the twisted loops using the previous loops and the laid thread. Follow the same process. |
 |
|
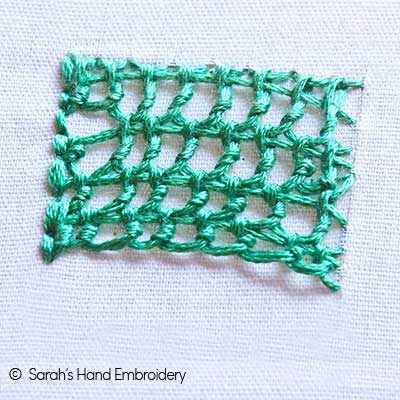
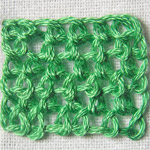
| Fig 11: This is how the filled portion will look like. I have done the Back Stitch on the left edge and left it open on the right edge. When working on the needle lace project, you will leave smaller gaps than what shows here. |
Learn this stitch along with 305 other stitches from our 600-page eBook.

Related Stitches from the Blanket Stitch Family
|
Blanket Stitch
|
Buttonhole Stitch
|
Whipped Buttonhole
|
|
Double Blanket Stitch
|
Closed Blanket Stitch
|
Crossed Blanket
|
|
Buttonhole Wheel
|
Buttonhole Wheel Cup
|
Rosette of Thorns
|
|
Buttonhole Bar
|
Barb Stitch
|
Mirrored Blanket
|
|
German Knotted
|
Honeycomb
|
Fishnet
|
|
Detached Buttonhole
|
Shaped Scallops
|
Scallop Stitch
|
|
Buttonhole Shading
|
Antwerp Edging
|
Berwick Stitch
|


 Sarah has been researching and sharing hand embroidery lessons for over 18 years, making it accessible to everyone around the globe.


Hello Sarah. I think you accidentally uploaded the wrong pictures for Steps 5 and 6.
Oh, you are right! 😣 Thank you for letting me know. I have made the corrections.
Thank you. 🙂 Your tutorials are wonderful. I’m learning so much!
Always a pleasure, Kaylee. 🙂