

There are commonly two kinds of embroidery threads- the Pearl Cotton (or, Pearl Cotton), and the Stranded Embroidery Cotton thread (Embroidery Floss).
The Pearl Cotton thread cannot be divided and comes in yarns of various thicknesses. The higher the size of the Perle Cotton, the thinner or finer the thread. I suggest you use size 5 or 8 for learning embroidery. You use it as it is – just cut the desired length, thread it, and start stitching.
On the other hand, Embroidery Floss is a six-strand thread that is loosely twisted into a thread. Each strand can be separated from the thread helping us to regulate the thickness of the thread we want to stitch with. The thickness of the thread is based on the thickness of the fabric and the kind of stitch we are doing. I suggest that you use 3 strands while learning hand embroidery. This page will show you how to separate the threads and make them ready to stitch.
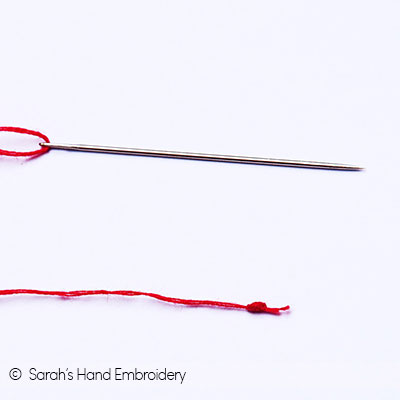
One question many ask is how long should one cut the thread. The easiest way is to cut the thread at an arm’s length. This way, when you stitch you can pull out the entire thread from the fabric with just one long pull. Anything over the length of your one arm means an extra length of thread that needs to be pulled more than just once for each stitch. Also, each time the thread passes in and out of the fabric, the friction causes wear in it making it lose its sheen and freshness. So, too long a thread also means you would end up with a worn-out thread towards the end showing up poorly on the quality of your stitch result.
Now, I will show you how to separate the strands from an Embroidery Floss.
 |
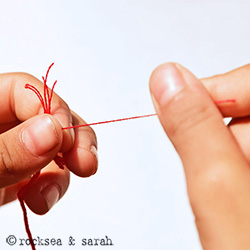 |
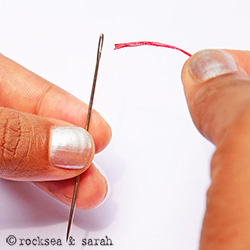
| Fig 1: After cutting out an arm’s length of thread, try to separate the strands at one end of the cut thread, as shown in the illustration. You will see six different strands. | Fig 2: Now, holding about half an inch below the tip of the separated end, pick one strand and start to pull it out slowly. Do not hold the thread too tight- you will not be able to pull the strand out. At the same time, do not hold it too loose- you might cause the other strands to tangle while pulling out the strand you picked. If you do not get the method the first time, do not worry. Keep trying a few times more and you will understand the trick. |
 |
|
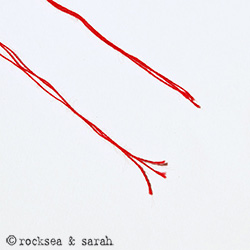
| Fig 3: After pulling out three strands in a similar way, you can put them together to use for stitching. The remaining three strands can be kept away to use later. Three is the number of strands that I suggest using on a piece of normal cotton fabric. |
Related posts about handling embroidery threads
|
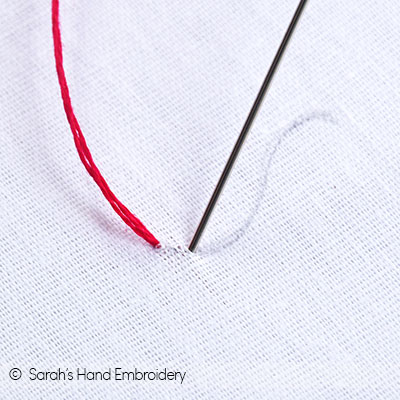
Starting a stitch
|
||

Learn more about Hand Embroidery along with 306 stitches from our 600-page eBook!

 Sarah has been researching and sharing hand embroidery lessons for over 18 years, making it accessible to everyone around the globe.


Handling embroidery thread was a real challenge for me when I started, but this blog post has been a lifesaver! I found the section on separating floss particularly helpful. Thanks for sharing your knowledge
Any tips for how to prevent the thread from separating? I am struggling with my lazy dazy stitches looking rather messy. The pattwrn called for 4 strands so I have done 2 strands doubled over with a knot of the end.
Dear Lena,
When you double the thread, you are already ‘separating’ the strands! Try working with four strands of single-layer instead of 2 strands doubled.
The other tip I can give you is to keep the threads shorter- half an arm’s length should be good. When you pass the thread through the fabric many times, it wears out, and there is a chance that the strands start separating. This does not happen with all the threads, though. Keeping the thread shorter ensures that the wear-out is less, thus keeping it fresher.
I hope the above tips make sense. Let me know if it worked!
When using twisted strands of metallic thread, do you separate down to one single thread of metallic to stitch with or is it actually 2 twisted together?
Hi Melanie,
It is actually 2 twisted together. 🙂
Is there a difference between using anchor silver and gold 300 and 301 in separating them they seem to be different from the coloured thread.
Hi Isabel,
The metallic threads are what I call ‘the wild child’ amongst the embroidery threads. 😃Anchor metallic threads come in six strands like the regular cotton threads, but each strand tends to fray easily. Not only are the threads delicate, but they are not flexible enough either. So, it is a slightly ‘difficult’ thread to work with. A few tips should help:
1. Take shorter lengths of the metallic threads to stitch as the more they pass through the fabric, the more they tend to fray and get unruly.
2. Use fewer strands to stitch.
3. Use them to embellish than to actually stitch through the fabric. For instance, use them to whip or lace through a base stitch.
4. Handle them slowly from separating the strands to stitching. You would separate them by pulling each strand at a time.
I hope this helps. Let me know!
i cannot find a description of the Breton Stitch, is there a link?
Here is the link : https://www.embroidery.rocksea.org/stitch/herringbone-stitch/breton-stitch/
Just activated it! 🙂
How to take strands from double shaded anchor threads
Hi Simy,
You would take the strands the same way in double shaded anchor threads – just cut out the desired length. Then pull out the strands either one at a time. Then, place them together.
You can also separate two or three strands of threads at the same time too. Take the number of strands you want between your fingers and gently pull it apart from the remaining strands. The threads might twist at the bottom and, if it does, just try to straighten it out before you continue separating them.
If your question is how to cut out the threads, then I can give a quick tip. Cut out the thread in the middle of one of the shades of the thread. This way if you have to continue stitching with more thread, the color shift will not be abrupt. This is what I usually follow.
I hope this helps.
I am trying to figure out if you actually stitch with one strand of the twists of metallic thread or is it actually 2 threads?
Thanks!