
Just like there many ways you can start your stitching. You need to choose what works best for you and the project. I will show you how to start with a knot and without a knot in different ways. Scroll down to find the one you find the best!
Method 1: Starting with a knot
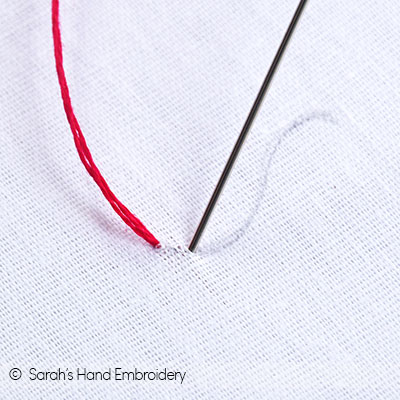
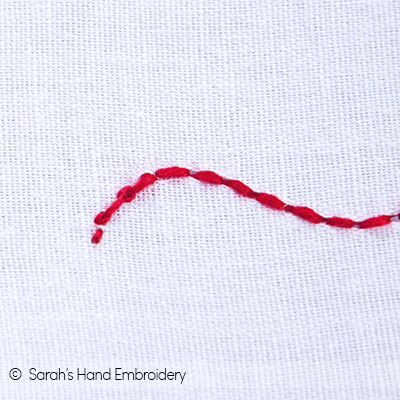
This is probably the most common way to start a stitch in hand embroidery. Though traditionally, knots at the back of the fabric are not appreciated, I have to admit that most of us use it without guilt. There is no problem in having a back with knots that reveal the start and end of your thread, as much as there is no need to fuss over how neat the back of your embroidery work should be. However, there could be embroideries that do require you to avoid knots due to technical reasons, like when working Needlepoint. The holes in the even weave fabric might not be great in holding the knots behind the fabric, and so you might have to resort to other ways to start your work. For surface embroideries where the back of the material does not matter, knots can be just fine to begin your work.
 |
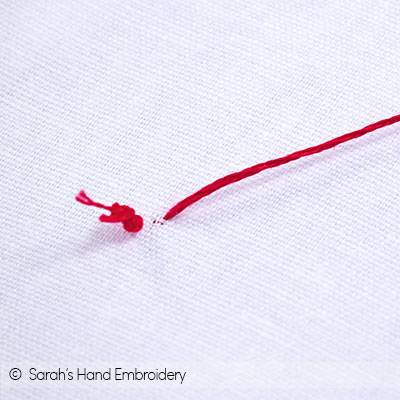 |
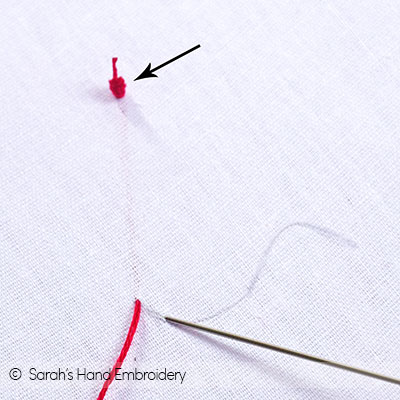
| Fig 1: Use one of the methods to knot the end of your thread. Start by bringing out the needle from behind the fabric. | Fig 2: The knot will stop the thread from pulling the thread through to the other side. You can now start stitching your stitch. The back of the fabric will show the knot this way. |
 |
|
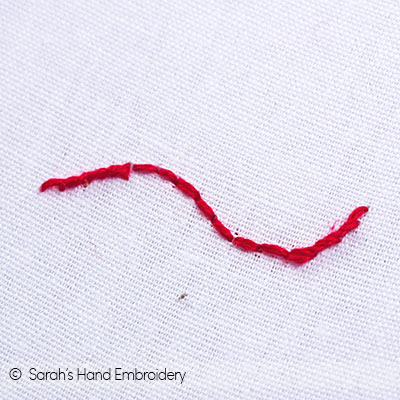
| Fig 3: When you finish your work, the front will look neat like this. I have stitched the Back Stitch. The backside of this piece is irrelevant to me, and so, I do not mind having a little knot hidden behind this neat front. |
Method 2: Starting with a waste knot
The Waste Knot method is popular in Cross Stitching and Needlepoint. It is also used in embroideries where there are many fine stitches like the Satin Stitch. We do knot one end of the thread in this method, but it is snipped away at the end. So, in actual we are using a knot to make a no-knot starting for the stitches. That is why it is called the waste knot. This waste knot sits on the front of the fabric. I personally find this method a little time-consuming. However, this might be a preferred method by some. It might also be a better method to use on certain projects where you do not want to spend too much time using the other techniques to secure your starting thread.
 |
 |
| Fig 1: Front: Start by taking in your needle from the front of the fabric at about 3 or 4 inches distance from where you want to begin your stitch. | Fig 2: Front: Complete stitching your work. Then, snip off the knot at the front of the fabric. |
 |
 |
| Fig 3: Back: Now, pick the thread that has fallen free from the knot at the back of the fabric. Thread it through the needle. | Fig 4: Back: Pass the needle under the stitches in a whipping fashion. Do this a few times. This secures the thread between the existing thread. |
 |
|
| Fig 5: Back: The stitch is secure. Any excess can be snipped off. |
Method 3: Starting with a loop
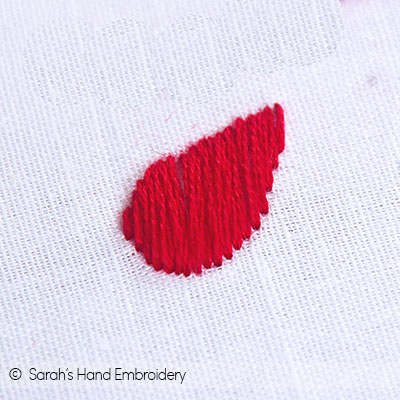
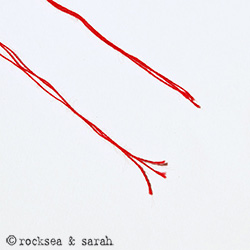
The loop method works when you work with an even number of threads or strands. This method is borrowed from Cross Stitching and Needlepoint, where starting with a knot is not technically possible. So, if you are working either of them on an even weave fabric, recommend you to use this method of starting your stitch. This method is suitable to use for surface embroidery on regular fabric too. Since this method uses an even number of threads, take half the number of strands as we would be doubling it. For instance, if you want to work with two strands, take just one strand of thread. You would be doubling this thread to make it into two strands. For this illustration, I will be using three strands of thread, which I will double to get six strands to work with.
 |
 |
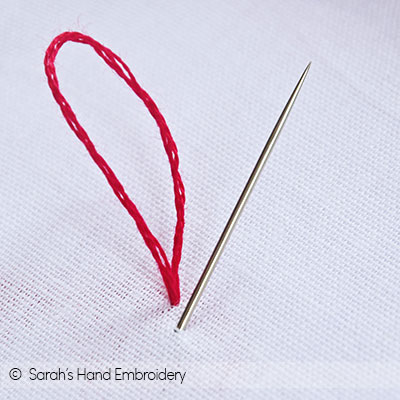
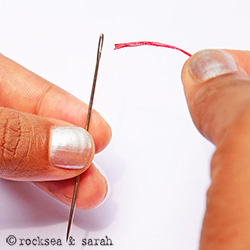
| Fig 1: First, pull out half the number of strands that you want to work with. I want to work with 6 strands, so I have pulled out 3 strands of thread. | Fig 2: Double the thread to bring the ends together. Now, thread both the end through the needle, as shown. The other end will be a loop. The looped end should be the longer side. |
 |
 |
| Fig 3: Back: Now, come out front of the fabric. Pull out just enough to leave a part of the loop behind the fabric, like this. | Fig 4: Back: Go back in through the fabric, close to the loop. |
 |
 |
| Fig 5: Back: Now, pass your needle through the loop, as shown. | Fig 6: Back: Pull out the needle and tighten the loop. This secures the working thread in place without a knot! |
 |
 |
| Fig 7: Front: The front of the fabric will show a small straight stitch, like this. If you are beginning your stitch with a straight stitch, this can be an advantage. If not, you can start to stitch over this little stitch. Note that I have placed the stitch in the stitch line. | Fig 8: Front: You can now stitch your work. I have done a Reversed Chain Stitch making use of the tiny straight stitch that was formed at the beginning. |
 |
|
| Fig 9: Back: The back of my stitch will look like this. Instead of a knot, we have a neat little loop. |
Method 4: Starting with anchors
Starting the stitches without a knot can leave a smooth and ‘finished’ reverse side of your work. There are a few ways you can begin to stitch without a knot. This is the anchor method. Here, you would make a few stitches to secure the thread to the fabric to act as an anchor to the working thread. This method is excellent for working on reversible hand embroideries like the Blackwork or Sashiko, where the front and back of the fabric matter.
Remember that you will not be knotting the end of the thread. Also, note that this method works on any kind of stitches. I have illustrated how to use this method on outlines, fillings, and even stand-alone stitches.
1. Starting outline stitches with anchors
 |
 |
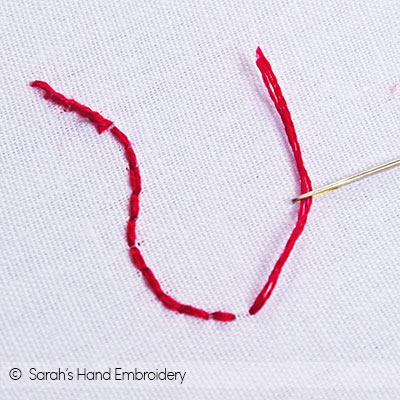
| Fig 1: Front: Start from a little ahead of the direction you want to stitch and make a few stitches backward. Your thread is not knotted, so make sure you do not pull it out of the fabric. | Fig 2: Back: The back of the fabric will look like this. The open thread will stick out a bit this way. |
 |
 |
| Fig 3: Front: Now, do your stitch over these anchor stitches. I am doing the Stem Stitch. | Fig 4: Front: I have finished my stitching. The beginning of the stitch looks slightly thick, but nothing significant. |
 |
 |
| Fig 5: Back: Snip off the little tail that was sticking out. Do not worry, your stitching will not come undone. | Fig 6: Back: Your stitch will look like this on the back- neat and clean without a knot. |
2. Starting filling stitches with anchors
 |
 |
| Fig 1: First, pull out half the number of strands that you want to work with. I want to work with 6 strands, so I have pulled out 3 strands of thread. | Fig 2: Double the thread to bring the ends together. Now, thread both the end through the needle, as shown. The other end will be a loop. The looped end should be the longer side. |
 |
|
| Fig 3: Back: Now, come out front of the fabric. Pull out just enough to leave a part of the loop behind the fabric, like this. |
3. Starting standalone stitches with anchors
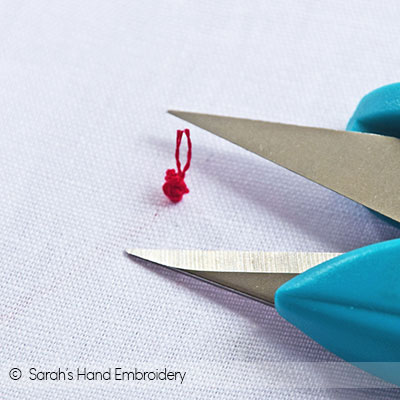
The anchoring method is perfect to work on tiny stitches like the French Knots too! In fact, it is good to start any knot stitch with a couple of anchoring stitches. While working on a cluster of knots and making a mistake with one of them, you don’t have to remove all the stitched knots, but cut off just that particular one. The earlier knots will remain intact, thanks to the anchors you provided!
 |
 |
| Fig 1: Front: Make little anchoring stitches on the locations where you want to stitch the knots or the Standalone stitches. |
Fig 2: Front: Now, do your stitch over these anchor stitches. I am working the Colonial Knots. My anchors are so tiny that it will hide under the knots. |
 |
 |
| Fig 3: Front: I have finished my stitching. The Colonial Knots sit perfectly over each anchoring stitch. | Fig 4: Back: Snip off the little tail that was sticking out. Do not worry, your stitches will not come undone. |
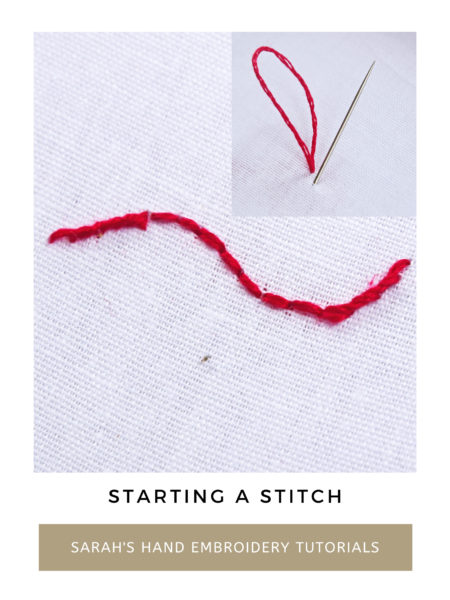
Learn five ways to start an embroidery stitch- Using knots, the waste knot method, the loop method, the tucked tail method, and the anchor stitch method.
Related posts about handling embroidery threads


 Sarah has been researching and sharing hand embroidery lessons for over 18 years, making it accessible to everyone around the globe.


Thank u Sarah!
what does surface embroidery mean?
Super super. Excellent way of explaining.
Thank you, Shobha ☺️❤️
super merci
bonne journée
Thank you,Odette! Always my pleasure.❤️
Wonderful! Thank you!
☺️❤️
Yorá are the best!! Nice to meet you I follow you in all web and books. You are great!!!I live in South América Uruguay 🇺🇾🇺🇾🇺🇾🙏♥️God bless you!!
Thank you, Elisa. It’s awesome to have a reader from Uruguay! ❤️❤️