
Stitch leaves using the Leaf Stitch.
|
|
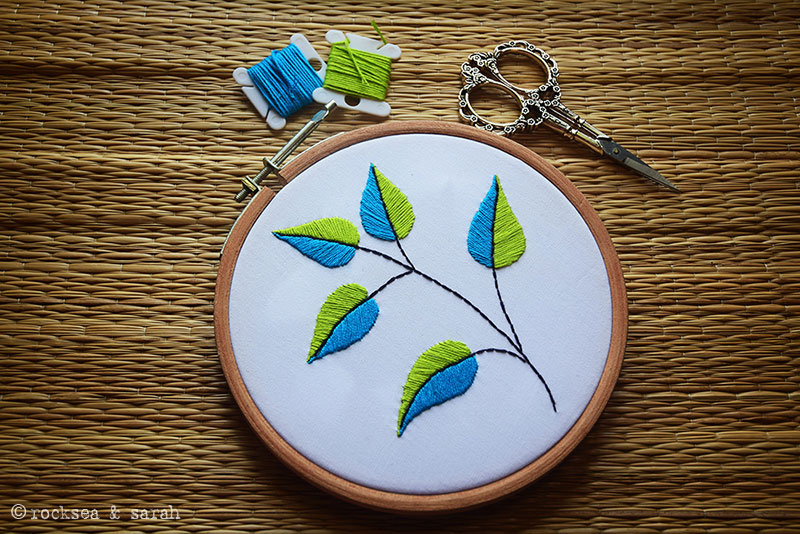
Leaf Stitch is probably the most commonly used stitch to stitch a leaf. It comes out smooth, covers the entire leaf area, and takes on any shape! So, I am going to kick start this project on Leaves with the Leaf Stitch. I will add some interest to it by using two colors on a single leaf. Come and learn with me! Pick up any two colors you love- no need to stick to the greens.
When you go through the tutorials, pay attention to the simple but effective tips to make your leaves beautiful. The tips are also summarised at the end of the lesson.
 |
 |
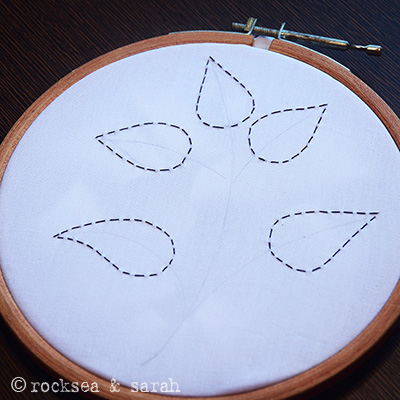
| Fig 1: Get your fabric, hoops, and threads ready. | Fig 2: First, outline the leaves with the Running Stitch. This will help in keeping the edges neat. |
 |
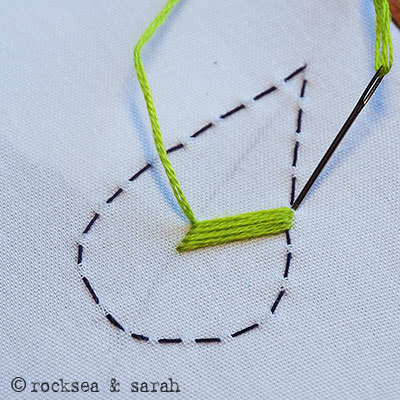 |
| Fig 3: Your leaves are now ready to be filled in. Make sure the side you want to stitch faces you. I have observed that it is much easier to stab the needle into the correct position on the outline when it faces you. | Fig 4: Start from the midsection of one side of the leaf. This helps in maintaining the desired angle of the stitch. Then, work yourself up till the tip. |
 |
 |
| Fig 5: In a tapering leaf, the tip can be challenging but not impossible. A round end can be much easier to stitch. | Fig 6: Now, come back to the middle and work your way down to finish the side. |
 |
 |
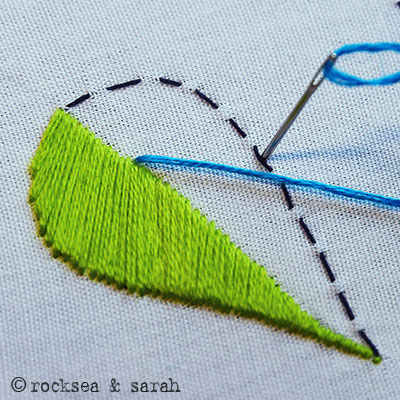
| Fig 7: You can begin stitching the other side. Again, start from the midsection and stitch at the desired angle. Observe how the needle is stabbed into the stitch line by nudging the Running Stitch a bit. | Fig 8: I finished the upper portion and returned to the mid section and working my way down. |
 |
 |
| Fig 9: Here’s the finished leaf!
To make sure all the strands in your thread is laying flat on the fabric, check the working thread occasionally. If twisted, straighten them out. A twisted thread will lay like a cord and not blend smoothly with the neighboring threads. |
Fig 10: When you deal with curved leaves like the one shown here, slightly space out the stitch in the inner stitch line. This is to compensate for the difference in the area created due to the curve. If you do not space it out slightly, as shown, the stitches will look clumped in the inner curve and appear radiating to the outer edge. You will not space out the stitches in the outer curve. |
 |
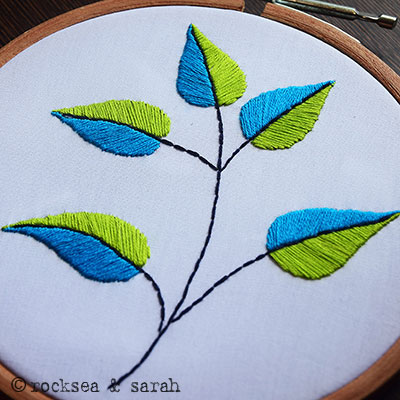 |
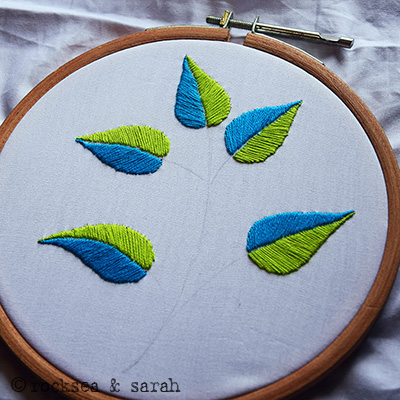
| Fig 11: All the leaves finished, look like this. | Fig 12: Add the stem and rib, and you get a fancy leaf. I have used the Back Stitch to do them. |
TIPS to make your leaf perfect:
- Stitch an outline of the leaf with the Running Stitch.
- Start stitching from the midsection to maintain the angle.
- Face the stitching side of the leaf to yourself to help keep a smooth outer edge.
- Check your working thread occasionally to make sure it is not twisted or .
- When leaves have a curve, space the stitches slightly on the inner curve only to maintain the angle of the stitch.
 Sarah has been researching and sharing hand embroidery lessons for over 18 years, making it accessible to everyone around the globe.


this is a fabulous tip — I am new to embroidery and love to learn how to make my stitches better
Awesome, Michelle! 😊