
Stitch flowers using the Closed Herringbone Stitch.
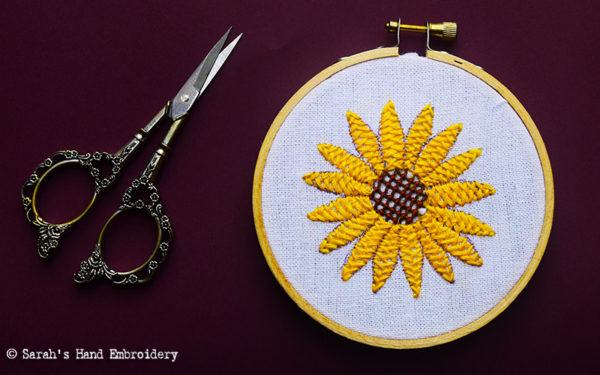 |
The Closed Herringbone Stitch is excellent for making quick fillings on leaf-shaped patterns. I drew this sunflower pattern on a 4″ hoop and could not think of a better stitch to fill the petals. When we think of sunflowers, a big and a smiling happy flower comes to our minds. This pattern is inspired by a smaller variety, drawn out of nostalgic memory. During my teenage years, I somehow got hold of a bunch of seeds – trust me, I still don’t remember where from. Being a person who loves to garden, I went and sowed them at a small patch of land we had in our rented apartment on the ground floor. They all started sprouting and growing fast. I had no idea what it was, but it was great to watch them grow taller each day. It was like Jack’s beanstalk! Then, all at once, they started to show buds. A few days later, I woke up to a patch of beautiful and smiling little sunflowers already being loved and kissed by the tiny bees. Until that day, I had never seen these flowers – brilliant bright yellow, and perineal. I was proud of them! They were about 6 feet tall and would peek out of the compound wall!
How to embroider flowers using the Closed Herringbone Stitch
 |
 |
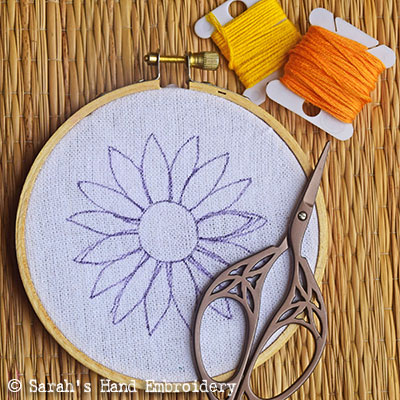
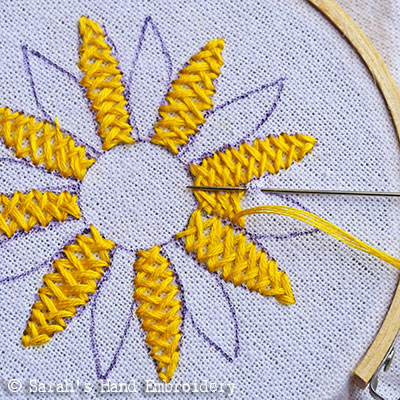
| Fig 1: Get your fabric, hoop, and threads ready. I am using a 4″ hoop and will use 6 strands of thread. | Fig 2: Start with the broader end of the petal with the Closed Herringbone Stitch. |
 |
 |
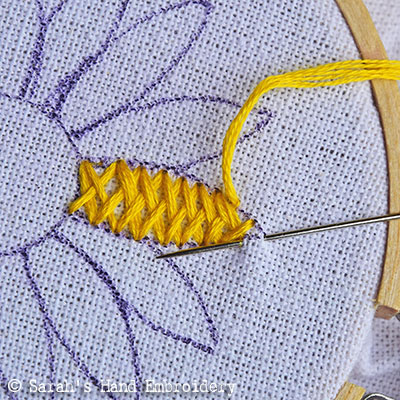
| Fig 3: When you approach the other end, include the tip in your stitch. | Fig 4: Finish the petal by taking the needle in through the tip again. |
 |
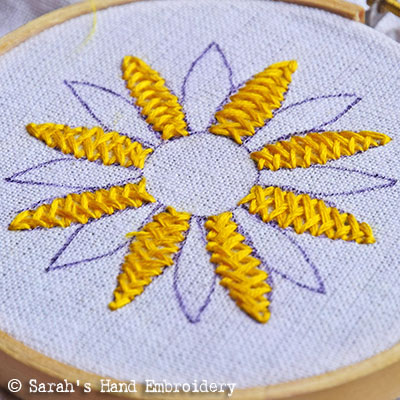 |
| Fig 5: This way, you create a sharp tip. | Fig 6: I worked the alternate petals first. |
 |
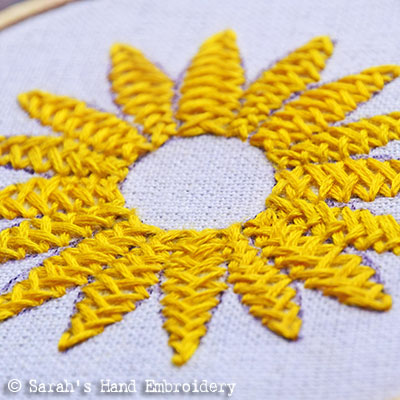 |
| Fig 7: I then work the remaining petals. These petals a bit squished on the bottom than the earlier petals. | Fig 8: All the petals are now done! |
 |
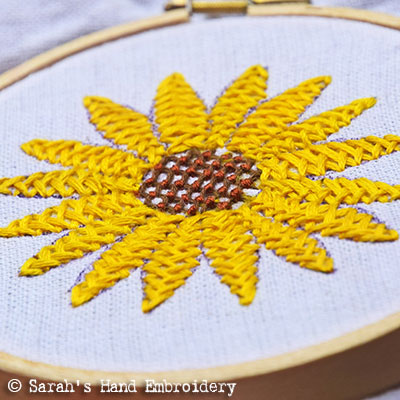 |
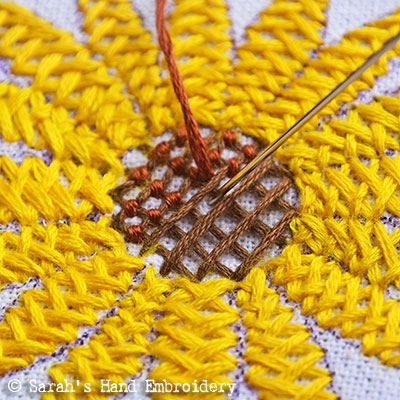
| Fig 9: I fill the center with Jacobean Couching. | Fig 10: My flower is done. Working the outline with Stem Stitch or the Back Stitch would give it some finishing. |
Tips to make your embroidered flower beautiful
- Work the alternate petals first, then fill in the remaining petals.
- Start from the broader end of the petal and work towards the tapering tip.
- For a finishing, end by working an outline around the petal using a straight line stitch like the Stem Stitch or the Back Stitch.
Related Projects
|
Flower Embroidery
|
Leaf Embroidery
|

 Sarah has been researching and sharing hand embroidery lessons for over 18 years, making it accessible to everyone around the globe.


Thanks for the inspiration and teaching. My first complete work of embroidery. Struggled with the outline of the petals. Haha.
Hi Nyambura. I think you missed to attach the picture of your embroidery. Please try again. Would really love to see it. ☺
Thank you madam for sharing your elegant and stylish works. I really love it. Your variety ideas gave me more inspiration on my work as a fashion designer.
Thank you Sarah for sharing. I have used the Closed Herringbone before and like it – I’ll try it with the warm yellow soon.
Awesome! 🙂
Hi. Sarah’s.
Thank you for with me the sun flowers. It v v nice. Add bees or butterflies waw will make my dress v v beautiful.
Yes Sarah’s how do I add in my cross stitch photo to show to your coustmer.
Thank you.
That’s great! ☺️
wonderful … Loving to follow the details and learn the new stitches
Happy to know, Namitha! ☺️
Hi, where can I buy hard copy of second edition hand embroidery for everyone. I would really appreciate if you could reply.
Inspiring! And I like your sunflower story. I grew hollyhocks from my grandmother’s garden and had the same delight.
Awesome! 🌻🌻☺️
Hi, where can I buy hard copy of second edition hand embroidery for everyone. I would really appreciate if you could reply. Thank you
Hi Sheena,
Thank you for contacting us. We do not have any hard copies of our books yet. Since the second edition of our eBook is 600-page massive with high-resolution images, it is better used as a digital one. You can carry it around on any of your devices, and it can be used with or without the internet. Also, you can zoom in on the images for better clarity! Plus, the pages are printable- so you can print out the ones you need. 🙂
Inspiring!