How to work Kasuti using Gavanti and Muragi stitches
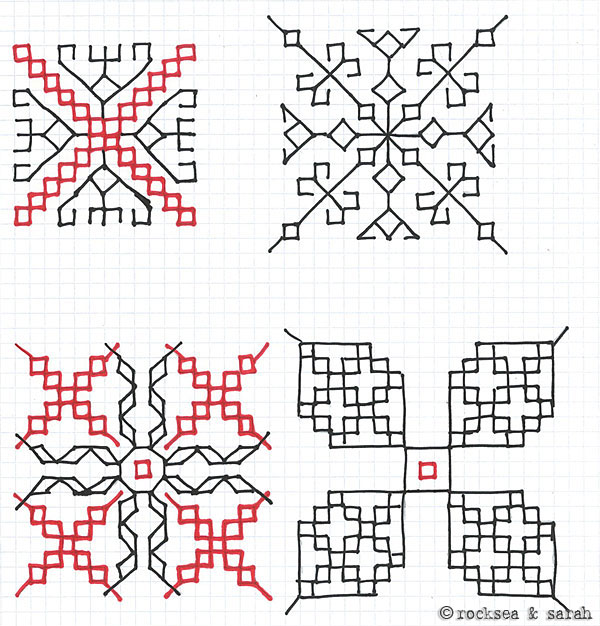
This lesson will teach you how to work Kasuti on plain fabric with a traced design. While using this method, the two stitches that can be done easily are Gavanti and Muragi.
Here, you will see an illustration of a simple pattern using a combination of Gavanti and Muragi. This lesson will also demonstrate elaborately on how to deal with the logic of the ‘stitch route’. This will be especially helpful to beginners to embroidery. For the more experienced, they can just breeze through to get an idea.
You need to refer Kasuti Lesson 1 before starting with this lesson.
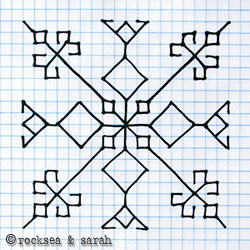 | 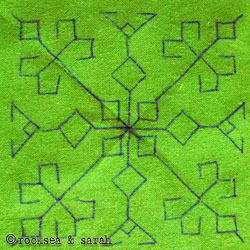 |
| Fig 1: Trace out the pattern from the graph paper onto the fabric using a carbon tracing paper or any other tracing medium. | |
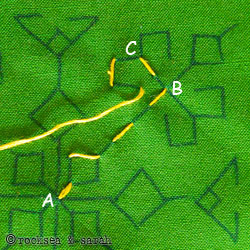 | 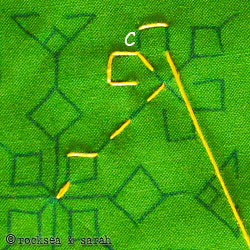 |
| Fig 2: Trace out the pattern from the graph paper onto the fabric using a carbon tracing paper or any other tracing medium. | Fig 3: Every time you reach a point with a choice to go either left or right, the trick is to keep finishing all the lines/patterns on the left first and then move to the right. This is a simple logic to keep any confusion at rest. So, start the return journey and when you reach back at C, move to the right side. |
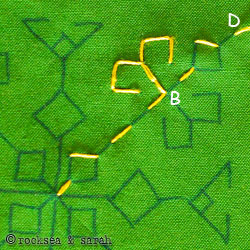 | 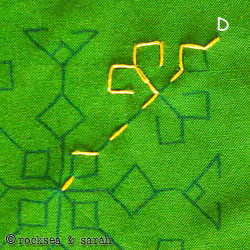 |
| Fig 4: Once you finish with the right side and return to the point B, continue the journey upward until you reach the last point, D.You will see that the patterns hanging on the left side is finished. | Fig 5: Start the return journey.Just a simple note: diamonds are seen as a split in the mainline, and not as a pattern in itself. This is the reason why the diamonds are finished during the return journey. |
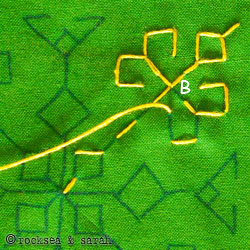 | 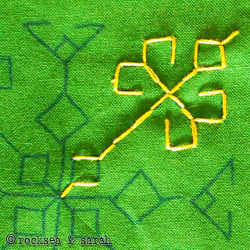 |
| Fig 6: Now, we start with the right side of the pattern. Finish up with the diamond, return back downwards. From B, turn to the right. Finish the left part of the hanging pattern first before moving to finish the right part. | Fig 7: Once you reach back to point B, continue the return journey downwards till you reach the first diamond. |
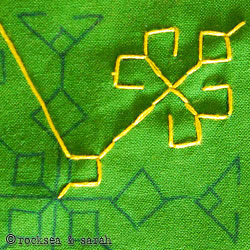 | 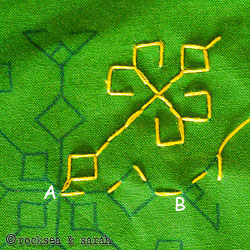 |
| Fig 8: Finish up with the diamond. | Fig 9: Return back to the center, A. Now we begin the next part of the pattern. Work upward, through point B till the very end. Keep to the left all the way. |
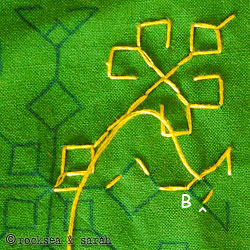 | 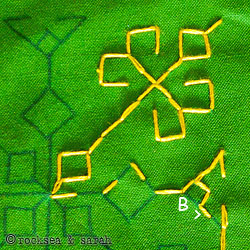 |
| Fig 10: Begin your return journey and come back to B. Move to the right side of the pattern, but before going all the way up, you have to finish the little diamond shape lying in between. So, take a diversion to where the little arrow points to. | Fig 11: Take the return journey and follow the little arrow to the right and continue to finish up with the remaining pattern. Now, instead, you can also finish the little diamond on return journey from the right side. |
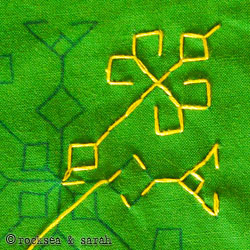 | 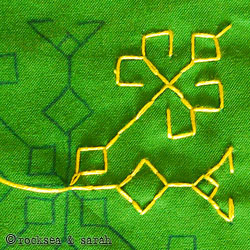 |
| Fig 12: Continue the return journey downwards. | Fig 13: Finish up with the diamond and return to the center. Now, continue with the next line of the pattern until the entire design is done in a similar way. |
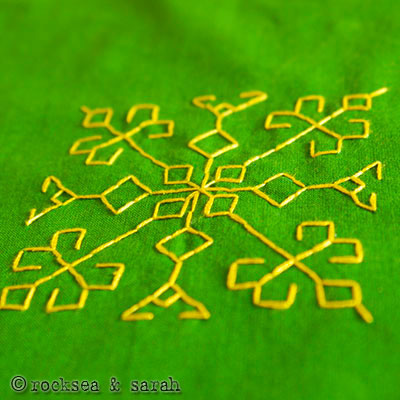 | Fig 14: he completed kasuti pattern would look like this. |
Note: This pattern has been borrowed from ‘Traditional Embroideries of India’ by Shailaja D. Naik.
Next, go to the other detailed Kasuti lessons:


