
In this tutorial, the step by step process on how I went about finishing this design is mentioned. You may click on the stitch name to go to the lessons of those stitches. I have used Anchor thread number 47.
 |
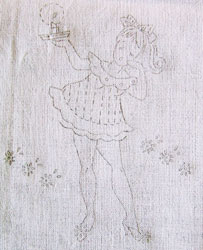 |
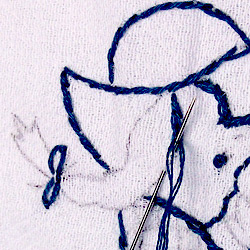
I have traced the design to a white cotton fabric using carbon paper.
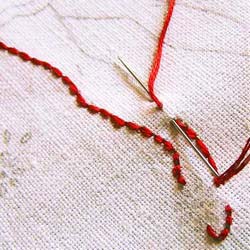 |
Back Stitch: I began to start the embroidery with back stitch. Personally, I felt it will be good to make the girl’s legs, hands and face using this stitch. |
 |
Outline Stitch: The outline stitch was used for the frock as it would give a thicker straight looking flow stitch. |
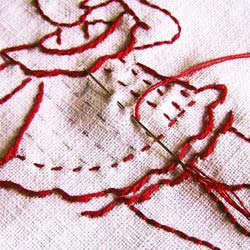 |
Running Stitch: The design on the girl’s frock was apt for a running stitch. Usually, running stitch is good for making strawberry seeds. I used this stitch to even do the glow around the candle light. |
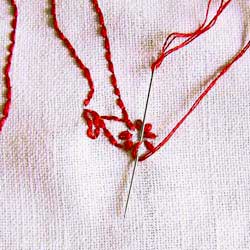 |
Lazy Daisy: All the flower pattern in this design is done in lazy daisy. The girl’s yawning mouth is also done using a single lazy daisy. |
 |
Stem Stitch: Just to demonstrate the stitch, I decided to incorporate this into the candle stand. |
 |
Split Stitch: I felt the split stitch was apt for the hair as it would give a thicker fuller stitch. I took two strands of the red floss and doubled it, so that the ‘splitting’ is easy. |
 |
French Knot: The best way to fill in dots or small circles is using French Knots, which I did on the frock and at the center of each flower pattern. |
 |
Straight stitch: Finally, I gave the finishing touch to the girl by making single straight stitches (single running stitch). I made its eyebrows, eyes, knees, and inside of ribbon using single straight stitches. |
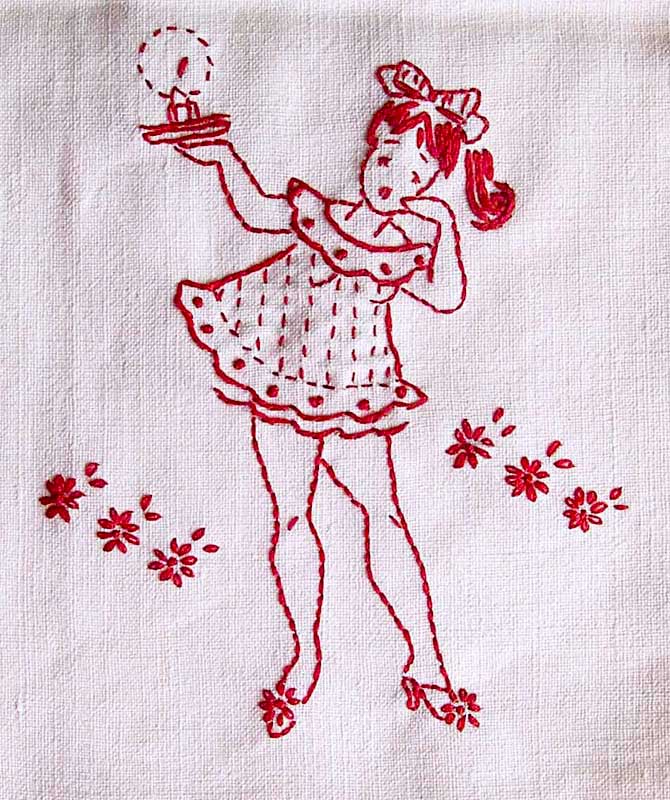 |
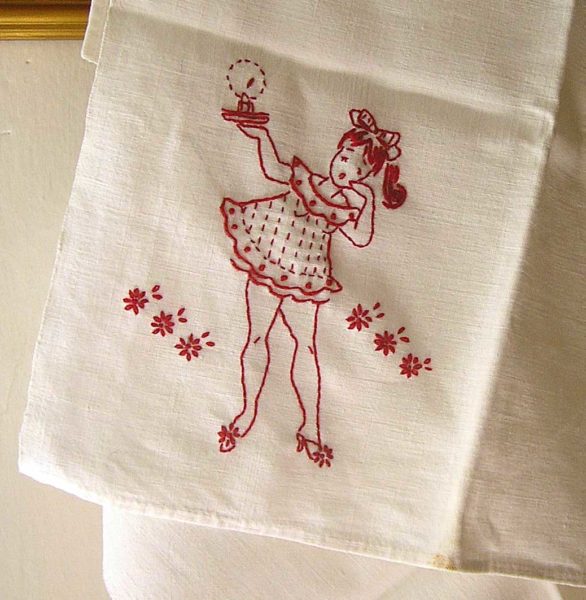
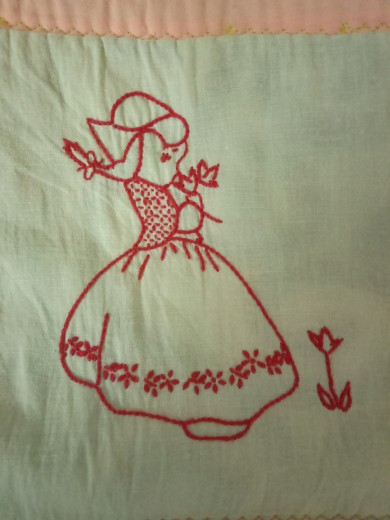
Our finished ‘sleepytime girl’ looks like this. :)Click on the image for a bigger version. |
Note: This design helped me to incorporate all the stitches traditionally used in Redwork and Bluework helping me to explain this lesson to you. Contemporarily, different kinds of straight stitches can be used to work these embroideries. This free design called ‘sleepy-time girls’ has been borrowed from needlecrafter.com.
Learn about Redwork or go to Bluework lessons:

 Sarah has been researching and sharing hand embroidery lessons for over 18 years, making it accessible to everyone around the globe.


Sarah,
Uploading our first hand embroidery class work.
It was a great learning experience for me.
Amazing how simple work brings out such beautiful output.
Wow, thank you for uploading, Swathy. Beautifully worked!
Dear Sarah, do you teach online (Zoom or Meet). I live in Chile. How could I have information about your lessons? 😊
Dear Sarah, do you teach online? (Zoom or Meet). I live in Chile. How could I have information about your lessons? 😊
Hi Maria,
Thank you for enquiring. Yes, I do teach online. I am in the course of preparing to start a batch on Tuesdays 9-11AM EST. So, that will be 11AM to 1PM Chile time. It will be zoom classes. I love taking live online classes as there is a lot of interaction and exchanging of ideas between students. I can give you more details and fee information via email. Can I use the email id you have provided?
Sarah
Some of my redworks done after being inspired by your tutorials. Done few years back for my kids quilt .It’s done in 2012.
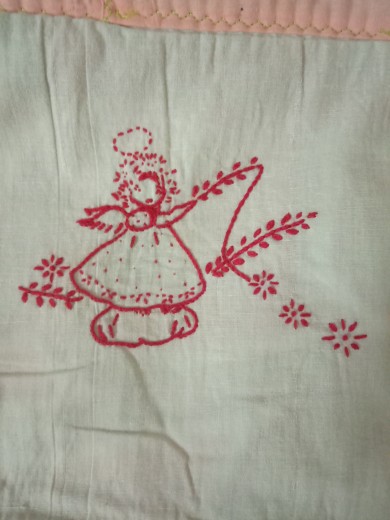
Wow, Anju! Thank you for sharing these! They are beautiful, especially the second one! 🙂
Thankyou
I need to know how to stitch a circle, esp. a small one. I have trouble spacing the stitches.
Hi Melissa,
You can use Satin Stitch if the circle is really small. It will fill it in though. If using straight-line stitches on a small circle, the easy way out would be to use small Back Stitches and avoid stitches like the Stem Stitch or Outline Stitch. You can also try the Eyelet Stitch ( https://www.embroidery.rocksea.org/stitch/straight-stitch/eyelet-stitch/ ) if it suits the patterns.
Let me know if it helped.
Love all of this .
Thank you, Shirley!
hi Sarah,
i am learning embroidery too but i need to know on what fabric do i do my projects? i want to know the name of the fabric and it’s thickness pl.
thanks
Sarah, I love your work, you make it look so easy. I’m going to share your page on my facebook quilting page.
Wow! This is adorable…I want to learn. Thank you for inspiring me.
Can you please post some more designs of this type?
Hi,
I just now saw this. It’s too good. I’ll try this on my daughter’s dress and then will send you that picture.
Hi Sarah,
I just found your site and I love it! This is my first try at hand embroidery…..
I am a lefty and I believe that I figured out how to reverse your instructions but one thing I can’t find. How do you handle curves and circles? Right now I am working on an outline stitch. Also, how long are your stitches?
Thank you for your help
Liz
hi mam, i’m very interested in embroidrry can u please send me some easy designs
Hi Sarah,
its beautiful and very much informative for mi as a beginner in embroidery.i heard about red work and now i know how to work with it.thanks
i have abook is name (danish cross stitch) you know this book
waaaaaaaaaaaaaaaaaaw
<3
realy i love it
<3
Hi Sarah,your lessons are really very interesting and helpful for a beginner like me.could you please tell me how can I transfer patterns to the fabric.
Dear Elizabeth,
I usually transfer from paper to fabric using a simple carbon paper, which is available in any stationery store. It is washable. If you want to free draw, you can use pencil.
Very nice sarah
Very useful too.
Hi Sarah,
I have thoroughly enjoyed looking over your site. I really like this sleepy time girls lesson. Your a very good teacher!
Hi-I love your site! The picture dictionary has been especially useful! I have a general sort of question-Is there a difference between Redwork and Blackwork besides the colors? I mean, do they both use the same 7 stitches that you’ve listed?
Thanks!
Dear Leslie,
Redwork and Blackwork and totally different forms of embroidery. Blackwork uses Holbein stitch (see straight stitch family).
Hello…I can’t seem to find the pattern for Sleepytime Girls like you suggested. Please Help!! Love this pattern and you work!!
Please respond and thank you very much!
Dear Bernice,
Try checking the website ‘needlecrafter’ and look for ‘people’ under free designs.
Thank you so much Sarah…I checked today and Yes I found it. Thanks Again!!
I just love this redwor! a couple of years ago, I saw a quilt made of ABC squares. I have searched for a pattern for this to no avail. would you have any suggestions? it was 26 squares, either toys, or Christmas ….thanks…
this is realy beautiful. keep it up
Beautiful job, Sarah. The question I need to ask – How do you know when to use each different stitch? That is my issue. I know how to make the stitches, but when there is no chart – I am stuck.
Thank you – you do wonderful work!!
Querida Sarah.
Hace tiempo que buscaba tutoriales de redwork por Internet y encontré tu página.
Eres muy buena profesora… las fotos del “paso a paso” me ayudó mucho.
Todos tus dibujos son preciosos.
Me llevo a ‘sleepytime girl’ que es muy sexy.. hahahaha.
La bordaré y la pondré en mi blog.
Muchas gracias por tus explicaciones.
Desde hoy te seguiré.
Beso desde Granada (España).
Querido Rosana,
Gracias por tu apreciación. 🙂
Por favor, ¡prueba este patrón. De hecho, es una muy hermosa. Además, no te olvides de compartir en nuestra página redwork también. Va a ser una inspiración para muchos estudiantes de otros nuevos. 🙂
Todos los mejores deseos.
Your links are broken. I can’t not go to any of the tutorials.
Thanks,
Janet
Dear Janet,
Thanks for informing about it.
I have repaired it. 🙂
Your work is beautiful!! Lovely tutorials. I absolutely LOVE redwork!!
Gracias por compartir el tutorial. Saludos desde México.
Superbe, très belle, quels sont les points utiliés? Il manque un traducteur à ton site. Bonne journée
Parabéns lindo!!!
Amei seu trabalho parabéns!!!
ohh this one is amazing…. i will def try this out soon… I love the RED!!!
Dear Victoria,
I have emailed you with my address for you to correspond with me.
You can check for more such vintage designs at needlecrafter.com, from where I borrowed this design.
I was browsing red work patterns and ran into your red work instruction page. I was delighted, not because of the directions (which are very good), but because of the pattern that you chose. I went into the bathroom and sure enough the hand towel that I worked in the mid-60s is definitely by the same artist. My Mom and I worked the pattern of a girl peeking out from behind a screen and the caption “Care for a towel”? We used many colored embroidery floss on a printed linen background.
I thought I could scan it into my computer and send it to you; however, that feature of my printer has not yet yielded to my not so patient fumbling. I will gladly send you a copy snail mail if you will e-mail your address.
In the source information you used the plural sleepy time girls. Do you know if there are more patterns by this same
artist? Where should I look?
Thanks Victoria
Hi Sarah,
Your works were mind-blowing… Clear explanations.. easy to understand… could u pls guide me which stitch is suitable for saree border n churidhar … awaiting for ur reply..
thanku… keep rocking yar…
Dear Sugashini,
I can suggest you some kasuti designs for saree and churidhar.
check : https://www.embroidery.rocksea.org/hand-embroidery/kasuti/
This is a detailed lesson on how to do Kasuti along with some printable designs. Hope this helped. 🙂
Hi Sarah,
I would like to know from where did you get the cloth in which you did red work embroidery which you posted on your site. this is called casement cloth right. do u get this in kottyam. can you please let me know where do get this cloth. please do pass me this infromation i think this is the best cloth you can do embroidery .
thanks
lots of love
anju
god bless
Dear Anju,
This embroidery is done over a hemp cloth. I am not so sure if you get such cloth in Kottayam. I see you are from EUC, so you can check it out there. My hemp cloth is from Italy.
A good replacement for this hemp cloth is the normal thick cotton fabric, which you should be easily be able to get from any fabric shop in India.
This is not a casement cloth, though the pictures might trick you into thinking like that.
maravilhoso esse bordado, parabéns
Dolly
Muito obrigado Dolly 🙂
I came across your post on Pintrest this morning with the caption – “Instructions for every stitch imaginable!”. That is exactly what I was going to start looking for! I will be on bed rest for 10 days for foot surgery and wanted to do some embroidery while resting. I can only do one stitch and I wanted to expand. My kids love to embroider, and teach their friends to embroider so I have to learn some more skills. Can’t wait to try your lessons!
Dear Ellen,
It is really nice to know that your interest in embroidery and that you will be learning from our pages. 🙂 Thanks.
We wish you a speedy and good recovery, and enjoy the stitch lessons while you are in your bed rest.
Please do try to share with us what you would be stitching…we would love to see it. 🙂
Best wishes.
Sara
once again thanks for the wonderful tutorials. Got impressed by the redwork how a single color turns out to a beautiful piece of work. tried the sample which you have given for the blue work with red color thread. Very happy to see the results. i have attached my piece of work. have a look at it and give your valuable comments.
Hi Shami,
There was some problem with the uploads and we have resolved it. Please upload your images once again.
Cheers,,
Dear Shami,
Thanks for sharing your work with us. But because of some technical reasons we were not able to get your upload. Please upload your picture once again. Eagerly waiting for the pictures. 🙂
Love your tutorial and this picture. I am a big redwork fan.
Thanks for sharing.
Thanks Janice 🙂
I’ve long loved the simple beauty of Red work Antique look, young children etc… But never saw how to do it …
I appreciate the leason & the fact it is so simple… THANK YOU SO MUCH!
Now I can do some red work on items for my Grand daughter & my BFF’s Grand daughter…
Look forward to looking around more to learn more and getting out my copied designs I’d been saving…. Ann Chg.
Dear Ann,
I am delighted to read your comment. I am happy that you appreciate our pages and have learnt from it.
Do let me know how your redwork designs have come out to be. Best wishes. 🙂
Thank you so much for sharing this. I love redwork- it is so simple and beautiful to me.
I am looking to begin embroidery. I would like to make some of my own designs…how do I get them on my fabric (think about using some pillowcases). Is there a way that is best for a beginner (I’ve done a little over the years, but really I am surely a beginner.) I’d love to teach my children how, but the Mama needs to get a bit of a lesson first.
thank you for sharing your skill and your wisdom.
Kimmie
mama to 8
one homemade and 7 adopted
Dear Kimmie,
I am delighted that you found an interest in embroidering. Well, transfering of designs usually depends on what kind of fabric you use. Since you are making a pillow case, and you are a beginner, I would suggest the simple method of using tracing paper.
You can make your own design on a butter paper or even any normal paper. Place the tracing paper (face down on fabric) between the design paper and the fabric. Secure them in the corners with a pin. Trace over the design on the paper with a blunt pencil. This design will get transfered to the fabric. The trace is washable. I hope this information helped.
It is nice to know of your big family. 🙂 We too have a child- homemade, and planning to adopt one or two in the future.
wishes to you and your family.
hai sarah, thanku soooo much for providing us such an useful webpage.You have explained each and every stitch in a proper way. and it is easy to understand. if u can pls include us some pattens so that we can download it and use
Sarah,
Your work is beautiful. The explanation for y you chose each stitch was very useful. Please keep adding more lessons 🙂
Thanks Mitra. 🙂
Hi,
I just saw all your tutorials.. The way you explained is wonderful.
Kokila, :).
Wow very pretty work.
viji
thank you viji 🙂
Srilatha and Inji pennu… 🙂
Hi,
We found this post titled “Redwork Lessons” in your blog cool and educating. Could you post this and a few other articles @hobbiesnyou.com in exchange for some publicity? Yes, we @ hobbiesnyou.com are starting a free newsletter and we would be glad to have this article in it. Please log on to http://hobbiesnyou.com, register and post your articles (As many as you can…). We will make sure to send you a copy of the newsletter and keep you updated where ever we take your article and publicize your blog, in advance ofcourse. So, why wait? You can find more details @ hobbiesnyou.com
P.s: Kindly note that you are one of the early birds. So, if you do not find much content in the site please do not get disappointed. We have just started walking the first steps. Support us!!!
This is sooo cute!
sarah..
i thought it was difficult to show the sleepy expressions .. excellent work !!!
i love the redwork embroidery you did! the sleepygirl, the stitches in the simple red color, the backstitch on the legs… great work… nice tutorial 🙂
🙂 I love it when you love it, chetta.
This is so cute. Yay! for redwork.
Yes Tressa, I was also flattered by the simple beauty of redwork! 🙂