
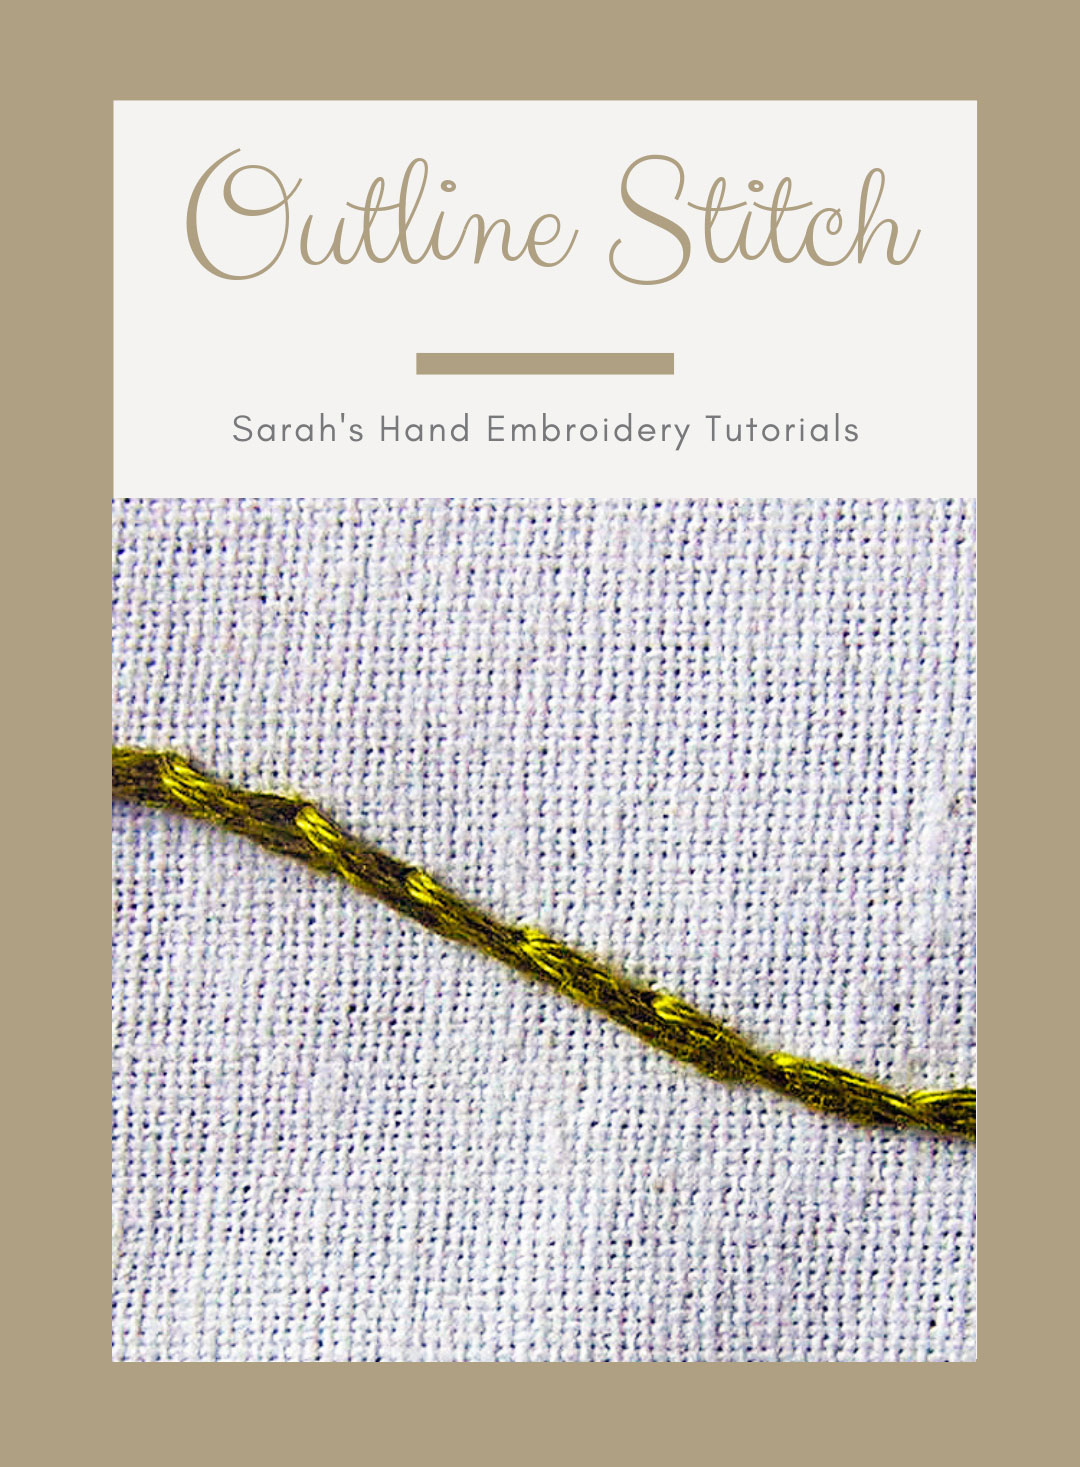
Outline Stitch is also known as
Puntada de contorno [ES], Point de contour [FR], Umrissstich [DE], Punto di contorno [IT], Ponto de cotorno [PT].
How to do Outline Stitch
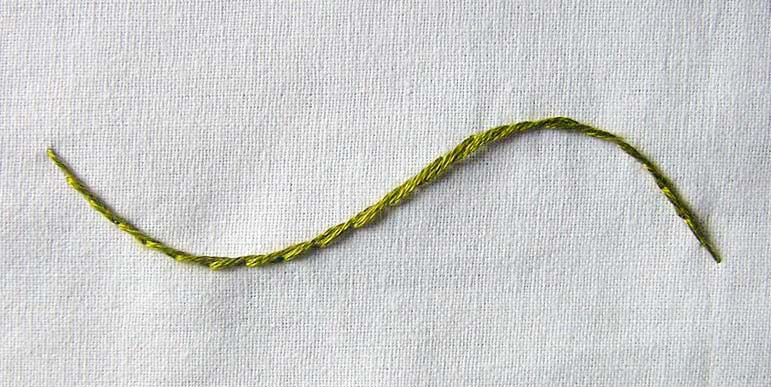
As the name suggests, this stitch is used to mark outlines in an embroidery pattern. It is a flexible stitch that can follow easy curves. In looks and procedure, it is only subtly, but importantly different from the Stem Stitch. Please follow the instructions of both the stitches carefully to study the differences.
To make the logic clearer, I have drawn a temporary stitch line with a pencil. Now, note that all the stitch points in Outline Stitch will fall ON the stitch line. I will be working this stitch from left to right. This instruction is for right-handed learners.
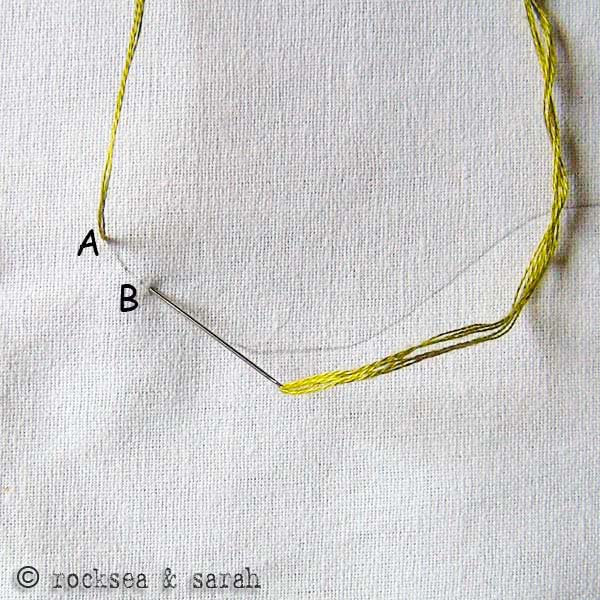 | 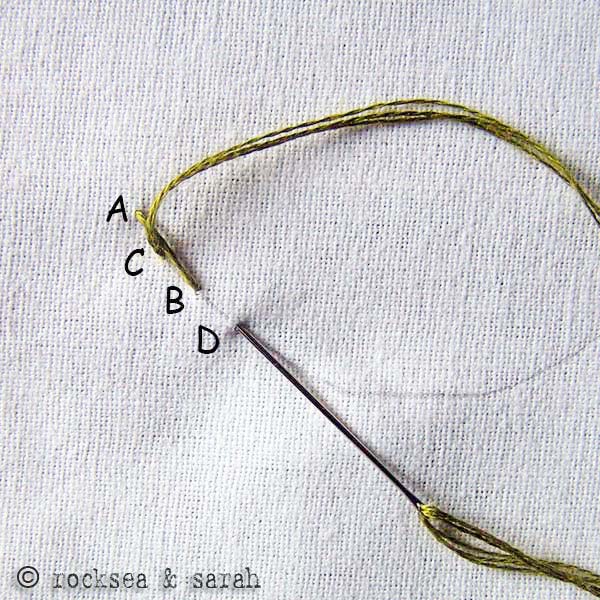 |
| Fig 1: Bring out the thread through A and take it in through B. Take the needle backward and bring the thread out through C. Make sure the point C lies under the stitch A-B. | Fig 2: You need to note that the point C lies about halfway through A and B. Also note that C lies under the stitch A-B. |
 | |
| Fig 3: Take the needle in through D. Try to mark D in such a way that the point B will lie halfway through C-D. Bring the needle out through B. The stitch point B will be at the bottom of the previous stitch. | |
 | |
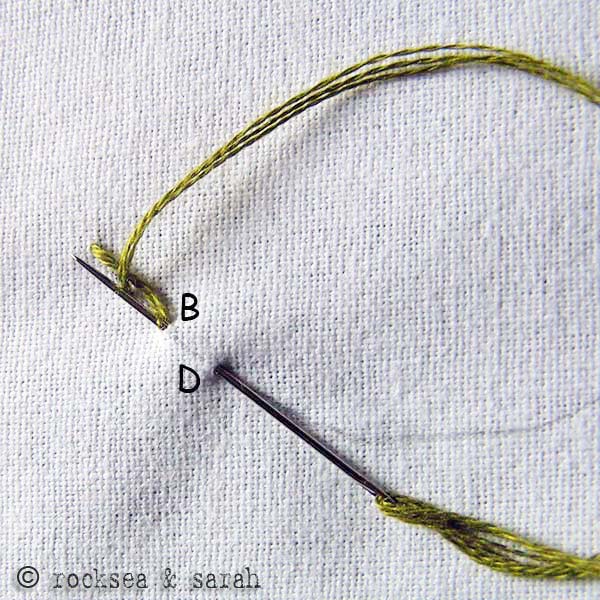
| Fig 4: Continue this pattern of stitching with the needle coming out from the bottom the previous stitch always. | |
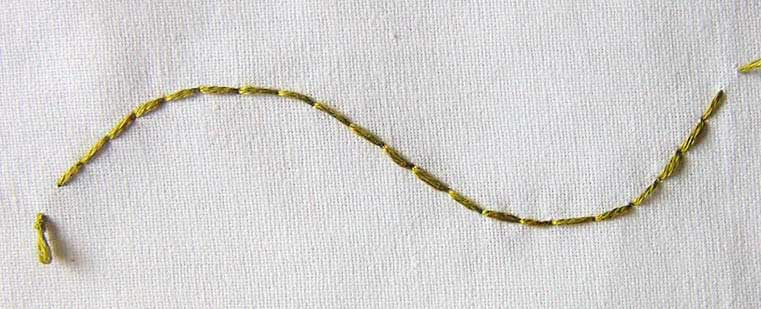 | |
| Fig 5: The reverse of the fabric will give you a back stitch pattern. | |
Learn to do Outline Stitch in 2 minutes!
Use this stitch on a pattern
Visit and Subscribe to Sarah’s YouTube Channel
Related Projects
Do you want to know where and how to use this stitch? Check out the projects below and learn more. Make something beautiful!
Redwork |

Related Stitches from this Stitch Family
Stem Stitch |
Whipped Stem Stitch |
Outline Stitch |
Cable Stitch |
Split Stitch |
Portuguese Stem |
Japanese Stitch |


Sylvia, If you download the eBook and save it to a stick or flash drive, jump drive, whatever you call it, you can take it to Staples and they’ll print it in book fashion and put a spiral binding on it. It comes with a clear plastic front cover and a black plastic back cover to keep the pages in good shape. You could have it separated in three books for easy handling. I got two manuals printed six years ago that I use almost daily and they’re holding up very well. I guess you would need permission from Sarah first.
Sarah, I’m just learning this embroidery fun and I am so glad I found your site! I watched a few videos and almost gave up as they were as clear as mud. Your presentations excellent! thank you.
Hi Anne Marie!
Thank you so much for directing Sylvia with printing directions. We appreciate it. 🙂
Your words of appreciation for our tutorials keep us encouraged to do more picture tutorials. I hope you enjoy more the journey of learning hand embroidery with us.
Your E book looks very wonderful. Do you have a regular paper book. Lots of times I am not at my computer, and would like very much to have a paper type book. Please e-mail me with this info. I would be very interested in purchasing a regular bound paper book. Your site is wonderful. Thanks for your reply. I’ll keep my fingers crossed for a paper book. Keep up the good work. Wonderful!
Hi Sylvia,
Thank you for writing and enquiring about our eBook.
We would have loved to say that we have a hard copy version of this eBook, but unfortunately, we can’t. Our book is 456 pages thick comprehensive guide for Hand Embroidery, making it not so easy for us to get it into a print version, at least right now. Also, we realized that a digital copy of the book will be convenient for most as such a thick book need not be carried around physically, but at the same time, if required, the pages can be printed as per convenience. Once the eBook is downloaded, it can be used on any digital device- computer, phone or tablet, and it won’t require the need for any internet to use the book.
Warm regards,
Sarah
Hi Sylvia,
Please do read the comment above by Anne Marie giving you directions on how you can acquire a print of the eBook. I hope it helps! 🙂
Thanks, Sarah. This is the first time I have learned this stitch making sure the points are on the drawn line. What a difference it makes. Thanks for all you do.
Awesome, Pat! 🙂
Really helpful for my project
Hello: When you’re using this stitch to outline an item that you’re filling in w/ embroidery thread, do you put the outline in 1st or do you do your fill work 1st? Thanks for your help!!!
Dear Sharon,
You can do either way. But, it might be better to do the outline first and then fill in. 🙂
Great job I really hate outlines but I wanna learn more about stitches.
Great job
Este site é o melhor e mais bem explicado sobre bordado que já vi, você está de parabéns por partilhar, obrigada.
Hii Sarah,
As im learning all ur stitches… im dooin each and every stitch u hv given. Ryt nw im on d outline stitch and i c dat stem stitch and d outline stitch are both the same. R dey both d same or do dey hv any difference.. cz if dey r diferent i can add dis stitch to my book or else i cud skip dis step…
Tnx for d site agaiin..!!
Dear Shafrina,
You can read the first paragraph of the stitch tutorial…it should answer you.
Your tutorials are so easy to understand! My friends and I love to get together to do crafts and I think we’ll have to have an embroidery day with your tutorial as our guide! Thank you so much for sharing! I am currently working on embroidering a skirt and will try to upload a picture when I’m done.
Thanks Ang. 🙂
Yes, please do share your works. We would love to see it.
hi,sara,your tutorial is wonderful.iam learning all your stitches.By the by where do you live?doyou have classes?
Thanks Shreya.
We live in Pune. You can check this for details : https://www.embroidery.rocksea.org/reference/summer-workshop/
I am right now on a break as we just had a baby early this year. I won’t get back to teaching atleast until august. Do contact me for more details.
hi sara,thank u for reply and wish u happy parenting time. Initially I thought that you might live in Bnglore.But Iam happy as I live in Kothrud,and wish to meet u after August. Iam a fulltime happy home maker with a caring husband and two lovely girls.
Hi Sarah! I have been working with my embroidery for about a year now. My Grandmother gave me an embroidery stitch book that she used when my Mother was a young girl. I have enjoyed it so very much but I have stayed away from so many of the stitches that are taught in that book because the instructions just didn’t make much sence to me. Thank you so much for sharing these tutorials. Your explanations are very clear and easy to follow and I love your examples! Last year I made an old purse look a lot better by adding my first embroidery piece to it. I am working on a hand made apron at the moment and have been using your tutorials to help me with some of my stitches!
Dear Amber,
It is nice to read from your comment. Please do share some of the embroidery work with us to inspire many other beginners. 🙂
Hey,
I’ve never done any embroidery before but because of the tutorials on your site I can’t wait to start! They’re so clear and really well done. Just a question though, what is the difference between this outline stitch and the stem stitch? Is the outline stitch not just the same stitch but upside down and backwards basically? Or am I missing something?
Thanks!
Lindsay
Dear Lindsay,
I am delighted to know that our pages have inspired you to start stitching. 🙂
Getting on to your query, stem stitch and outline stitch basically follow the same technique. The only difference is: while doing stem stitch you keep the needle above the working thread , but while doing outline stitch you keep the needle below the working thread. (compare Fig 3 of both tutorials).
So, yes, in a way you can say that outline stitch is same as stem stitch, only upside down and backwards.
Thank you so much !! I used to cross stitch when I was a child. And now I’m older I have forgotten how and your tutorial was wonderfull!!! I will now be working on my cross stitch with ease since I found this website !!! Keep up the good work !!!!
Dear Carmie,
Thanks. 🙂 So glad that you are able to get back to cross stitching and that our pages are of inspiration to you.
thanks for helping and making it a lot easier thanks alot
🙂 thanks Dihanie.
btw do you have the stitch couching?
Dear Sarah,
You did good job, got to learn many types of embroidery stiches, and it is very helpful to every one. Loved your hand embroidery stich tutorial… 🙂
Dear Swati,
Happy that you have learnt from our pages and liked it. 🙂
Thanks!! i love your blog! is amazing, i am living in spain but i am mexican, thanks, thanks!!
Hey Kut,
:). We are happy that you are happy and learnign from our pages.
love your blog thanks learnt how 2 do most of them thanks