
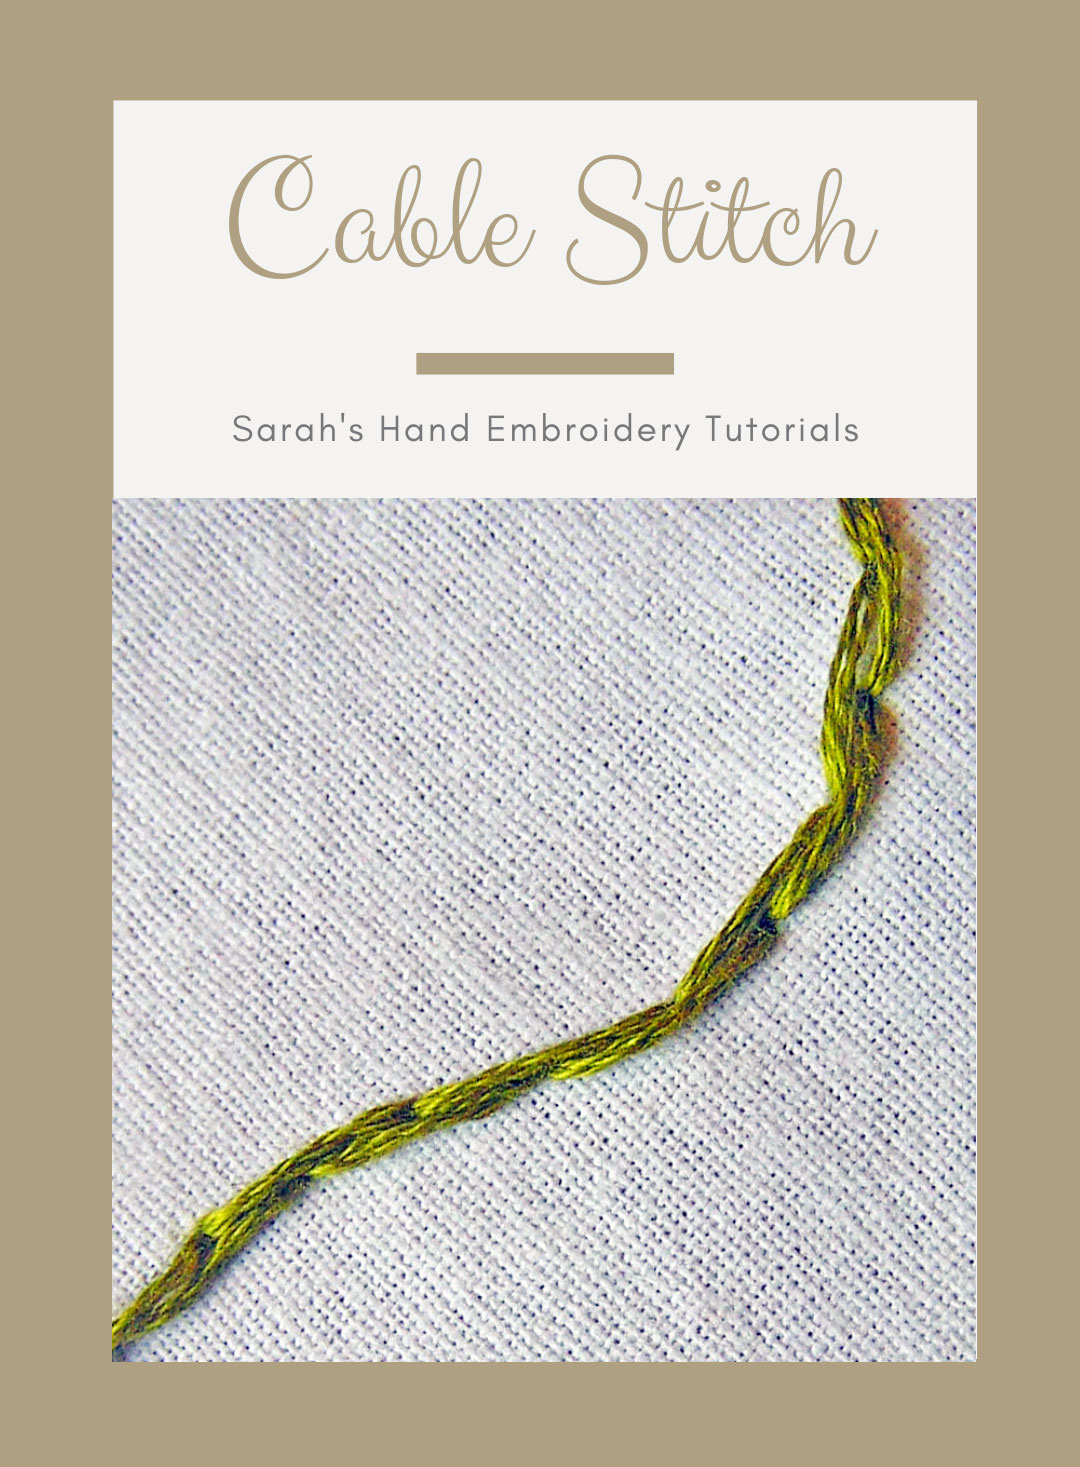
Cable Stitch is also known as
Side to side stem stitch [EN], Point d’armes contrarié [FR], Wechselstich [DE], Ponto de Repôlego [PT], stjälksöm [SV].
How to do the Cable Stitch
This uses Stem Stitch and Outline Stitch alternately. The final effect is a line with a ‘bricked’ look. To make it clearer, I have drawn a stitch line with a pencil. A stitch line is through which all stitches will be running. Now, note that all the stitch points of the Cable Stitch will fall ON the stitch line. I will be working this stitch from left to right. This instruction is for right-handed learners.
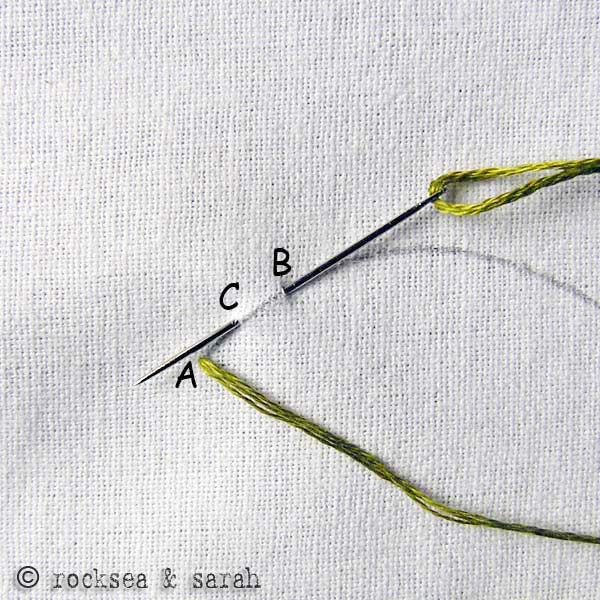 |  |
| Fig 1: Bring out the thread through A and put it in through B. Take the needle backward to bring it out through C. Note that C lies halfway between A and B. | Fig 2: This creates a single Stem Stitch. |
 | |
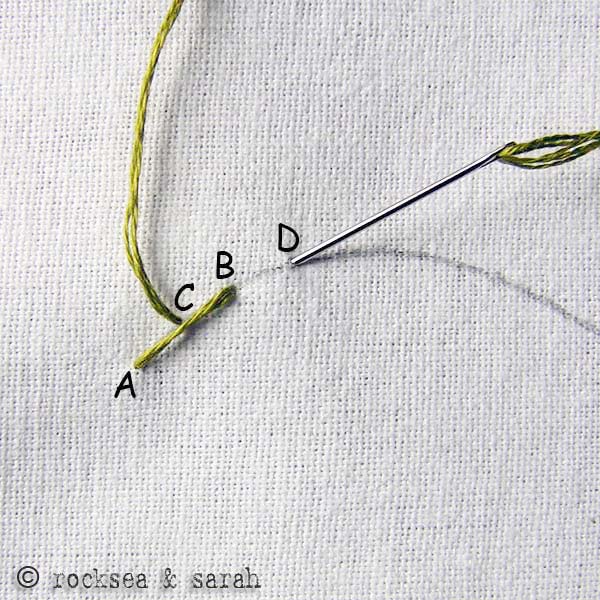
| Fig 3: Now, take the thread in through D and bring it out from B. Take the point D in such a way that B lies halfway through C- D. Also, the point B will lie BELOW the stitch C-D. This will create an Outline Stitch. | |
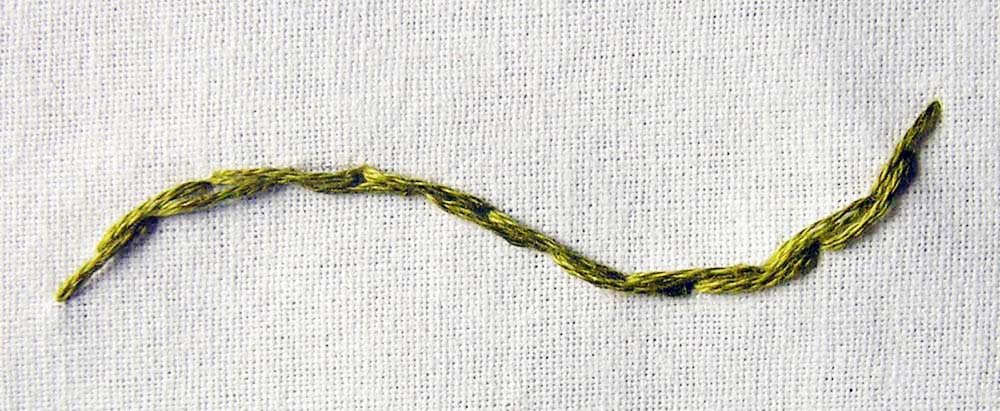 | |
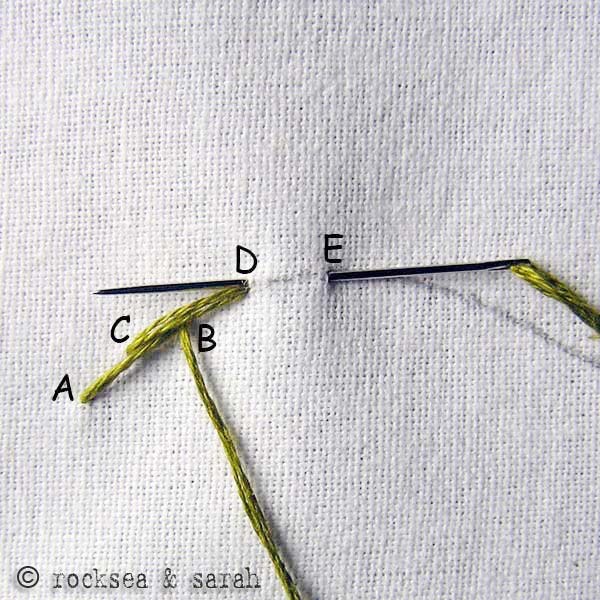
| Fig 4: Continue making a Stem Stitch and Outline Stitch alternately to get a final ‘brick-like’ effect. | |
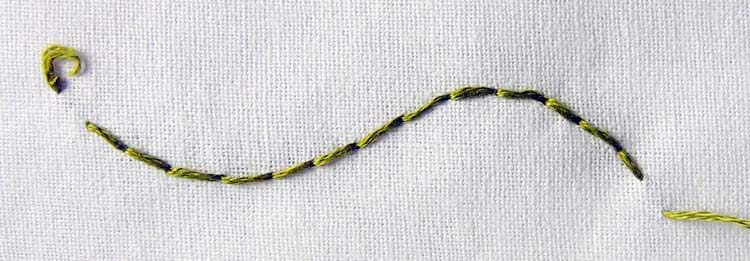 | |
| Fig 5: The reverse of the fabric will give you a back stitch pattern. | |
How to do this stitch using the 3sat Hair pattern
Learn Hand Embroidery Stitches | Cable Stitch, Split Stitch, Raised Chain Stitch
Visit and Subscribe to Sarah’s YouTube Channel


This is really helpful, thanks!
Glad that it helped you, Kathy!
Oh!Sarah!I’m Sorry for my little Negative comment in your other page in Stitches.But Sarah!Thank You so much!It really helps me how to sew this Cable Stitch!love Ya Sarah!
Hello Sarah:
Just had to say how much fun it is to come across your embroidery tutorial! I am just dabbling in embroidery and was blessed to come across your helpful info.
Thank you for sharing it with others,
Amy Kelsch
hi Sarah
u r doing good job. only because of u i have larn various types of stiches i have know only straight stich & chain stich.
carry on.
Thank you, Poonam! 🙂 I hope you are still stitching and enjoying embroidery.