
Simply put, this stitch is just a double layer of the Herringbone Stitch. Now, note something important – If your intent is to just use the Double Herringbone stitch as it is over the patterns, you can just check out Variation 1 for it. But, if you are going to use this stitch as a foundation for weavings, you will have to use Variation 2 which supports the interlaced weaving.
Variation 1
You need to know how to do the Herringbone Stitch for this variation. Variation 1 of the Double Herringbone Stitch is just an extension over the regular Herringbone Stitch and can be used for fillings and other simple variations.
 | |
| Herringbone Stitch: First, make a row of herringbone stitch. This will form the foundation, over which we will do the second row of herringbone stitch, slightly woven into it. | |
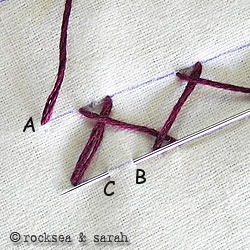 |  |
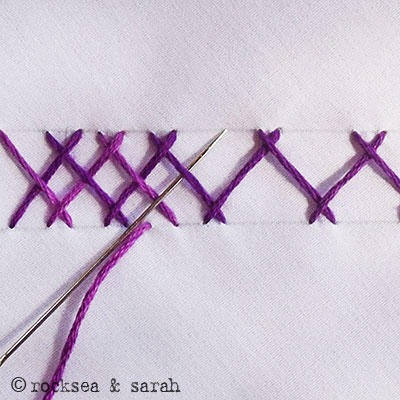
| Fig 1: Bring the needle out from A, put it in through B and then take the needle back out from C, like you would for a herringbone stitch. Make sure A, B, and C lie in sync with the stitch points of the previous herringbone stitch, as illustrated. | Fig 2: Now, take your needle above the stitch A-B, but below the stitch of the previous herringbone row. This is an optional process. |
 |  |
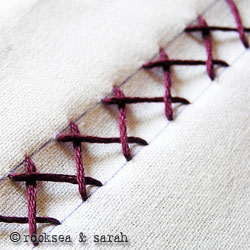
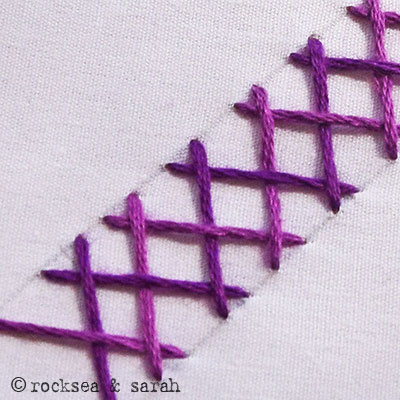
| Fig 3: Continue with a similar process throughout. | Fig 4: A finished row of double herringbone stitch should show up like this, as though woven into each other. |
Learn to do Double Herringbone Stitch (Version 1) in 2 minutes! Use this stitch on a pattern Visit and Subscribe to Sarah’s YouTube Channel Variation 2 Also known as: Indian Herringbone Stitch This variation requires you to work from the scratch, rather than just work over a row of regular Herringbone Stitch. This is because we need to make a weaving within the stitches of the Double Herringbone to support the interlaced weavings. | |
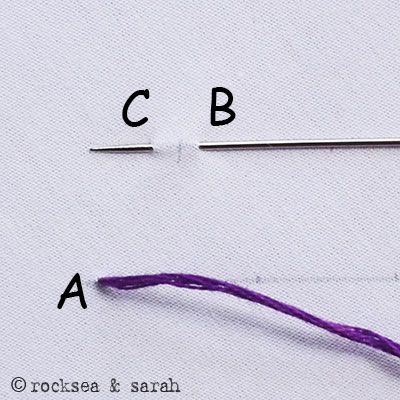 |  |
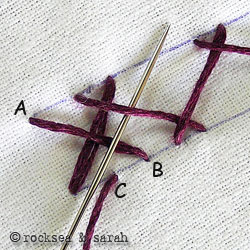
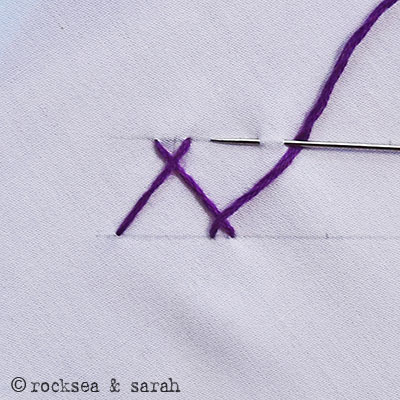
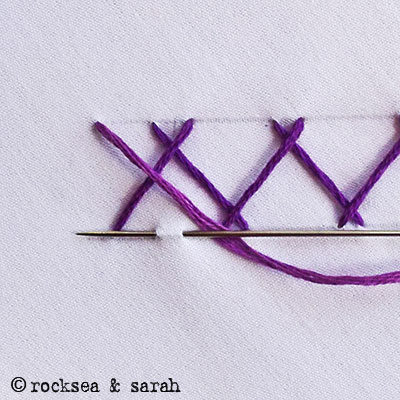
| Fig 1: Bring the needle out from A, put it in through B and then take the needle back out from C, like you would for a Herringbone Stitch. | Fig 2: Now, pass your needle below the stitch A-B. This is a very important step for this stitch as it creates the weave at the base level to help the interlaced weaving later. |
 |  |
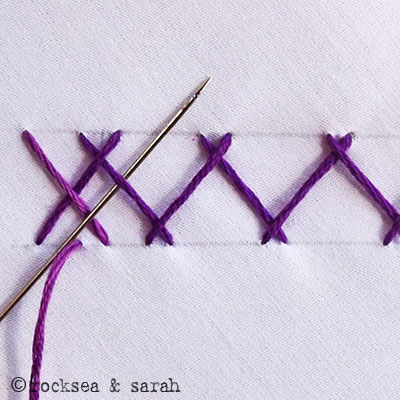
| Fig 3: Continue with the similar process until the row is finished. | Fig 4: Now begin the next row by starting from the left end again. Follow the illustration. |
 | 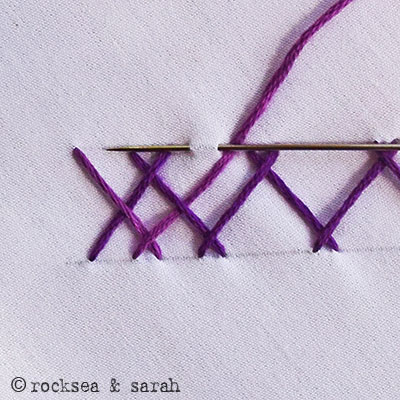 |
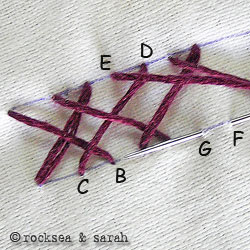
| Fig 5: This is the next important step. Pass the needle under the stitch of the previous row of herringbone stitch, as shown. | Fig 6: Continue making the herringbone stitch. |
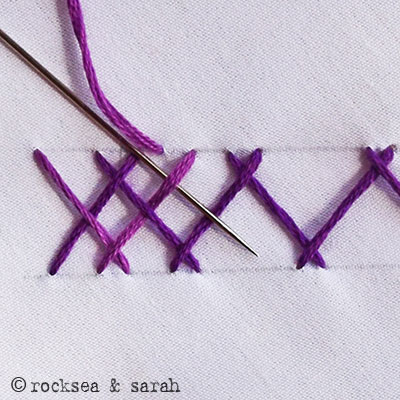 |  |
| Fig 7: Again, pass the needle under the working herringbone stitch and over the previous herringbone stitch, as shown. | Fig 8: Continue this process until the end of the row. |
 | |
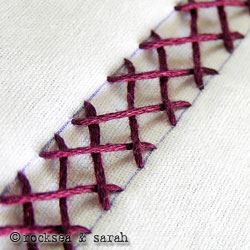
| Fig 9: At the end, you will note that the stitches intersect each other in a weave pattern. | |


I’m having trouble determining the spacing required between the stitches. I want to do the interwoven band on a st. Bridget’s cap.
Dear Sheila,
If you work between two parallel lines 1/2 an inch apart and, keeping the farthest legs in a single Herringbone Stitch 1/2 an inch apart, it should work. Basically, imagine working on squares of 1/2 an inch sides. I hope this helps. 🙂
Thanks. I’ll try that.
Is it possible to do a triple herringbone stitch with three different colors of thread?
I am wanting to do something like that but am not finding any tutorials or anything.
Hi Stephanie,
I have not really tried a ‘triple herringbone stitch’, even if exists. But it could be tried. That is what creativity adn imagination is all about. Only, I don’t get an idea where you might place the third row of herringbone stitch.
Dear Sarah, may I tell you that tripple herringbone embriodery is done with three diff. shades of threads there is no need of third row.
Oh ok. I have not really tried it, but I would like to include it in the tutorials. How do the three different shades of threads get incorporated?
awesome