
Fly Stitch is also known as
Y stitch, Open loop stitch [EN], Punto de mosca [ES], Point de mouche [FR], Fliegenstich / Zweigstich [DE], Punto mosca [IT], Ponto mosca [PT].
How to do the Fly Stitch
This is an easy stitch and looks beautiful. As the name suggests, it looks like a ‘Y’. Horizontal or vertical rows of fly stitch can be done to create various effects. It can be topped with more decorations with contrasting threads too.
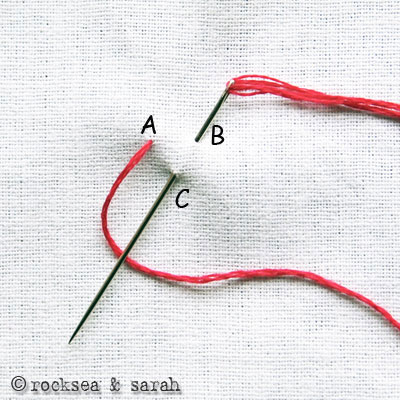 |  |
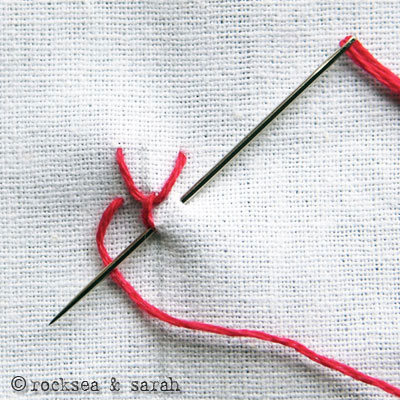
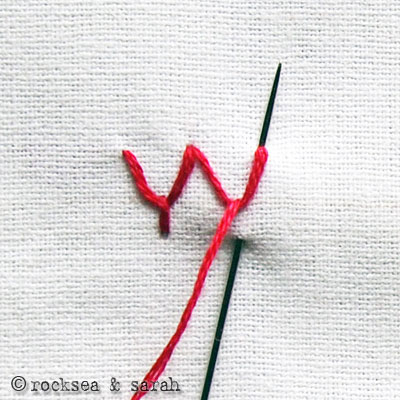
| Fig 1: Bring the needle out from A and put it in through B. Then, bring it out through C, which lies between and below A and B. Pull the needle out from over the working thread, as shown in the picture. this creates a ‘V’ shape. | Fig 2: Now, to create the ‘Y’ shape, you need to make a tail. So, put in the needle a little space right below C. |
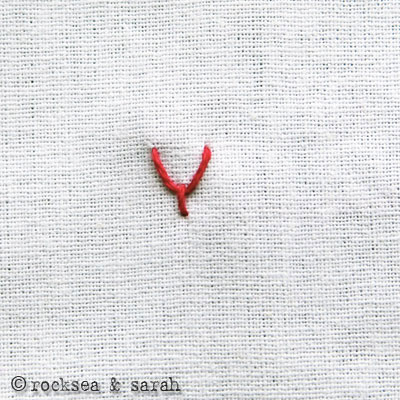 | |
| Fig 3: When you are finished, the stand-alone fly stitch would look like this. | |
| Variation 1: Vertical Row | |
| I have made a vertical line that will act as the stitch line for this illustration. To make a vertical row of fly stitch, consider making the tails of each fly stitch on the stitch line. The only thing to keep in mind is to keep the tails connected. It is easy to lose the ‘V’ shape in a bid to connect the tails…so try to keep checking the shape once a while. 🙂 You can also do a vertical line of fly stitch without connecting the tails…that is left up to your imagination. A vertical row of the Fly Stitch makes great textured fillings for leaves. | |
 | 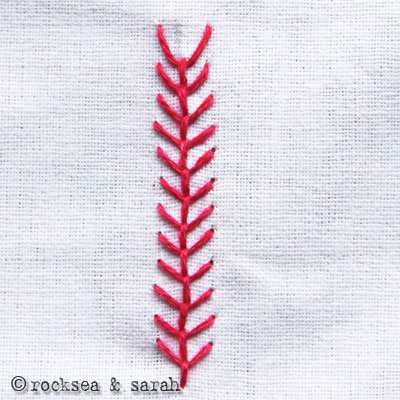 |
| Fig 4: Make a fly stitch. Continue for the second fly stitch in such a way that when you bring out the needle for the tail, it is brought out from the end tip of the previous tail. See illustration. | Fig 5: A vertical row will look like this…sort of like a fern. |
| Variation 2: Horizontal Row | |
| Here, you connect the top ends of the fly stitch to get a horizontal row. Of course, you can do it without connecting too. A horizontal row makes great border patterns. | |
 | 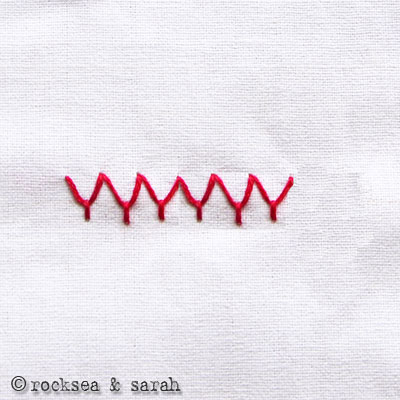 |
| Fig 4: Make a fly stitch. Continue for the second fly stitch in such a way that the top end is connected as illustrated and the tails will all fall neatly in a line. | Fig 5: A finished horizontal row of fly stitch would appear like this. You can always decorate over it using contrasting threads. |
Learn to do Fly Stitch in 2 minutes!
Learn this stitch along with 305 other stitches from our 600-page eBook.

Other stitches from the Fly Stitch Family


Very clear and simple instructions. Thank you! It was perfect!
Thank you, Toni! 🙂
Thank you so much! I love your tutorials and easy to follow instructions. These have helped me so much on my embroidery journey!
Thank you, Nancy. I’m happy that you like our pages. XO
Dear Sara,I’ve never seen such a neat,clear instructions for embroidery all in one place.This is a great work & it’s really helpful..thank u so much.. 🙂
Thank you, Lakshika! 🙂
Dear Sarah, I have used herringbone stitch and fly stitch here. Thank you for the tutorial.

Hi Anu radha. What a beautiful sampler! Thank you so much for sharing this work here! Lovely! 🙂
Easy to understand. Thank you!
I love your tutorials! I would love to feature this particular one on my blog as part of a series I do gathering the best tutorials for embroidery stitches. Would you mind? I would include a link to your site:) Let me know what you think! Thanks!
Sure Kristen. Go ahead. Credits and link is all that we ask for. 🙂
Thank u so much Sarah as I needed to learn this stitch so thank you😉