
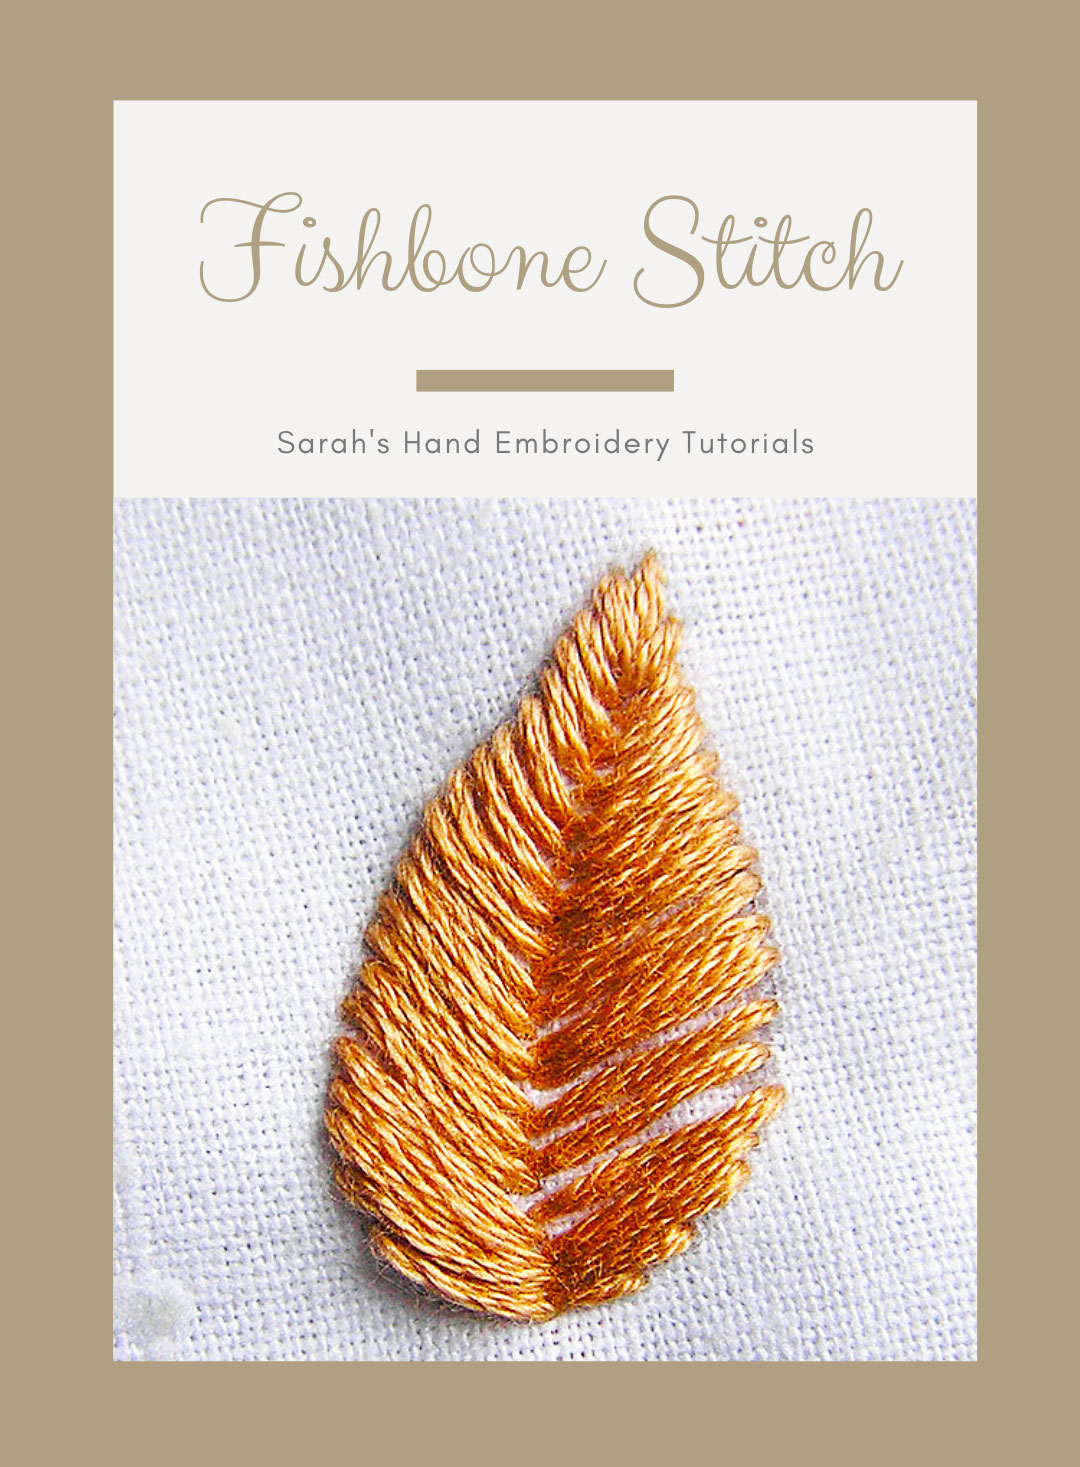
Fishbone Stitch is also known as
Punto pasado abierto[ES], Point d’arête [FR], Grätenstich [DE], Ponto de folha [PT], fiskbenssöm [SV].
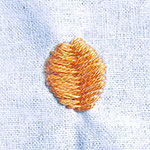
About the Fishbone Stitch
Fishbone Stitch is a kind of filling stitch which is ideal for making leaves or feathers. It requires us to divide the pattern into two and each side is filled alternately, giving it a plaited effect in the center, thus ideal to make leaves or feathers.
How to do the Fishbone Stitch
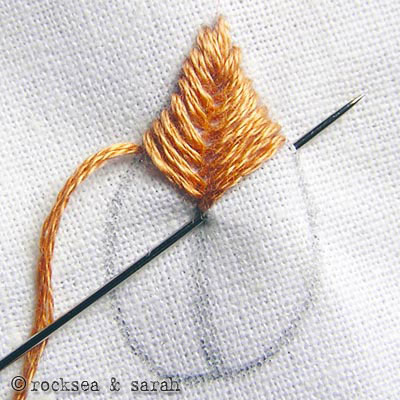
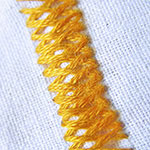
I will work on a leaf pattern, which I have divided into the center with a stitch line. To make the lesson easier, I have named the lines X, Y, and Z.
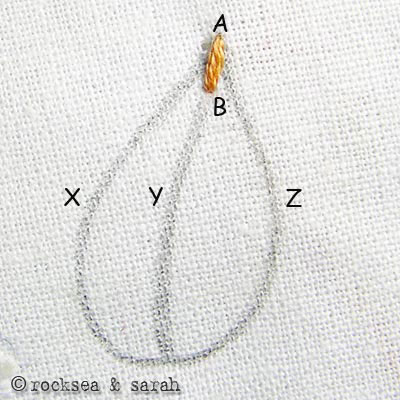 | 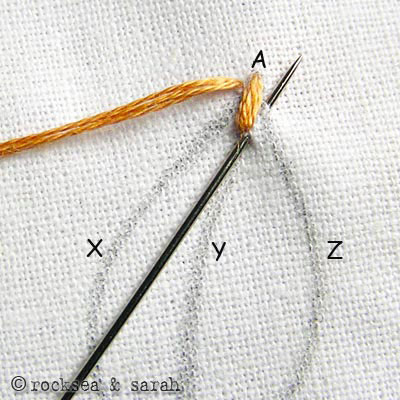 |
| Fig 1: To begin with, bring the needle out through point A, which is the top tip of line Y. Put it in through B, to make a single straight stitch. | Fig 2: Now, bring the needle out from a point very close to A on the the line X. Put it in through a point very close to B on line Y. Again pull out the needle through a point very close to A on line Z. |
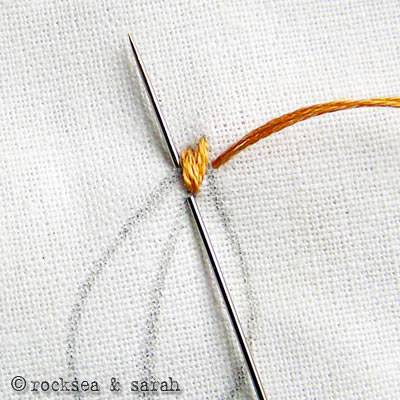 |  |
| Fig 3: This procedure of putting in the needle through X and Z alternatively will follow. Each time we will be connecting X-Y and Y-Z. | Fig 4: Make sure all the stitch points lie close to each other to avoid any visible spaces. |
 | 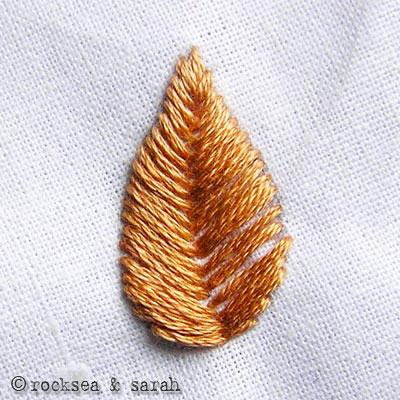 |
| Fig 5: Halfway through, our leaf would look like this. You can see the rib being formed. | Fig 6: Once finished, the filled leaf would look like this. |
Learn to do Fishbone Stitch in 2 minutes!
Learn this stitch along with 305 other stitches from our 600-page eBook.

Learn more stitches from the Fishbone Stitch Family
Sprat’s Head |
Crow’s Foot | |


Just started my first embroidery project and your lessons on how to do the different stitches is excellent. The instructions are easy to follow and I’m enjoying my new hobby, thanks to you.
Thank you, Ann. We are happy that you are enjoying our pages. Keep dropping by! 🙂
Thanks so much in 15 and learning embroidery as a quarantine craft
That’s great, Jimin-shi. Hand embroidery is a quieter and mindful art that will help you get you through tough times. 🙂
Hi Dear
This is really helpful. I could stitch as per the given instruction as it is very well illustrated.
Thank you for making stitching easy.
Hi Nimisha.
Thank you so much. Happy to know that you liked our instructions. Please do share your work here – it will be an inspiration to the others. 😊
What are the uses of fish bone stitch
Hi John. As you see, the most common use of the Fishbone Stitch is to make leaves. You can use this stitch to fill in anything that is more or less shaped like a leaf.
What is the difference between Boro and Sashiko stitches?
Hi.
Here is what I understand. Boro and Sashiko stitches are more or less the same. Both uses white thread over indigo fabric. It’s how they are used that brings the difference between them. While both are mending techniques, Boro uses running stitch over patches of fabric placed in a rough order. The stitches are done to secure the patches in place and so it does not make any patterns as such. Sashiko, on the other hand, uses the running stitch to create patterns like flowers, waves or tortoise shells, to name a few, and the fabric placement is also done more carefully. The result? Boro looks like a rag and Sashiko looks organised and enhances the look of the fabric through the stitches.
I hope this helps you!
❤️ Sarah
continuing on the below updated concern. Have drawn the leaf pattern as shown in the figure itself. Round in the middle and the same perfect leaf pattern
Hi Namitha, from what you said, I think, the ‘V’ shape starts getting narrower as you keep stitching? What you can do is try to keep the ‘V’ shape from tapering by judging it with its width. If you look at Fig 6, you will see some slight gap between the stitches. This is a way to adjust and prevent the stitches from getting narrower and tapering. I was trying to maintain the width of the ‘V’ so that it does not become a problem towards the end.
Don’t worry even if it takes a couple of tries before you get it perfectly.
I hope this helps.
Hi Sarah
I am trying on fish bone stitch on a leaf pattern as shown. But I am getting a tapered look and not able to achieve the round look in the middle of the pattern . Kindly help out to achieve the round pattern in this stitch
This was EXTREMELY helpful. Thankyou so much.
Nice variation of the satin stitch. I’ll have to try it out next chance I have 🙂