
Cretan Stitch is also known as
Persian Stitch / Long-Armed Feather Stitch/ Alternating Buttonhole Stitch/ Long Armed Feather Stitch/ Quill Stitch/ Spaced Cretan Stitch [EN], Punto de Creta [ES], Point d’Arête [FR], Kretischer Stich [DE], Punto Greco / Punto Cretese [IT], Ponto de Creta [PT], Snärjd Kråkspark [SV].
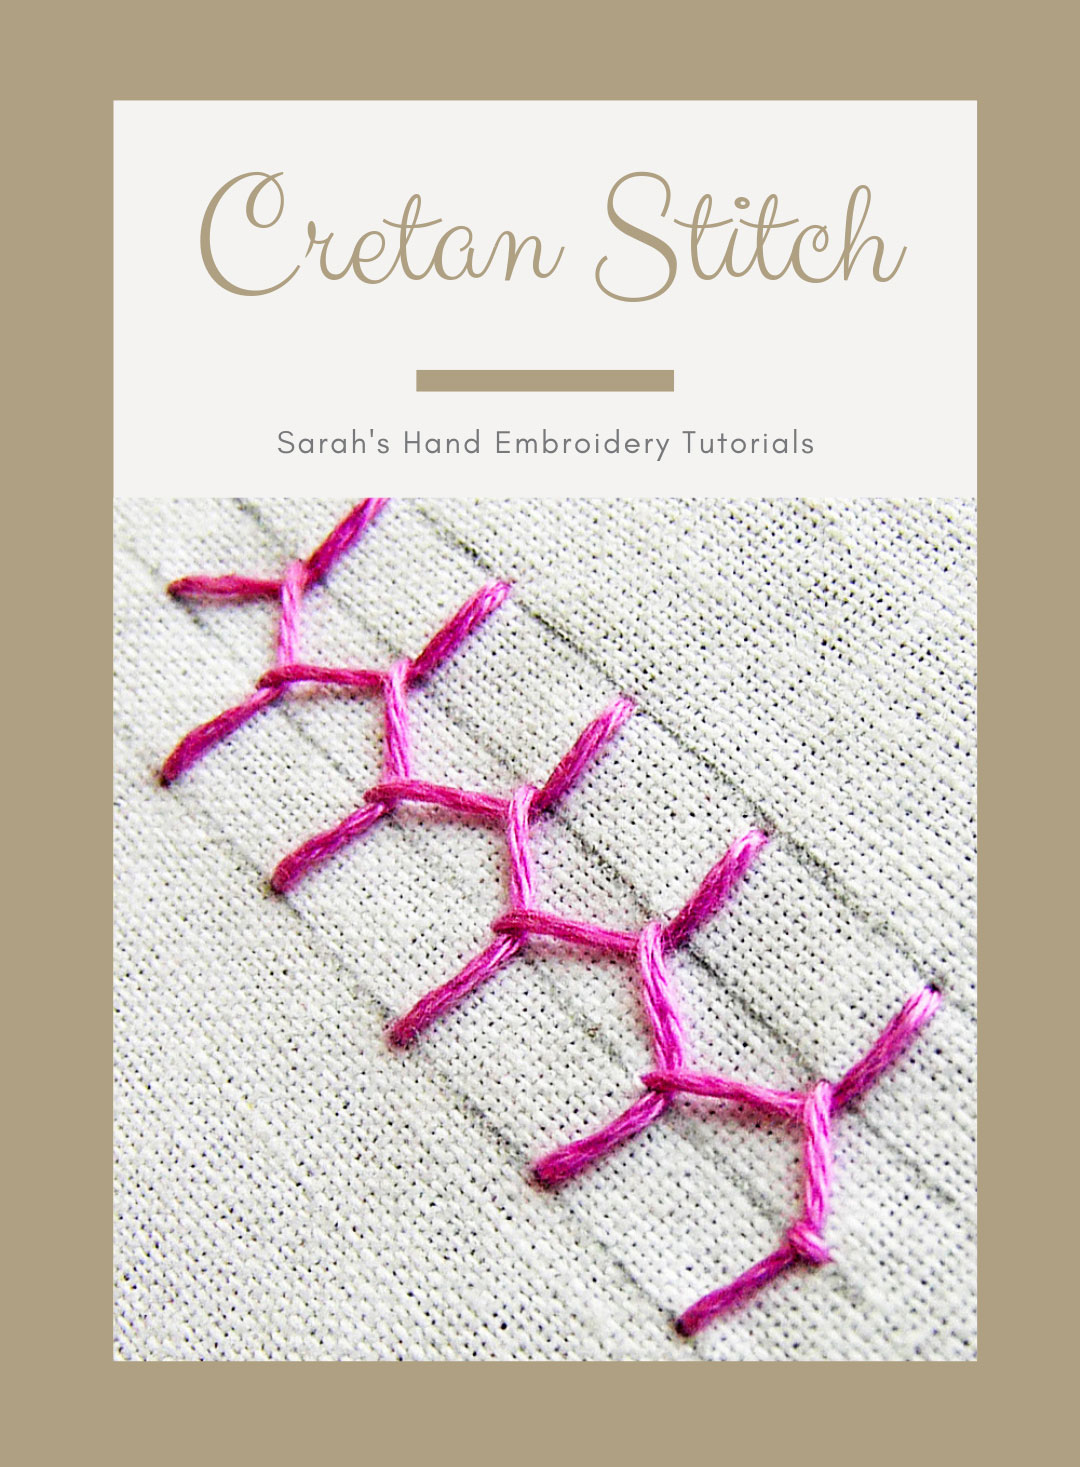
How to do the Cretan Stitch
This stitch is used as a filling stitch, especially in crewel embroidery. Various effects can be produced by altering the angle of the stitches or even closing them in or opening them out. This stitch can be worked from top to bottom, left to right, or even right to left, based on convenience and requirement.
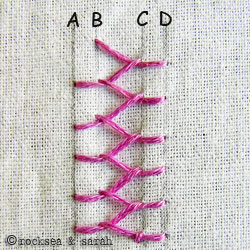
I will be working top to bottom, between four stitch lines A, B, C, D to illustrate this stitch and its variations.
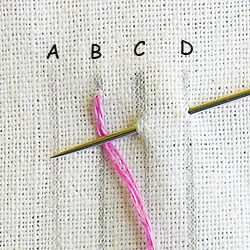 | 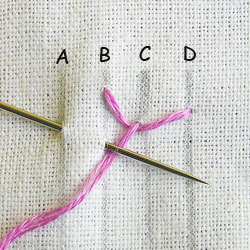 |
| Fig 1: Bring the needle out through B. Take the needle in through D and out through C. D should be slightly below the point in B. Now keeping the thread under the needle, pull the needle out. | Fig 2: Now, repeat the process on the other half. Take the needle in through A, bring it out from B, and keeping the thread under the needle, pull it out. Make sure A is slightly below D. |
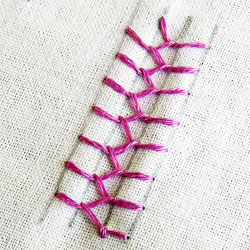 | |
| Fig 3: Keep repeating this process on either side. A finished pattern should look like this. I have spaced it out slightly more to show the features clearly. | |
 | |
| Variation 1: This is a variation to show the slight visual change made by making the two stitch lines in the centre spaced apart. That is, B and C are spaced far off. | |
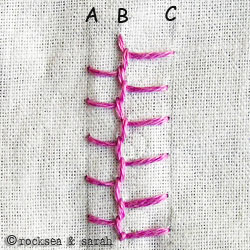 | |
| Variation 2: This illustration shows a variation where there are only three stitch lines A, B, C. The stitches in the centre fall on either side of the stitch line B, bringing out a different visual effect. The stitch technique, however, remains the same. | |
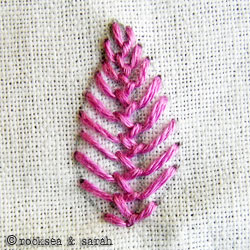 | |
| Variation 3: This illustration shows how a pattern can be filled using the Cretan Stitch. It also demonstrates a different visual effect by altering the slant in the stitches. |


I’m so happy to follow your stitch lessons, as today I needed the Cretan stitch and you make it easy to do.
Thank you, Sarah.
Hola Sarah: La felicito por darnos la oportunidad de compartir este arte maravilloso del bordado.
En esta puntada, tengo una observación: El cuadro que contiene la puntada final, es igual al de la Puntada de Creta Abierta y de acuerdo a las indicaciones, debería haber una inclinación en las puntadas exteriores.
Hola Ana,
Gracias por tus comentarios.
Tienes razón, he usado la puntada de creta abierta en el cuadro de imagen final. Se debe a que, simplemente, pensé que es una mejor imagen y que, de todos modos, siguen la misma técnica. 😉
Your instructions are wonderful. You are the best teacher in the world. Thanks to you.
Thank you a lot Sarah!
I am a retired Prof. I did a lot of embroidery when i was in young age.A long gap.. really a very long gap. Now i am looking for hand and machine embroi tutorials. i found yours.really amazing but have lots of doubts.Let me try and work out . thank you so much..
hai,thank u ….i’m looking 4 dis type f 2torial….thank u so much 4 helping me 2 fulfill my dreams…..
Hello,
I’m a beginner and I find your site so helpful! Your tutorial are really clear and the photos couldn’t be better. thank you so much
hai ! thanq for beautiful stitches… which is driving me to this world… to discover nd to explore many.
I amlooking for a clear set of examples of stitches, and this website was recommended
Hi. Congrats on your embroidery tutorials. They make all the stitches look simple and clear enough for a beginner like to try. This will be my first atempt to embroider anything, so I don’t know how it will turn out. I would like to embroider my dauhter’s name and baptism date on her baptism towel. Which stich woul you recomend? And another thing (probably a silly question!), how do you get rid of the pencil lines after you finish embroidering the fabric?
Thanks a lot for sharing 😉
Dear Catarina,
Thanks. 🙂
I would suggest you use any simple stitch like chain stitch or the back stitch to write your daughter’s name and date of baptism. Using simple stitches keeps the work easy and less frustrating, and of course, neater.
To get rid of the pencil lines, first, make sure that you do not draw too dark on the fabric. Then, just a washing would erase it. 🙂
You can also buy (in England) an air soluble pen. Use like a felt tip and about 24 hours later it just fades away. Mary Kinsey. PS Love your site and use it regularly