
This stitch is a little complicated, but not too difficult to learn. Here, we use two different threads to make chain stitches over a foundation row of straight stitches. So, the visual effect would be an embossed magical chain stitch. Multiple rows of checkered chains can be done over a broader foundation of straight stitch to give a chessboard appearance or a filling effect. For the sake of this lesson, though, I will be doing only one row over a narrow foundation of straight stitches.
The knowledge of magic chain stitch could be helpful, though not a must. This stitch requires more patience I feel since we are dealing with two colors of thread using two needles, alternately, in the same journey. I will work the straight stitch foundation from top to bottom, but the chain stitches will be worked from bottom to top for the sake of this lesson. You would require two needles with two contrasting threads. The threads need to be doubled in each needle, unlike the single threads we generally work with. This makes the making of chain easier to manage.
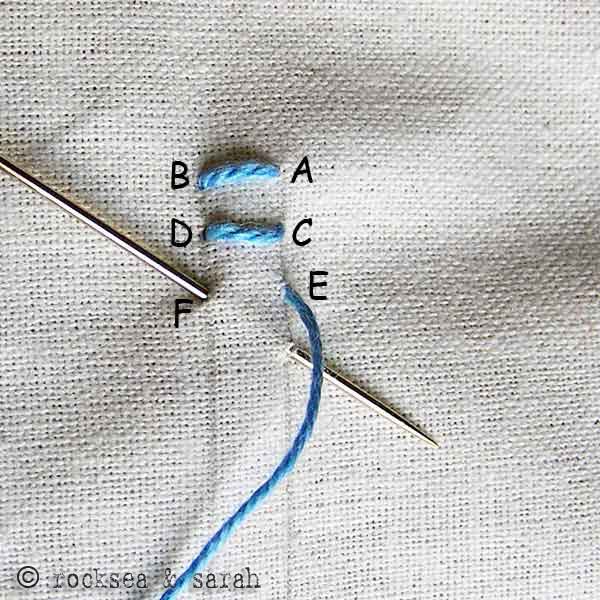 |  |
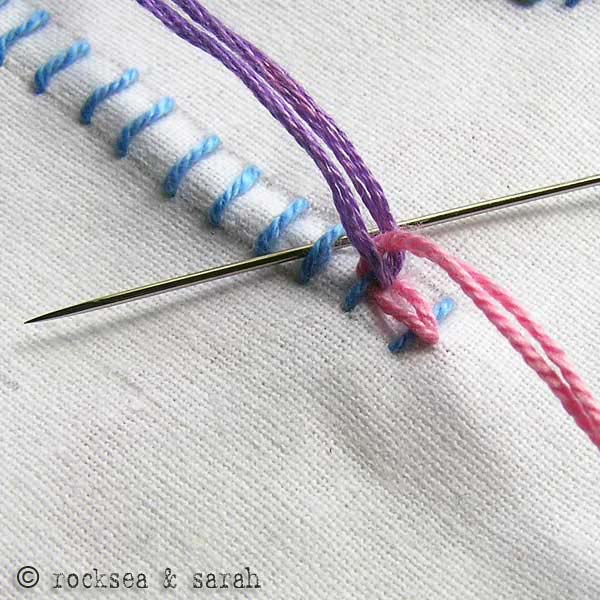
| Fig 1: We start by making a foundation row of straight stitches. The stitches are done between two parallel stitch lines. We draw the thread from A-B, C-D, E-F and so on. | Fig 2: No, I take my first doubled thread and bring it out from the bottom of the first straight stitch bar. Then, I take the needle over the first stitch bar, and beneath the second stitch bar. This makes the first ‘loop’ of the checkered chain. The chain will become clearer as we bring in the next thread. |
 |  |
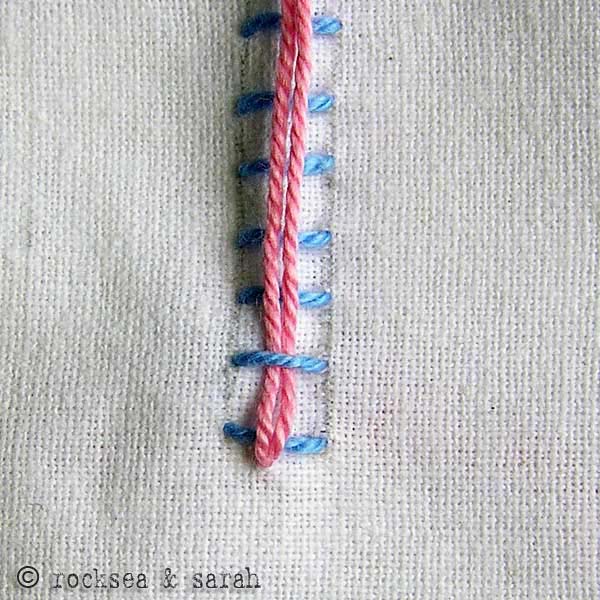
| Fig 3: Bring out the next thread from the bottom of the second straight stitch bar. When you bring it out, split the first thread. It is this splitting that gives the loop effect. | Fig 4: Next, we have to make a loop with the second thread, so, now, we split the second thread with the first one. |
 | 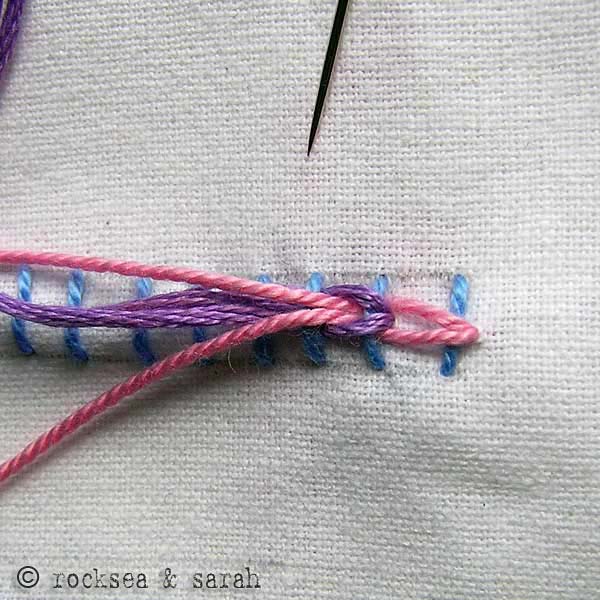 |
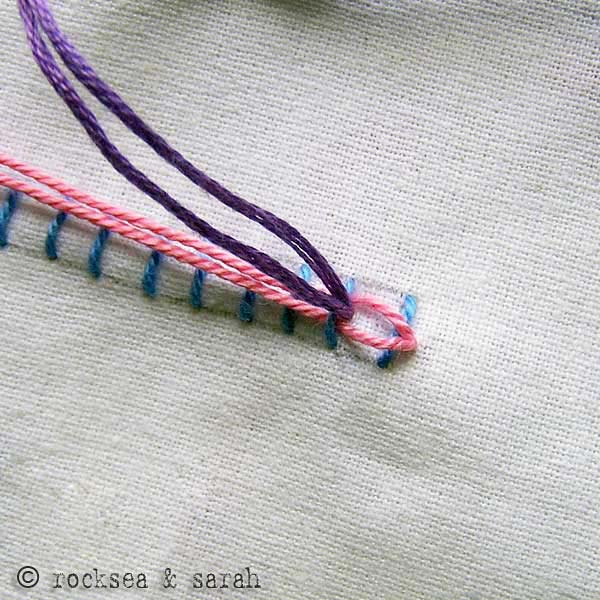
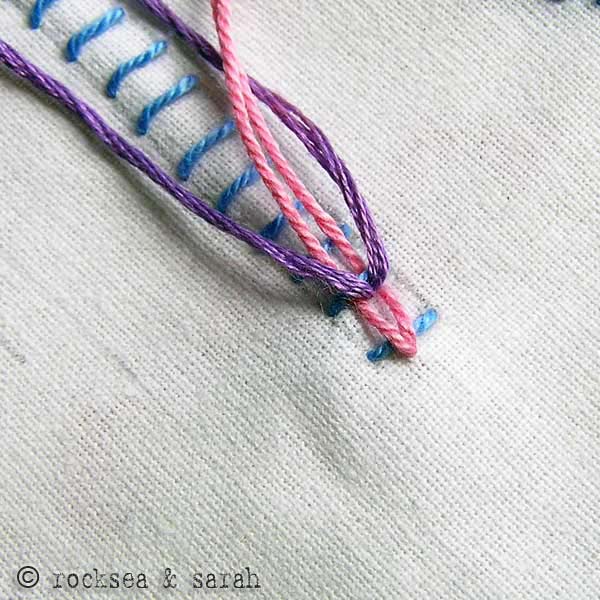
| Fig 5: Then, we take the second thread beneath the third straight stitch bar. This ‘locks’ or tightens the new ‘loop’ in place. | Fig 6: We continue this procedure of spliting the threads alternately and locking them by taking it beneath the next straight stitch bar. Once you get the idea of the stitch, it is not difficult to do. Just remember nto to pluck the fabric beneath when you work with the two needles. |
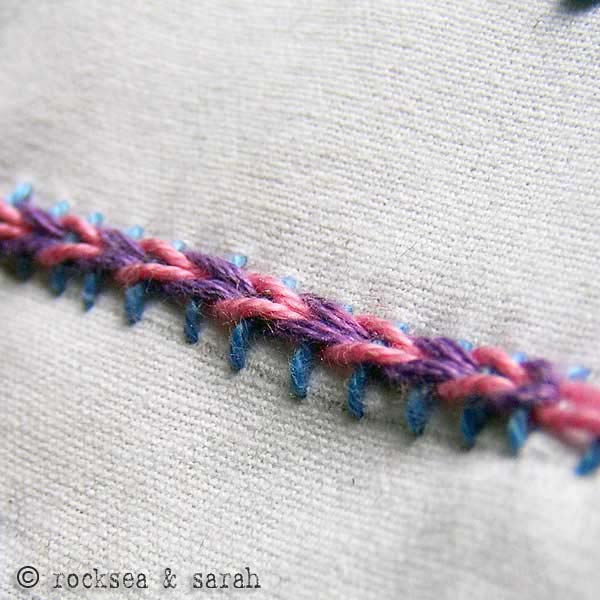 | |
| Fig 7: When finished, you should get a pattern like this. |


I have absolutely no idea what’s happening here. Wish we got the FULL picture in each image – which needle is where, how the tails of the thread are going, etc.
Sorry, Benny, that this tutorial is not an easy one to follow. I can try to look for the photos and see if I can show a zoomed-out version of the photos and include a few other photos too.
The pictures were very helpful. I was trying to follow directions in a book with a sketched diagram and it just wasn’t making sense. I finally did a search on Checkered Chain Band and your instructions popped up. After a few tries I’ve got it so Thank You!
Awesome. 🙂
This is my recent work on a saree. This stitch is chemanthi stitch. I have used a sequin in the centr of the flower.
Each stitch is very creative .simply love them.
Hi Teresa. It was nice to read your comment. I am glad that our pages inspired you to get back to your passion for craft. 🙂
Do try to share some of your stitching with us here by uploading the pictures. It will inspire many more.
For years I have gone to my local craft shop and gotten embroidery thread. Not for making lovely pieces of art, but for making friendship bracelets. Yes, the kind you made at camp when you were ten. I got very good at it. I could create letters and shapes out of the thin threads. Some of the work could be very detailed and labor intensive.
Now that I am 25, I have outgrown my bracelet days but still crave the hours of locked-in-concentration that it takes to create such things. That’s when I stumbled upon my mother embroidering a bib for my new baby cousin. I had always thought that embroidery was sort of for old ladies, but the design she was working on was cute and modern. I got very excited when I saw it. She commented that I would like embroidery very much because of the time, detail and creativity it entails. I thought it over and then sort of forgot about it all together.
Then today I was looking around on another one of my favorite craft sites and there was a link to this one. The tutorials were so clear and informative. I got all excited again about the prospect of using embroidery to embellish all kinds of things. Thank you for creating this site and re-kindling my passion for all things crafty and creative! I’m going out to get my first design to start practicing right now. 🙂
Love your site!