
Pekinese Stitch is also known as
Chinese Stitch [EN], Punto de pequinés [ES], Point de Pékin / Point arrière entrelacé bouclé [FR], Pekingstich [DE], punto Pechinese [IT], Ponto Pequinês [PT].
How to do the Pekinese Stitch
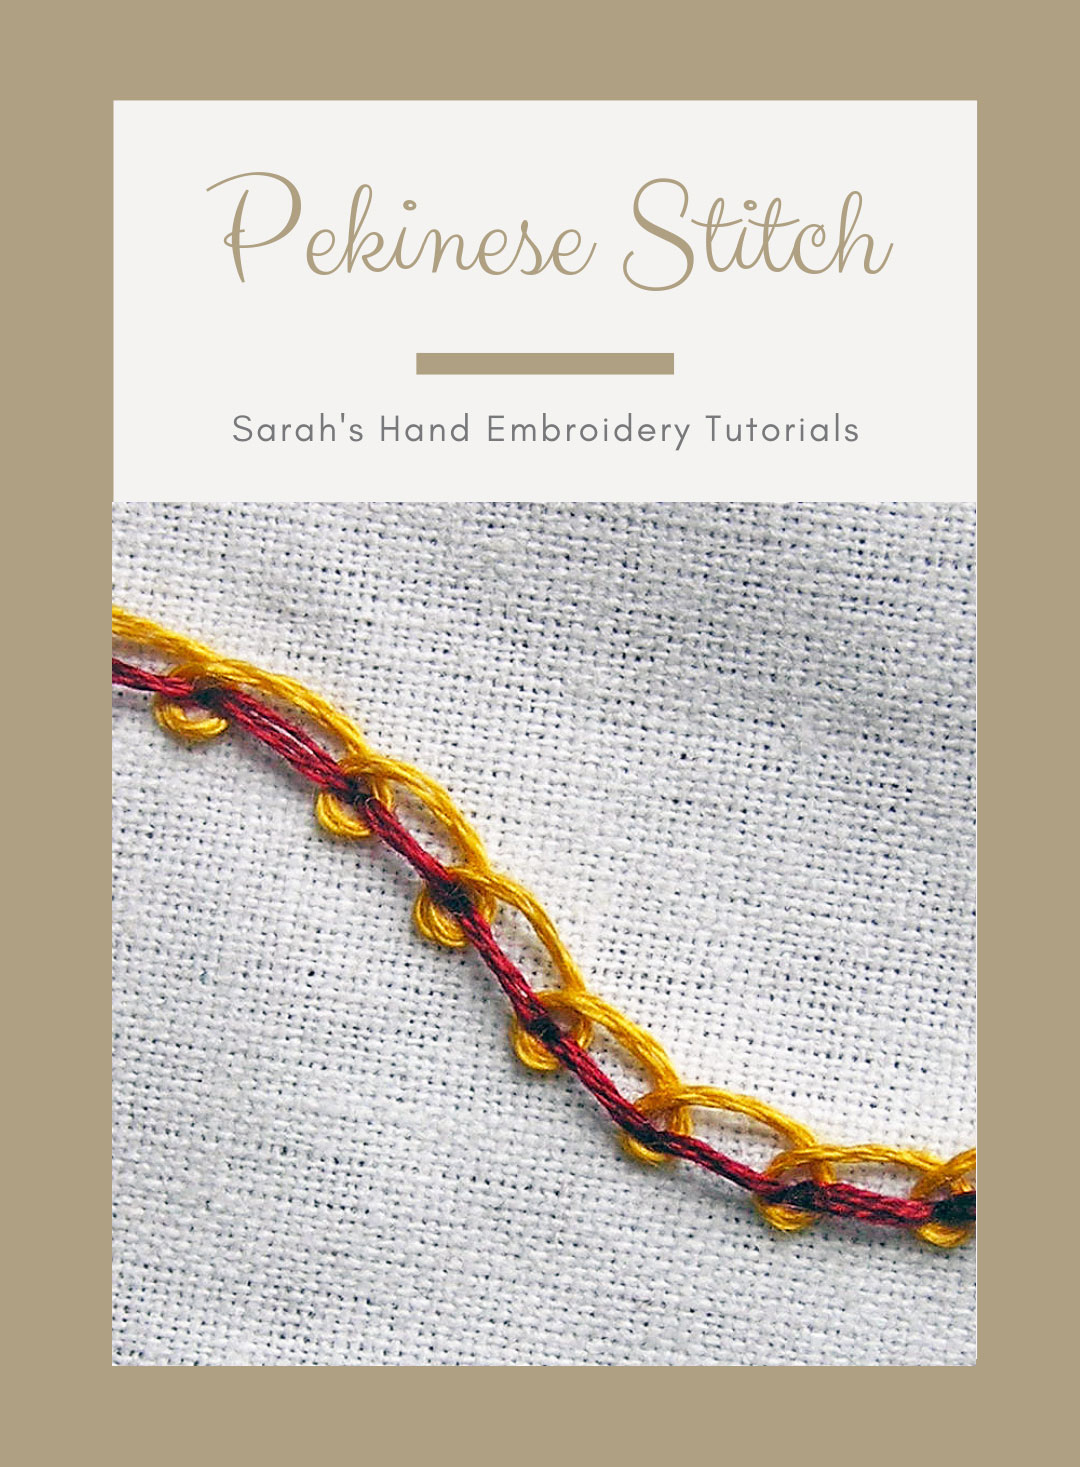
The Pekinese Stitch is commonly found in Chinese embroideries and used to make linear elements rather than fillings. One or two rows are placed to make outlines in the pattern. Using contrasting threads will throw up the beauty of the design well. It could be confused with the Chinese knot Stitch which is used to make fillings, though both the stitches follow absolutely different techniques. That being said, it can resemble the ‘ring’ variation of the Chinese Knot placed close to each other.
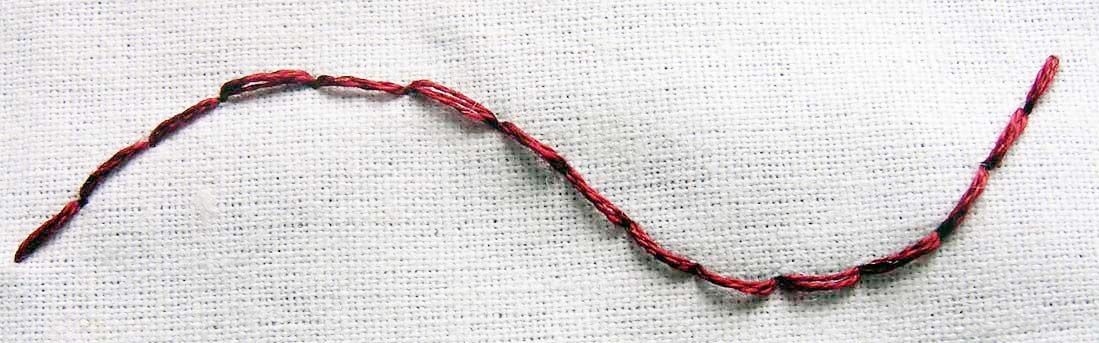 | |
| Back stitch: Lay the foundation by doing a Back Stitch. | |
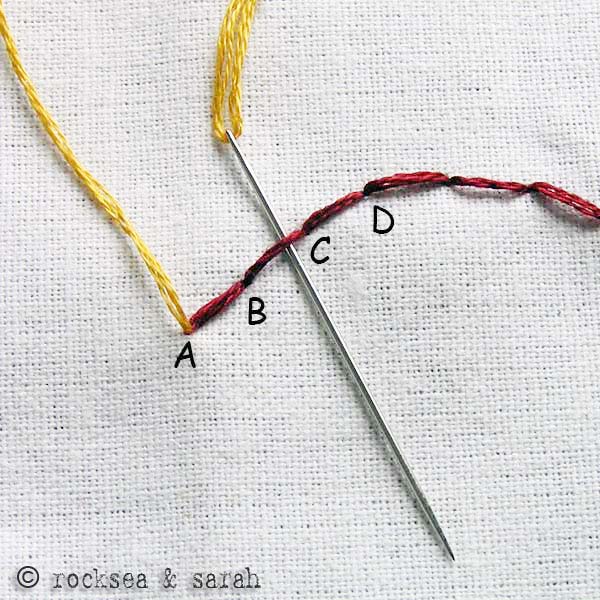 | 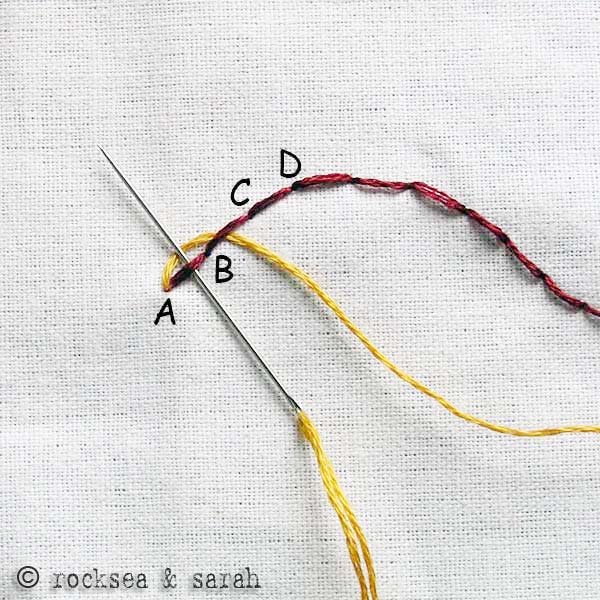 |
| Fig 1: Take another thread and needle and bring it out through A. Pass the needle under the stitch B-C, from above, as shown. Do not pluck the fabric underneath. | Fig 2: Now, pass the needle under the stitch A-B, from below, as shown. |
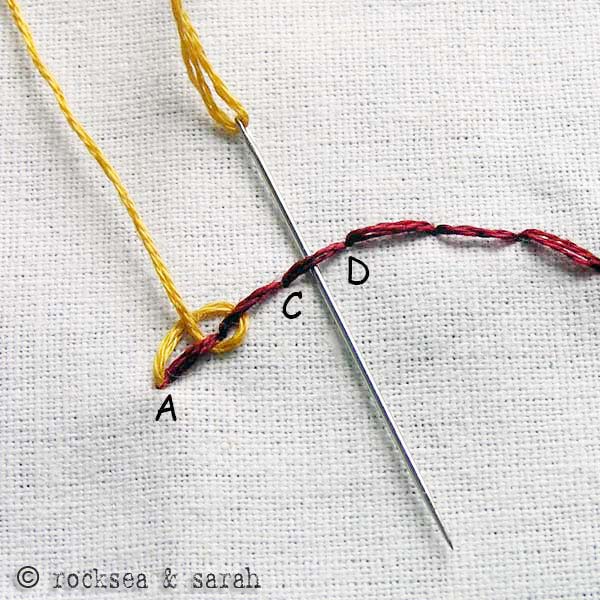 |  |
| Fig 3: You will see that a loop is formed at the stitch point B. Our aim would be to make such similar loops at each stitch point. As the next action, take the needle under C-D from above. | Fig 4: Now pass the needle under B-C from below. Continue this action of looping each stitch point by taking the needle under the stitches. |
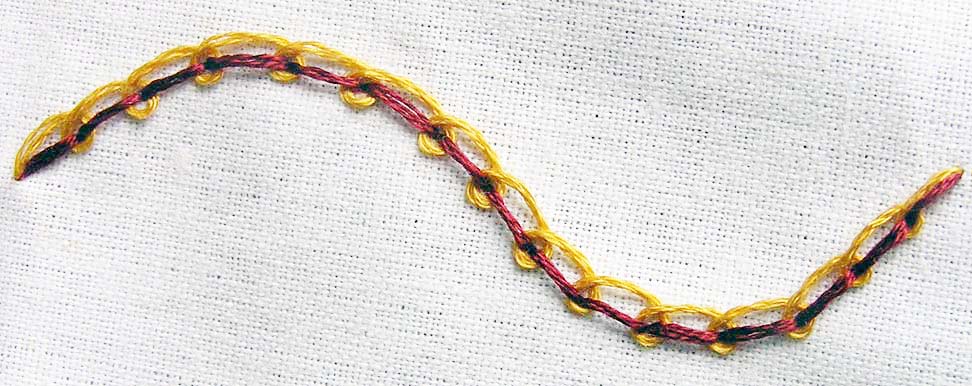 | |
| Fig 5: Continue this process of taking the needle under each Back Stitch foundation to give it a twining effect. | |
Related Projects
Do you want to know where and how to use this stitch? Check out the projects below and learn more. Make something beautiful!
Learn the Straight Stitch along with 305 other stitches from our 600-page eBook.

Related Stitches from the Back Stitch Family


I love this website so much! I generally make my own designs and I get in such a rut, especially with outlines, trying to make them more visually interesting. Like, theres only so many outline stitches one can use before things start to look real boring. I really appreciate the resource and the variety of techniques you have on here. Thank you.
hey sarah…i love your work, clear tutorial steps .really helped me…thank you
Namaste Sarah
What beautiful work, so neat and stiches are so even.
So very tempted to start embroidery projects after having visited you tuts.
Well done. A true work of art, your love for this art form shows in your
beautiful pieces.
Thanks so much for your tutorials. You explain it so clear & easy. I made my 1st hand embroidery. I love your website! Thank you!

This is so pretty and fabulous, Giselle! Thank you so much for sharing it with us here. ❤️
A. O. A Ma’am how are you? Ma’am I saw your work, it is really very nice and beautiful. Great effort…..
Regards,
Syeda toseefa abrar
Hello I am thrilled with your embroidery tutorials. I am doing a Textile City and Guilds course at College and I have never done hand embroidery only at school and that was yonks ago. Its so easy to follow your instructions and the images are beautifully clear. Thanks so much.
Hey thanks for the list of stitches etc… I was really looking for it to refresh my knowledge… Thanks a lot… Here is a glimpse of a work done by me for the summer Kurta for men!!! This image would motivate all the viewers to be really passionate about embroidery!!!
Dear Ansho,
Thanks for sharing your work with us. It is nicely done. :)Sure, it will inspire many.
Sarah!
First I visit your site. Really so very useful techniques for those who learning by internet. We always welcome your site.
hey sarah
I`m doing home economics in my college.So could you recommend me what type of stitch can i make so a bird
Hi Sarah,
All your works are really good. Do you have your collections as a book??? If so how can I get it???
Dear Sarah
Im so impressed with this tutorial. so excited to learn it. me and my mom was surfing through net to learn the embroidery stitches. this is very clear. i learnt basics of embroidery way back some 7 yrs ago. now im happy that i can learn it back sitting at home.
thank you so much sarah. please continue updating this.
Dear Sarah
Im so impressed with this tutorial. so excited to learn it. me and my mom was surfing through net to learn the embroidery stitches. this is very clear. i learnt basics of embroidery way back some 7 yrs ago. now im happy that i can lear it back sitting at home.
thank you so much sarah. please continue updating this.
lovely….I have to thanks to much your website..
I love broderies…..
Do you know of any websites that sell the kits having a hard time locating any?
me also i want one
Dear sarah
Got inspired to learn embroidery
after seeing your pages.
Learned so many stitches and have done
a simple embroidery in my blouse.
Please do visit my post in my blog
shamiatcraft.blogspot.com
Do pozt your comments.
Thank you.
Dear Shami,
Thanks for referring our pages. I am glad to know that you are indspired and have tried something nice on your blouse project. I have dropped a comment on your blog too. 🙂
OH IM WRONG!@ IM SORRY…THAT IS OUR EMBROIDERY@
I CANT UNDERSTAND THIS! THIS IS NOT OUR EMBROIDERY PEKINESE STITCH!
i love the way u give instruction…it makes easy for me to stich..this is kind of that site that mostly people search,and i’m luck to find this site…great work!!
dear sarah,
i had been searching for this kinda site.
it is wonderful. u r doing great work. thanks
Dear Manasa,
🙂 happy that you like learning from our pages.
Hey Sarah, do u know how to do crochet stitching? If yes plz do post that also… thanku.. all ur wrks r nice..
Dear AnnMaria,
Thanks for visiting. I am yet to learn crochet..it certainly is one of my interests too. Once I am good enough with it, I will be putting up tutorials for it too. But that might take some time. For now, I am concentrating more on the embroidery section.
Thanks Sarah for the clear and precise instructions provided… looking forward to the instructions that are to follow.
🙂