
Stitch flowers using the Woven Spider Wheel or Woven Spider Web.
|
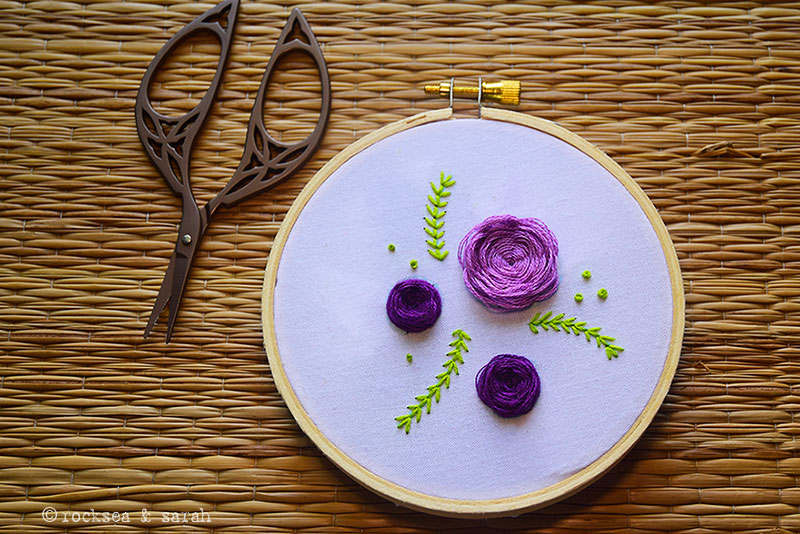
The beauty of a rose flower made using the Woven Spider Wheel Stitch is just a sight to see. This stitch has become popular with hoop art artists because of its simplicity and elegance. You can make bigger or smaller flowers using just this stitch and add a dimension to it. Pay attention to the small tips to make your flowers beautiful. Come join me and enjoy making some beautiful roses!
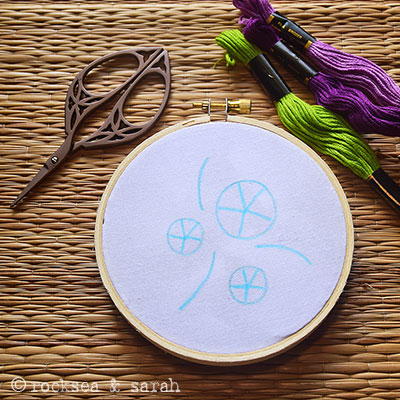 |  |
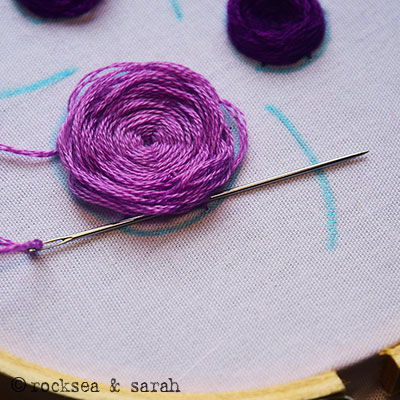
| Fig 1: Get your fabric, hoop, and threads ready. To stitch the flowers, mark the outline with a circle and 5 spokes inside each circle. I have marked lines for the leaves as well. | Fig 2: I start with the small circles. Stitch the 5 spokes and work the Woven Spider Wheel Stitch. Using 6 strands of threads will give you a denser and sturdier flower. I am, however, going with just 3 strands. |
 |  |
| Fig 3: As you stitch, if you are not able to see the spokes, just give the threads a small nudge with the shaft of your needle. You can make the flower as dense as you like. | Fig 4: I now start with the big flower. A my flower got bigger, I had to hold down the stitched circle down with my thumb while pulling out the thread from under the spokes to keep the circle in shape. This is partially because I was using only 3 strands of thread. |
 |  |
| Fig 5: As you stitch, you will notice that your threads will start to overlap the previous stitches, especially in bigger flowers. Make sure you do not pull the thread too hard and just allow the threads to lay on the fabric around the circle. | Fig 6: End the stitch by passing the needle slightly towards the inside of the circle, under the bunch of worked threads. |
 |  |
| Fig 7: You can puff up your flower by plucking the threads gently with the back of your needle. | Fig 8: The flowers are now ready! Since I used 3 strands of embroidery floss, you could see the strands in the layers of the Woven Spider Wheel stand out, especially in the big flower. |
 | 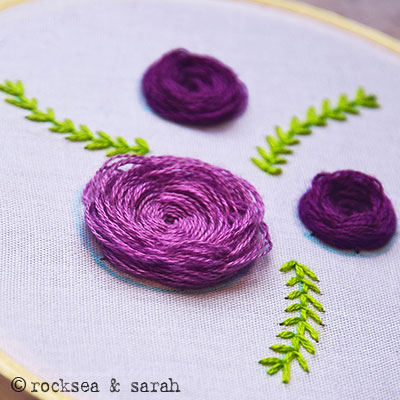 |
| Fig 9: I spruce up the frame by adding some green leaves. I used the Fern Stitch. | Fig 10: The flowers look beautiful! Later, I added some French Knots for finishing touches. |
TIPS to make your flowers beautiful:
- Stitching with 6 strands of the embroidery floss will give you a sturdier and denser flower. Fewer strands will make it delicate.
- As your flower grows, keep your thumb over it, if required, while pulling the thread under the straight stitches.
- To be able to see the spokes under your stitches, just nudge the worked threads gently inwards.
- To puff up your flowers, just use the blunt end of your needle and delicately pluck the threads upwards.
- You may add French Knots to the center of the flower.


Sarah, Did this with the steps given here. Thank you so.much.
Wow, Chaitra! You made my day! How lovely the rose you made.
Hi, I made some dense roses using this technique but I want to add a leaf directly up the side of the rose itself. I feel like I could use a satin stitch. What is your opinion? Would adding a leaf directly onto a woven rose work?
Hi RMB!
So if I understand right, you want to make a leaf partially(?) over the rose itself. I have never tried a leaf over the Woven Rose. Maybe you can experiment with it. The issue that I see with it is that the leaf would appear padded on the portion that is made over the flower and flat when it gets on the fabric. But, if the leaf is not going to get onto the fabric, it should work. Satin Stitch will be fine. I would also suggest the Fishbone Stitch- I just feel it brings out the texture of a rose-leaf better.
Usually, when a leaf is to be stitched in ‘front’ of the flower, you would stitch the leaf first and then do the rose. And when you reach the part where the rose is overshadowed by the leaf, you would go under one side of the leaf, come out from the other and continue the weaving to do the rose. You would keep doing that each time you come around to the leaf.
I hope this helps. If you can, just upload a picture of your work in progress, and I will be glad to give you specific tips. 🙂
What sort of thread are you using? Is it cotton or wool or even silk?
Hi Judith,
I am using stranded cotton embroidery floss. I use the Anchor brand.