
Rope Stitch is also known as
Puntada de Cuerda [ES], Point de Corde de Chaîne [FR], Kordelstich [DE], Ponto Corda [PT].
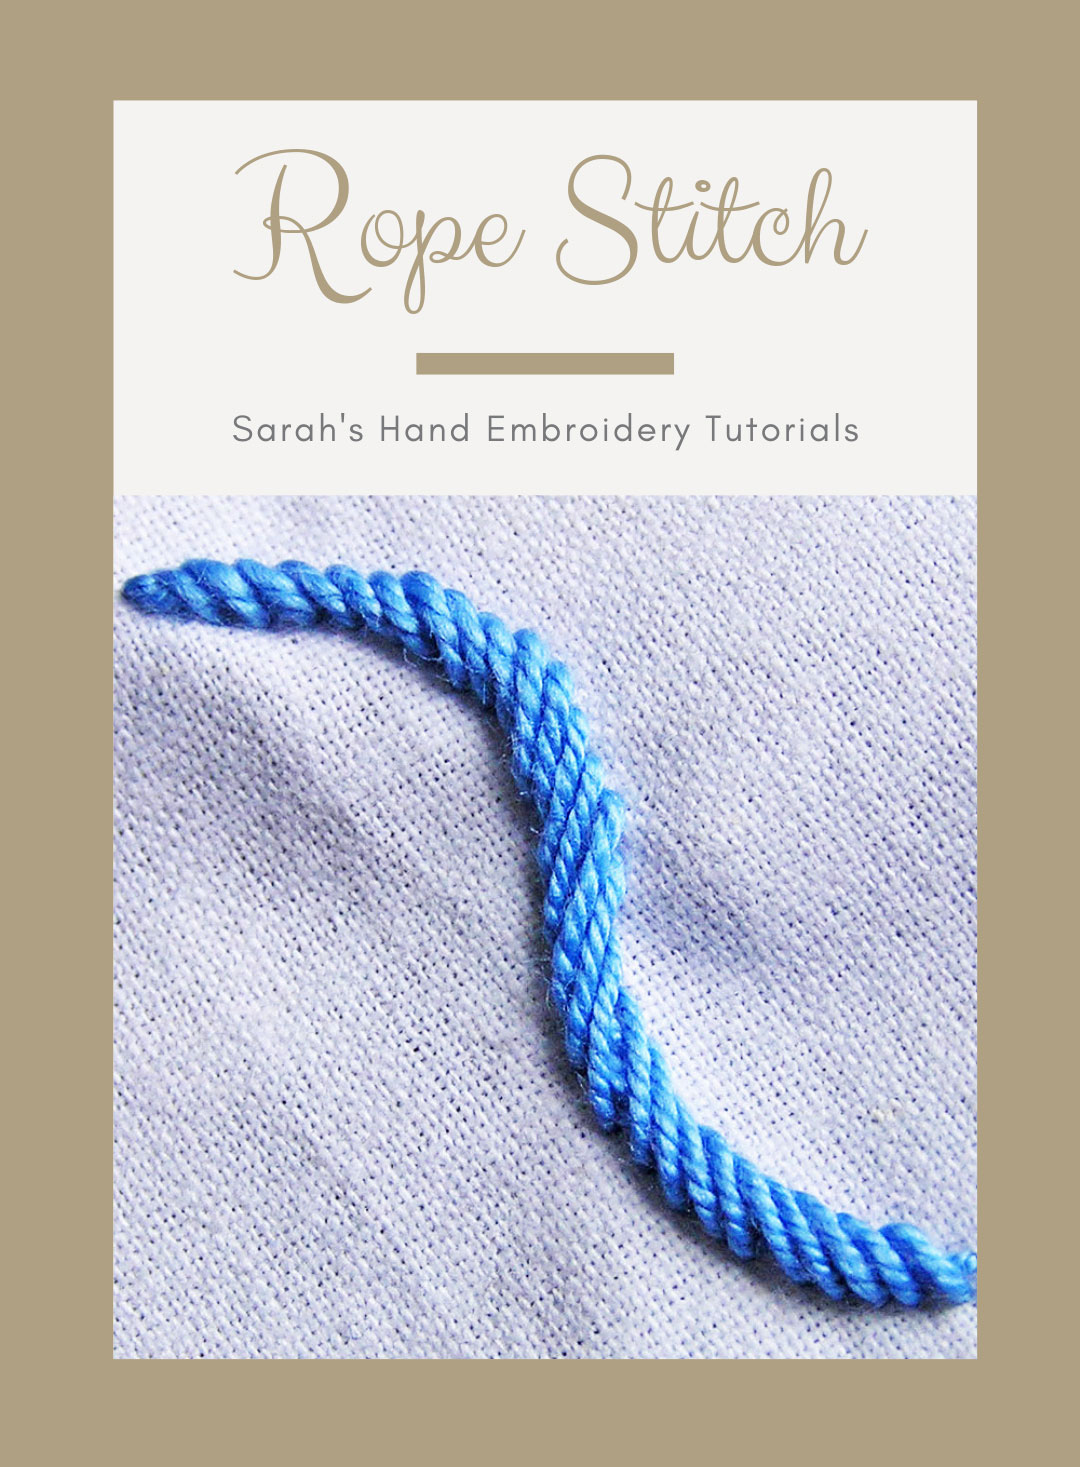
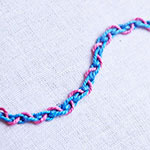
About the Rope Stitch
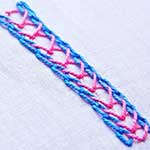
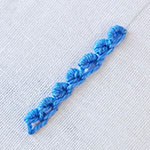
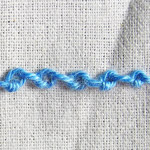
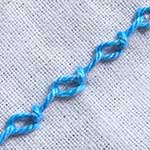
Rope Stitch is a rich-looking outline stitch for this family. It follows a series of closed-up twisted chain stitches to form an embossed rope look.
How to do the Rope Stitch
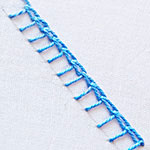
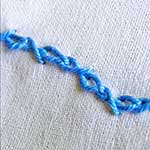
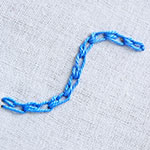
You need to know the Twisted Chain Stitch to do the Rope Stitch. I will demonstrate this on a curved stitch line.
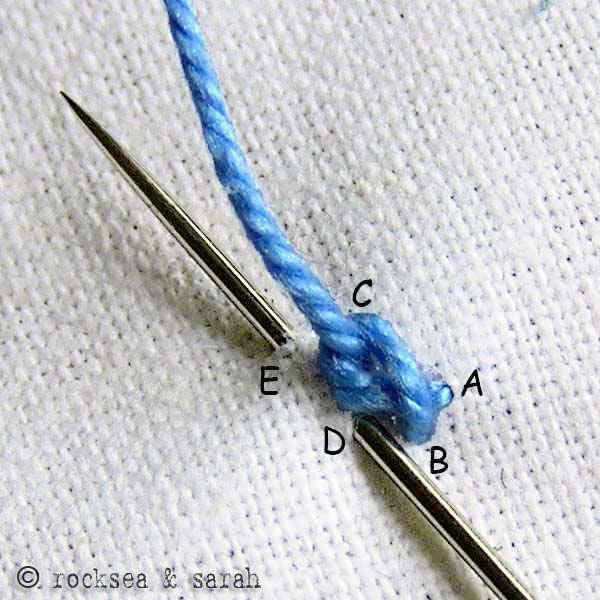 | 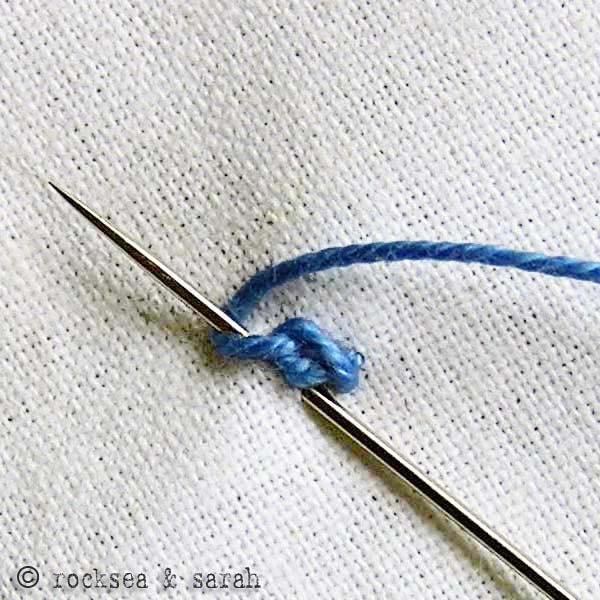 |
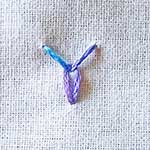
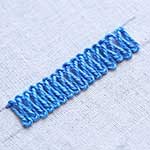
| Fig 1: Make a twisted chain stitch loop with the first point A on the stitch line. Put the needle in through D and bring it slightly out through E, which lies ON the stitch line. This is a similar pattern we follow for Twisted Chain Stitch. The only difference here is that D falls just above B instead of near C. This helps to close up the spaces between each stitch to give that embossed rich look. | Fig 2: Loop the thread around for a Twisted Chain Stitch as usual. Pull the needle out. Continue this procedure. |
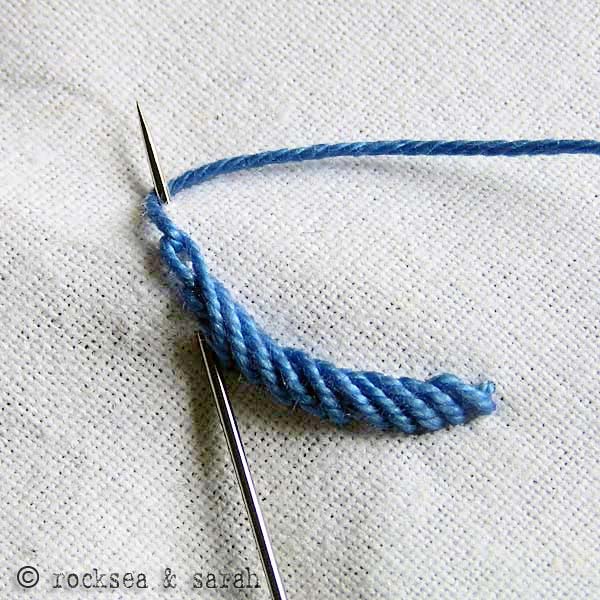 |  |
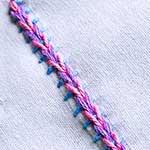
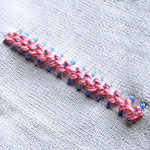
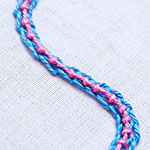
| Fig 3: Note that the stitches will get longer when you do the curves. This is to compensate for the curves. | Fig 4: As you end the curve, the stitches will return to their normal or shorter ones. |
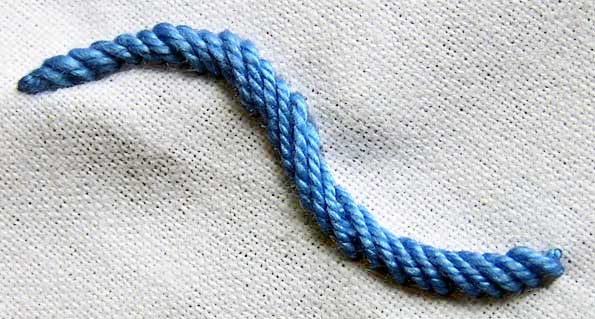 | |
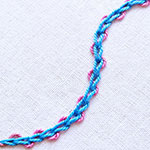
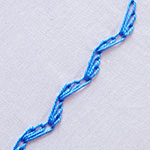
| Fig 5: A finished curve of a rope stitch would look like this. | |
Video on how to do this stitch on a pattern
Visit and Subscribe to Sarah’s YouTube Channel
Learn to do Rope Stitch in 2 minutes!
Learn this stitch and 305 other stitches from our 600-page eBook.

Related stitches from the Chain Stitch Family


Definitely, you can! This stitch can take curves without much strain. Just be aware to adjust the lengths of the stitches when doing sharp curves. I hope you enjoy the project. You are welcome to post a picture of the finished project here. ☺️
Hello, I’m looking to embroider letters onto a shower curtain. Would I be able to combine your stitch with the cursive letters in the posted image?

Admiro todos tus trabajos felicitaciones
Mil gracias por compartir desde Cali Colombia
Thank you so much! 🙂
No me sale… Quiero saber si tenés algún vídeo que me indique mejor… Estoy tejiendo una manta para mi bebé, y quiero terminarlo antes de que Nazca.
Hello. Would this work on a gradual curve on needlepoint canvas? Great looking stitch. Thank you.
A gradual curve will work fine, I believe.
Hey I’m wondering if I’m also able to make straight lines with this stitch? I’m doing an embroidery of someone doing shibari and this stitch looks perfect for the image
Hi Jess,
Of course, you can make a straight line with this stitch. This tutorial illustrates a curved line just to show that it is a flexible stitch.
🙂
I really think you do a wonderful job with your description and pictures showing how to do stitches, but I must say I don’t think much of step 1 of your rope stitch directions. There are 5 steps in step 1 and all you say is ” you should know how to do a twisted chain stitch”. That tells me a whole lot of nothing. I’ve read and owe a lot of embroidery books and I can’t think of one that assumes you know what to do after you come up at A. And no, I really don’t want to have to go to yet another page just to be able to do step 1.
Karen, the twisted chain stitch has a tutorial page of its own, and it is better to follow that link first, before getting in to this page with an advanced stitch. It is impossible for us to show all the basic stitches before each advanced stitch!
Dear Rocksea, I am a follower of Sarah’s embroidery tutorials. And I appreciate her efforts to create each of this tutorials by dedicating her time despite of her responsibility towards the family. Convey my regards to her.
Thank you,
Regards
Sherine, Kochi.
Thank you very much Sherine, for your encouragement and a happy note 🙂
Dear Sarah: I just ran across your tutorials and am excited. I learned embroidery as a young child and hadn’t touched it since highschool. I’m 77 and was looking for something to do in the evening while watching TV with a llittle dog on my lap. My mother taught me (from memory) most of the older style stiches but didn’t know they had names. Thank you so very much for sharing your talent. Norma
plenty of stiches i have to explore in ur tutorial.thanks a lot for such an easy way of learning.i never confuse….amazing tutorial
Dear Sarah,
I am enjoying practicing old stitches and learning new ones with your tutorials. Thank you for making these available.
Best wishes,
Bonnie Chakravorty
dear sara you are very kind i like your site
thanks
wow nice and how do to simple amazin
I’ve just come across your site, and I’m very favourably impressed! I love the look of this stitch (rope), it looks very sturdy, and suitable for things like stems, or for filling in. My embroideries so far, have been counted stitch techniques like cross stitch, blackwork ,and drawn thread, but I’m beginning to go further, so this site seems ideal.
Hi sarah,
My finished rope looks nothing like yours. I have to admit that it is not as easy as it looks. Perhaps using two strands of embroidery thread was not enough to give the embossed look. Like someone else mentioned even I had a doubt as to how the repeat is to be done. And i think I did not do the twisted chain after the first time. will try again. Love your site. Has made me take up hand embroidery after a long time.
Dear Sobana,
Try using all the six strands for this stitch to give an obvious look. In the illustration, I have used perle cotton. Then, of course, practice will help. 🙂
hi sarah
Your tutorial is very nice and clearly explained. It is very useful to beginners
Thank you for this tutorials. I wish all the best..
Jayalakshmi
Kerala
gr8 work…

Hi Sarah…
Yeah, got you…
Thank you 🙂
Sowmya. S
Hi Sarah
I have some doubts abt this stitch.
1. Is twisted chain stitch sewed only once ie as the base?
2. Must we go for the twisted chain stitch after every time the previous stitch is done (Twisted stitch, and looping)?
Dear Sowmya,
The twisted chain is not sewn only once, but every time.
The only thing that differs in this stitch and the twisted chain stitch is the way we position the needle (fig 1: points D and E) for every next stitch. You can rather say that rope stitch is a ‘closed’ version of the twisted chain stitch.
Hope this has cleared your doubt.
Hi Sarah,
ur crystal clear tutorials pave me the way to this wonderful world of hand embroidery.
Thank u soo much !
keep going.
Raji.
🙂 you are welcome Raji.
hi sarah,
thank u for ur reply….
hi sarah,
i love ur stitches n i ve a doubt, wat type of thread u ve used in rope stitch???
Dear Bhuvana,
I have used perle cotton to do this stitch. 🙂
beautiful i love it
Dear sweet angels,
This stitch happens to be one of my favourites. I just love the way it looks on embroidery. 🙂