Raised Herringbone Stitch is also known as
Puntada de Espiga Levantada [ES], Ponto Espinha de Peixe Levantado [PT]
How to do the Raised Herringbone Stitch
The Raised Herringbone Stitch can hardly feels like a member of the Herringbone Stitch Family! It is an absolutely delightful stitch to work small raised leaves, making it great for 3D embroidery. It might take a couple of practices before you perfect it. Draw a stitch line to mark the length of your stitch.
 |
 |
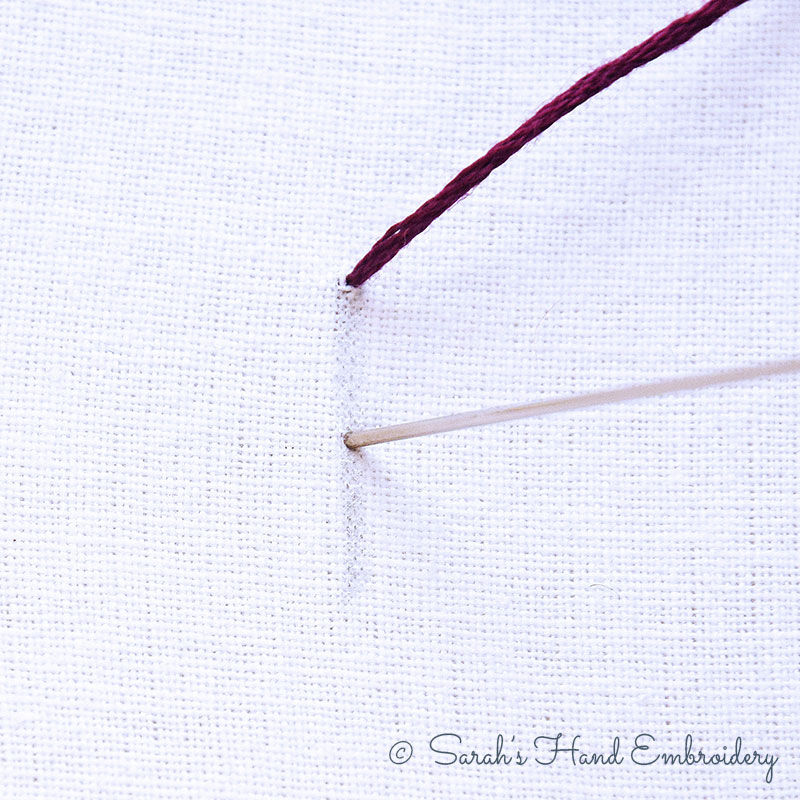
| Fig 1: Start by making a vertical stitch from one end of the stitch line to half the way. . |
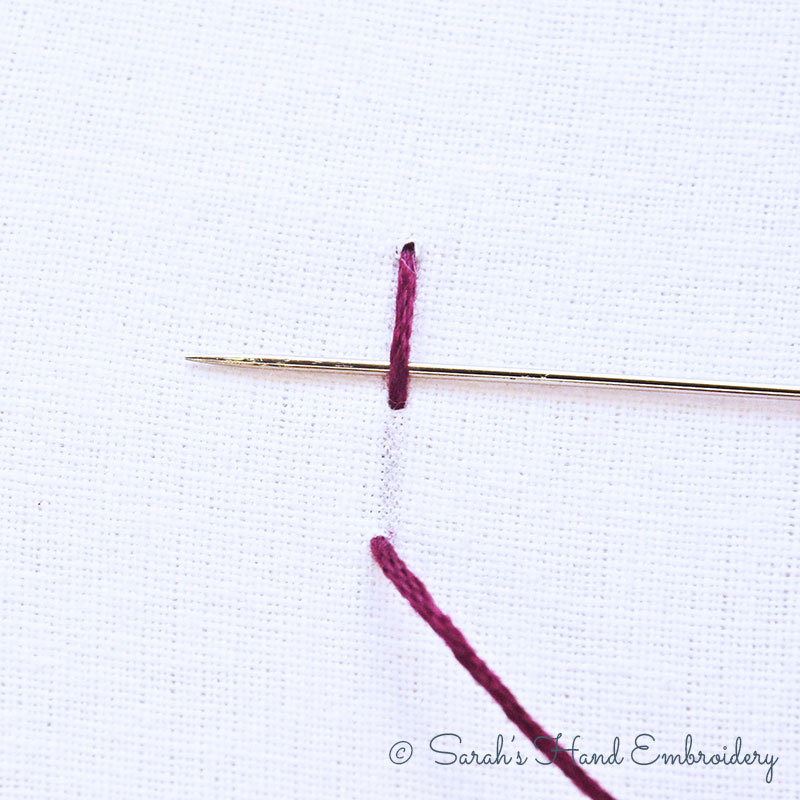
Fig 2: Now, bring out the needle from the other end and pass the needle under the previous stitch made. |
 |
 |
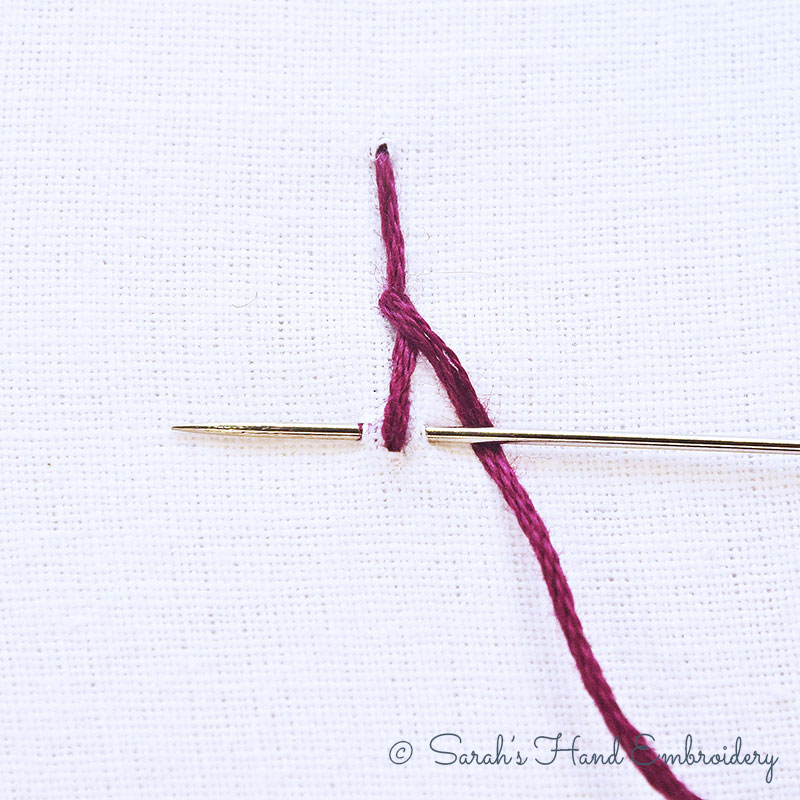
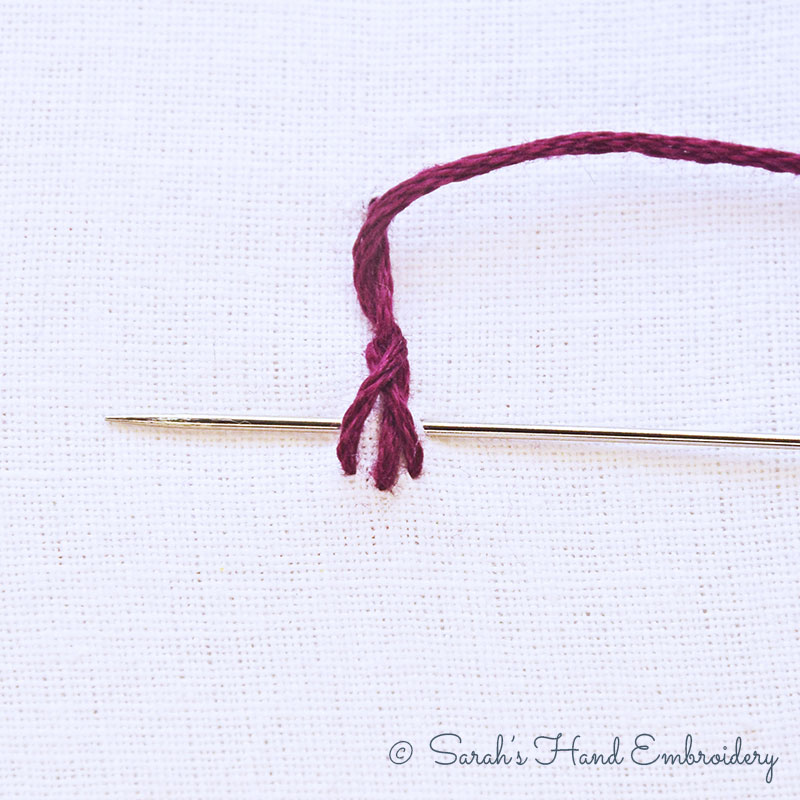
| Fig 3: Now, take the needle through the fabric under the stitch as shown. This will mark the width of the stitch. |
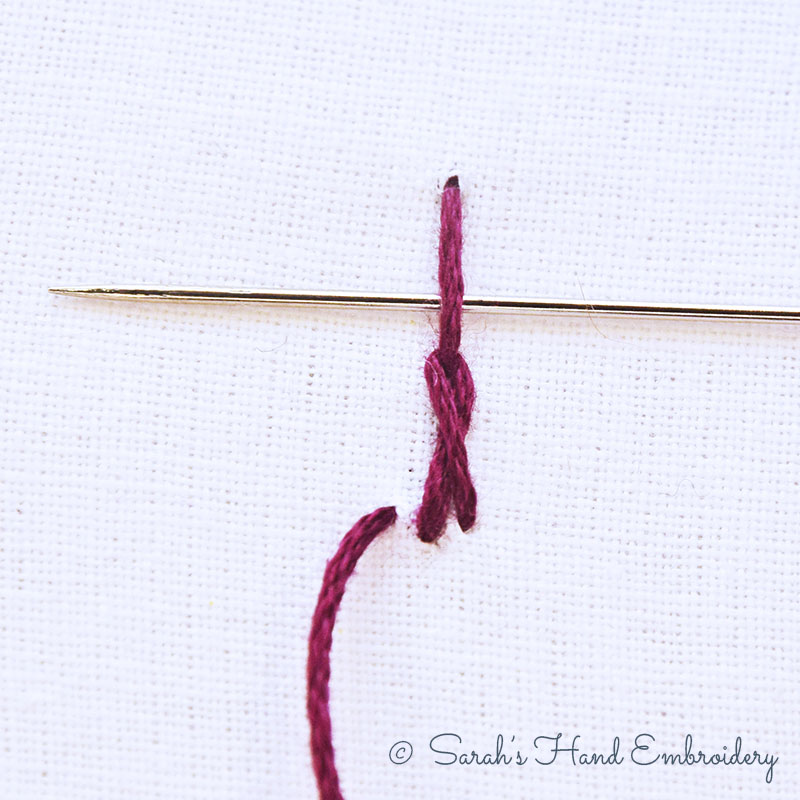
Fig 4: Again, pass it under the first vertical stitch, as shown. |
 |
 |
| Fig 5: Again, take the needle through the fabric under the stitch. This time, it will be above the previous stitch. You will continue this process and keep building up the stitches. |
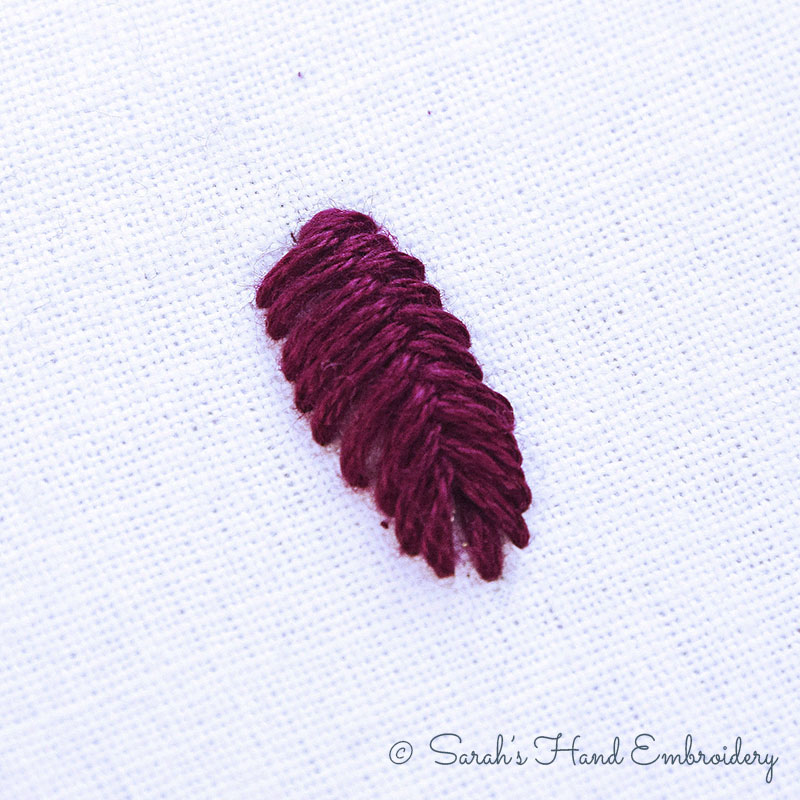
Fig 6: The final outcome is a pretty little raised grub-like structure. |
Learn this stitch along with 305 other stitches from our 600-page eBook.

 Sarah has been researching and sharing hand embroidery lessons for over 18 years, making it accessible to everyone around the globe.