Fishbone Stitch is also known as
Punto pasado abierto[ES], Point d’arête [FR], Grätenstich [DE], Ponto de folha [PT], fiskbenssöm [SV].
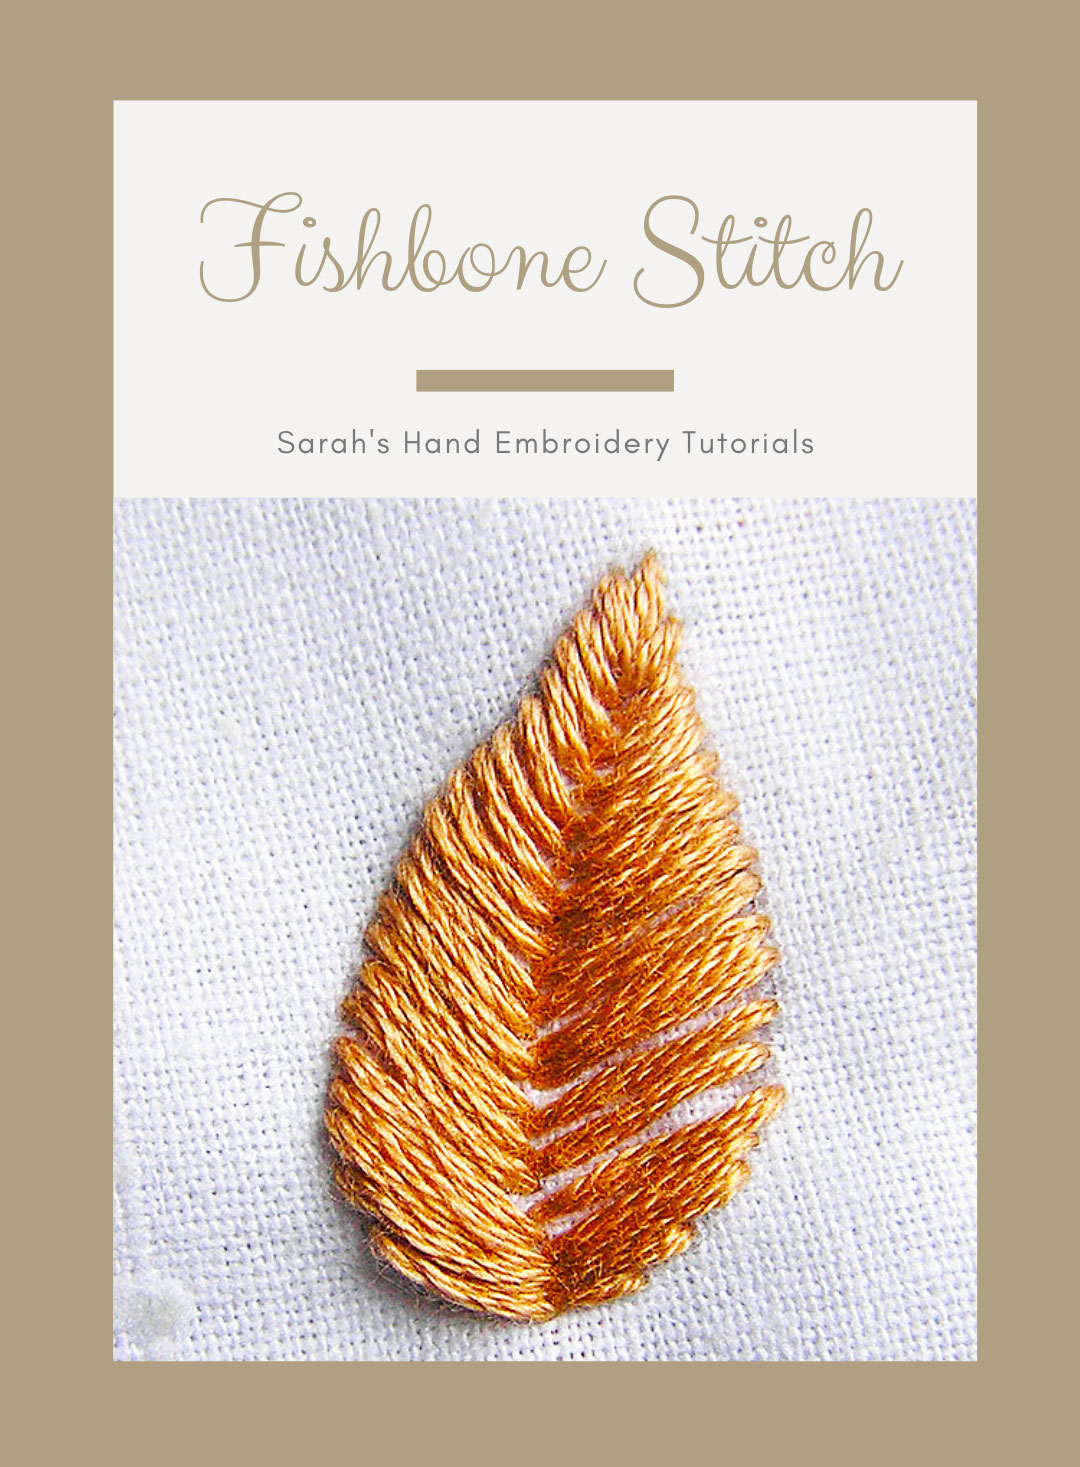
About the Fishbone Stitch
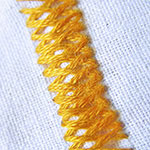
Fishbone Stitch is a kind of filling stitch which is ideal for making leaves or feathers. It requires us to divide the pattern into two and each side is filled alternately, giving it a plaited effect in the center, thus ideal to make leaves or feathers.
How to do the Fishbone Stitch
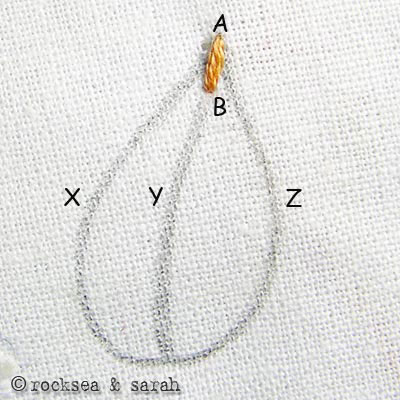
I will work on a leaf pattern, which I have divided into the center with a stitch line. To make the lesson easier, I have named the lines X, Y, and Z.
 |
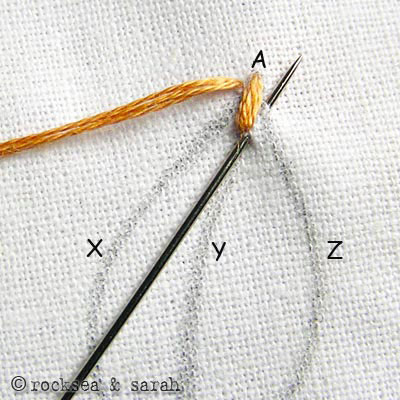 |
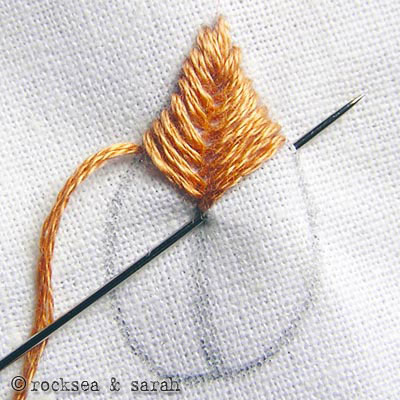
| Fig 1: To begin with, bring the needle out through point A, which is the top tip of line Y. Put it in through B, to make a single straight stitch. | Fig 2: Now, bring the needle out from a point very close to A on the the line X. Put it in through a point very close to B on line Y. Again pull out the needle through a point very close to A on line Z. |
 |
 |
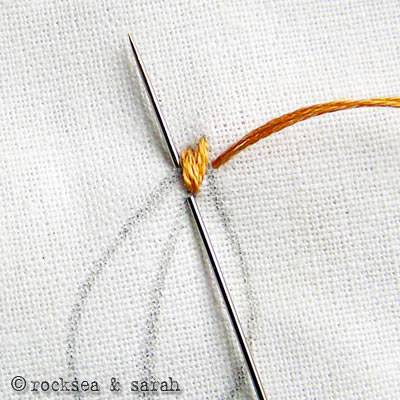
| Fig 3: This procedure of putting in the needle through X and Z alternatively will follow. Each time we will be connecting X-Y and Y-Z. | Fig 4: Make sure all the stitch points lie close to each other to avoid any visible spaces. |
 |
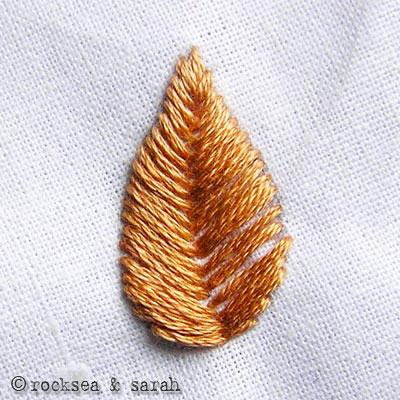 |
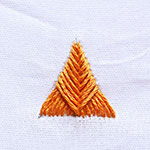
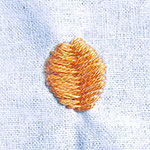
| Fig 5: Halfway through, our leaf would look like this. You can see the rib being formed. | Fig 6: Once finished, the filled leaf would look like this. |
Learn to do Fishbone Stitch in 2 minutes!
Learn this stitch along with 305 other stitches from our 600-page eBook.

Fishbone Stitch Family


 Sarah has been researching and sharing hand embroidery lessons for over 17 years, making it accessible to everyone around the globe.


Just started my first embroidery project and your lessons on how to do the different stitches is excellent. The instructions are easy to follow and I’m enjoying my new hobby, thanks to you.
Thank you, Ann. We are happy that you are enjoying our pages. Keep dropping by! 🙂
Thanks so much in 15 and learning embroidery as a quarantine craft
That’s great, Jimin-shi. Hand embroidery is a quieter and mindful art that will help you get you through tough times. 🙂
Hi Dear
This is really helpful. I could stitch as per the given instruction as it is very well illustrated.
Thank you for making stitching easy.
Hi Nimisha.
Thank you so much. Happy to know that you liked our instructions. Please do share your work here – it will be an inspiration to the others. 😊
What are the uses of fish bone stitch
Hi John. As you see, the most common use of the Fishbone Stitch is to make leaves. You can use this stitch to fill in anything that is more or less shaped like a leaf.
What is the difference between Boro and Sashiko stitches?
Hi.
Here is what I understand. Boro and Sashiko stitches are more or less the same. Both uses white thread over indigo fabric. It’s how they are used that brings the difference between them. While both are mending techniques, Boro uses running stitch over patches of fabric placed in a rough order. The stitches are done to secure the patches in place and so it does not make any patterns as such. Sashiko, on the other hand, uses the running stitch to create patterns like flowers, waves or tortoise shells, to name a few, and the fabric placement is also done more carefully. The result? Boro looks like a rag and Sashiko looks organised and enhances the look of the fabric through the stitches.
I hope this helps you!
❤️ Sarah
continuing on the below updated concern. Have drawn the leaf pattern as shown in the figure itself. Round in the middle and the same perfect leaf pattern
Hi Namitha, from what you said, I think, the ‘V’ shape starts getting narrower as you keep stitching? What you can do is try to keep the ‘V’ shape from tapering by judging it with its width. If you look at Fig 6, you will see some slight gap between the stitches. This is a way to adjust and prevent the stitches from getting narrower and tapering. I was trying to maintain the width of the ‘V’ so that it does not become a problem towards the end.
Don’t worry even if it takes a couple of tries before you get it perfectly.
I hope this helps.
Hi Sarah
I am trying on fish bone stitch on a leaf pattern as shown. But I am getting a tapered look and not able to achieve the round look in the middle of the pattern . Kindly help out to achieve the round pattern in this stitch
This was EXTREMELY helpful. Thankyou so much.
Nice variation of the satin stitch. I’ll have to try it out next chance I have 🙂
I just wanted to take a minute to say thank you. I am new to hand embroidery and I’ve learned tons from your website. You’re an excellent teacher. Your instructions are very clear, which has made it very easy for me to learn many of the stitches you present on your pages. I look forward to learning more from your website and truly appreciate the time and effort you take to show us how to hand embroider. I’m still in the learning stages but someday I hope to post a photo of my work on this site! Thanks again and keep up the good work! This has been a blessing for me and I’m sure many others!
Hi Leslie.
Thank you very much for your appreciations. I am glad that you are enjoying our tutorials. We would be looking forward to seeing some of your works. 🙂
I do that gathering stcith around the circles too. I use a plastic circle template, gather around edge, pull up gathers around the circle and then steam set with the plastic circle still inside. When you take out the plastic circle before appliqueing the fabric remembers the circle and goes right into shape.Laura
I am new to all of this, I had a stroke last year and it has changed how i live my life, I bought a sewing machine and some embroidery hoops, after i had discovered Pinterest! your page is refreshingly easy to follow, with clear pictures and explanations, and i am actually enjoying this new venture, it’s made me happy……it is always good to be happy, thank you Sarah xx
Nice to hear that you are enjoying our pages Anna. I had been a little off making new tutorials for some time now. I just need to hook back on, and more pages will follow. 🙂
gracias por las bellezas que me mandan me ha gustado todo también me gusta bordados en hilo gracias gracias
hi aunty! i am 11 years old i love to stitch i made this within a minute! it was easy! and lovely! thank you for posting this!
Wow Priya! You must be one of my younger learners. I am proud of you. If you want to share your work you can upload a picture of it. We will be happy to see it.
Sarah: this is just what I was looking for. Raised embroidery. I bought some beautiful English tablecloths with raised embroidery and wanted to do it so much! Now, I can. Your graphics are so easy. I understood them right away and two leaves; one with the other fishbone stitch and one with this one. They look different, the other more raised, but I love them both. Please, write that book! Thanks, Chris
Thank you so much for sharing all this knowledge. I used to embroider everything but it has been years and I have forgotten so much. Your examples are wonderful and I appreciate the time you have spent putting this out there.
I was having a dream that i wanted to learn amrodary but because of work i would not. Thanks a lot for opening this website as i could learn and make amrodary on my new chunris.
You are a genius..
i hate ur website like something sarah dont feel bad
HELLO MADAM
Your website is to good, nice stitching work of embroidery. I am so impress. Please add new style embroidery in your website.
Please step by step add your embroidery step.
Dear Sarah,
Your lessons are simply amazing…..so clearly made us understand …pls keep on posting …..I want to do embroidery on a plain bedsheet…can u please suggest something
Adorei as dicas.elas estão muito claras e bem explicadas até eu que nunca bordei esse ponto conseguir compreender.
Hi Sarah
How do the stitches look like behind for this stitch?
pls let me know
Dear Sarah mam
Thanks for your great website.
You are a great teacher and things are very easy to understand.
Is it possible to include malayalam ……
Dear Rathi,
I am not sure if a malayalam version is possible at this time. But, it is a nice suggestion, and we can think about it. Thanks. 🙂
Thanks Sarah.
please show me about long and short stitch.
Your website is very easy to understand. But it is not there in your site . so please add long and short stitch also in your site.
thanks again.
Stitching Pattern with suggestions

Thanks for these absolutely incredible tutorials!! I’ve been contemplating trying my hand at embroidery and you’ve convinced me. I will be gathering supplies and once I have something done, I’ll upload pictures. Thanks again for this incredible reference.
🙂 Thanks Meredith. Really nice to know that you are learnign from our pages. We will be waiting to see some of your works.
I’ve been using using this stitch to fill in leaves on a table cloth I’m embroidering. I love it, its so elegant.
🙂 Nice to know Meri. Can you share a picture of your work with us? Just use the function below the comment box. We would love to see it.
Thanks a lot for this brilliant tutorial! 😀
🙂 Welcome Nash.
hey sarah !
Ur 2 gr8 !
i used to hate thiz stitch buh nw i jz lyk luv it !
thnxxx alot !
🙂 Thanks Sapna. It is nice to hear that you have strated to like this stitch.
dear sarah
do you have a design for kanta work peacock. i wanted to do it on a beigh plain sari
with regards
sangeeta
Dear Sangeeta,
Thanks. I have to check for a peacock design. But I won’t be able to upload it unless with the tutorial, since I have to prepare/recreate the entire design.
Hi I am finishing a Peacock on the thigh of my Bluejeans now! I am also adding beads as I go along .
Linda
very useful and clear instructions. Thanks a lot..
Thanks Sreedevi 🙂
What a waste of time- searching on other sites for the stitching technics!
The lessons are great, illustrations are superb and the result is just wordless!!
You’ve done a wonderful job Sarah!..Tons of regards and best wishes!
Dear Prapeetha,
Thanks a lot for all your appreciative words. 🙂 It is nice to know that you have been enjoyign learnign from our pages.
thanks a lot dear.
:), always welcome.
hi sarah,
Ur website is very useful.I’ve done many Embroidery designs
bcoz of ur site only.Thanks a lot.U r my Guru
Dear Selvi,
We feel good with all your appreciations. So happy that you are enjoying our pages and stitching them too. 🙂
awsum…itz vry clear.. once again thank u vry much sarah <3 dis site..:)
🙂 thanks Shalini
Hey Sarah,
Your site is just amazing.please do keep posting.
Thanx for the step-by-step instructions.
Best wishes,
Rebecca
🙂
wat is the thread used for making this designs can u please tell me am just the beginer
Dear Shilpa,
I have used anchor cotton thread (used for embroidery) for this stitch. They have 6 strands and you can use 3 or 4 strands. To do that, cut the desired length of thread and just pull out 2 strands one by one.
Tumbled upon your page, interesting:) Loved your wedding photos and others too. Will look in again. Keep well, God BlessX
Hey, thanks Anna.
Best Wishes. 🙂
Hi Sarah,
thx fr da post. I learnt this stitch bt i dint knw it was called fishbone stitch. Instead I was taught dat it was a satin stitch used fr fillin leaves. Bt nw I knw its nt.
Yes Shazeenah, like I said in the fishbone stitch family page, this stitch is regarded as a member of the satin stitch family in a broader sense, probably because it is used for filling. I only broke it down further to make it clearer and more distinguished. 😀
Thank you for the tutorial. I comprehend pictures much easier than words. This is very helpful.