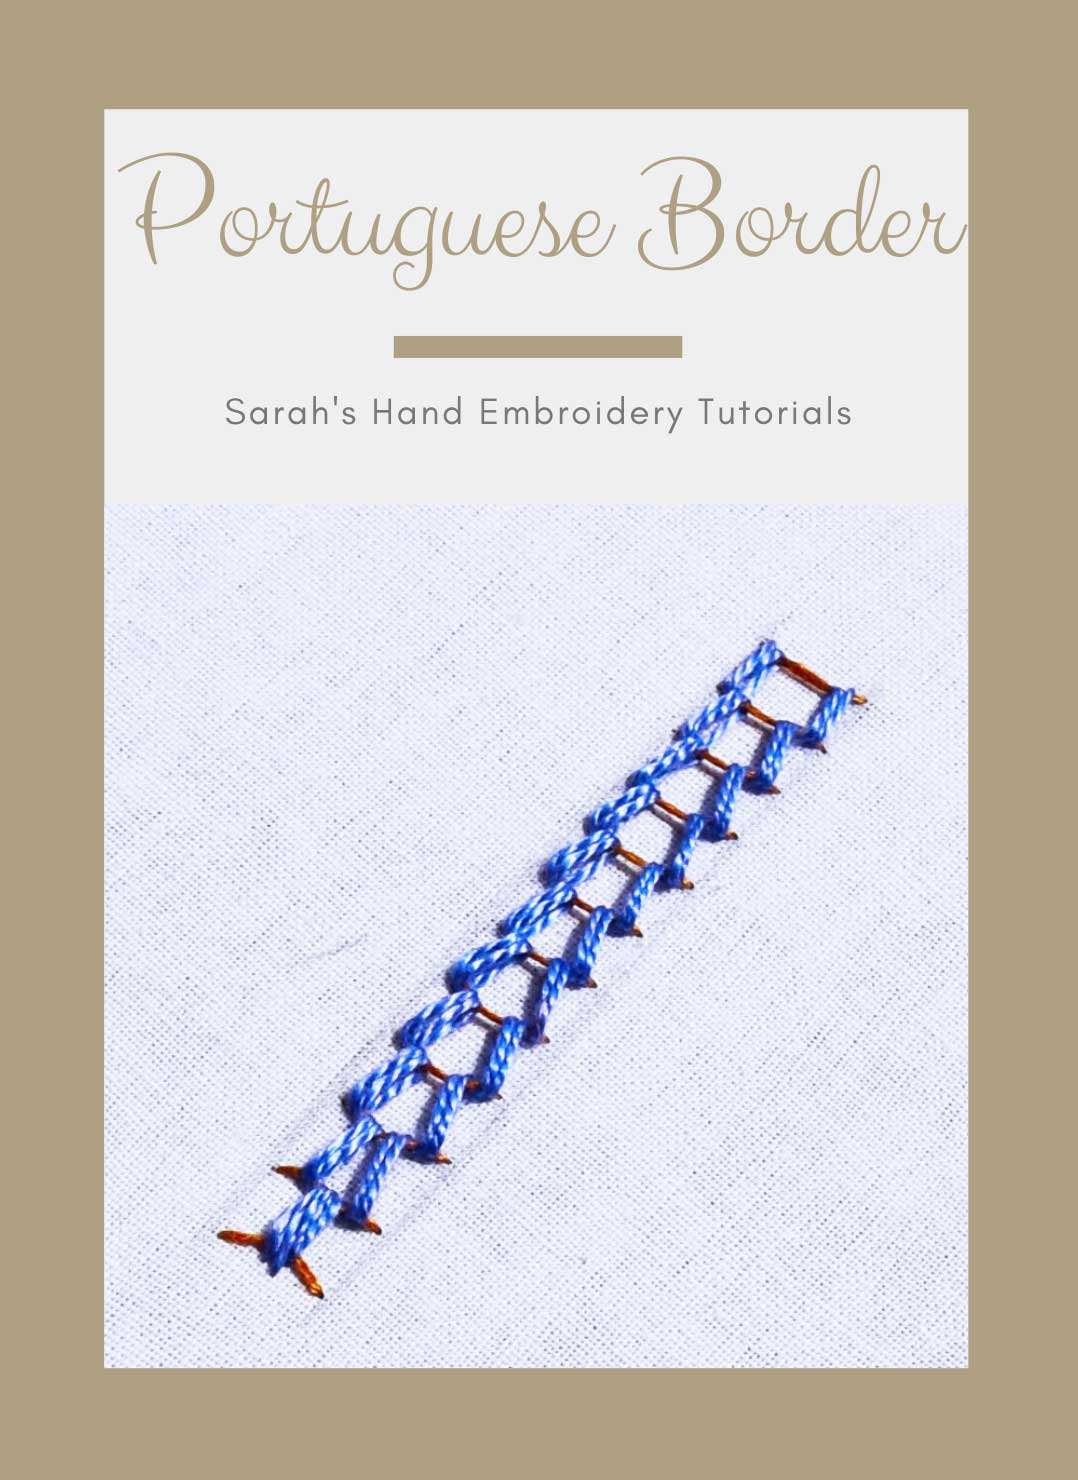
Portuguese Border Stitch is also known as
Portugiesischer Stich [DE], Barra Ponto Portugês [PT]
About the Portuguese Border Stitch
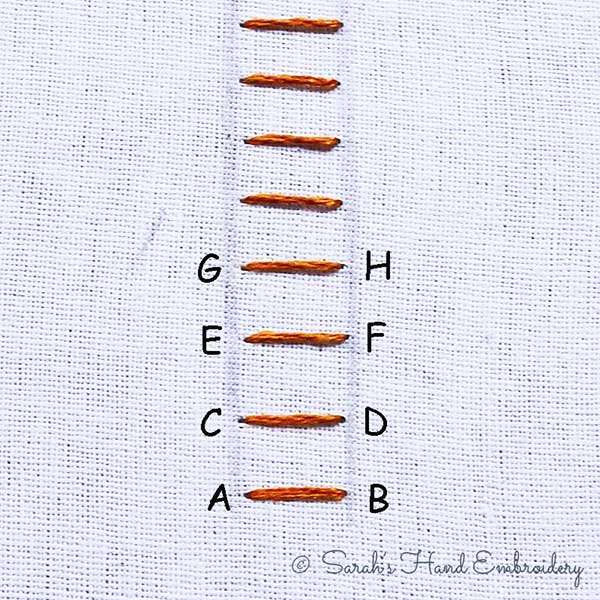
While making the Portuguese Border Stitch, the weaving is done in a backward motion over a ladder of straight stitches. The stitch can follow gentle curves. It can also be worked on leaflike shapes while the weaving fills space. I will be working this stitch between two straight parallel lines.
How to do the Portuguese Border Stitch
 |
 |
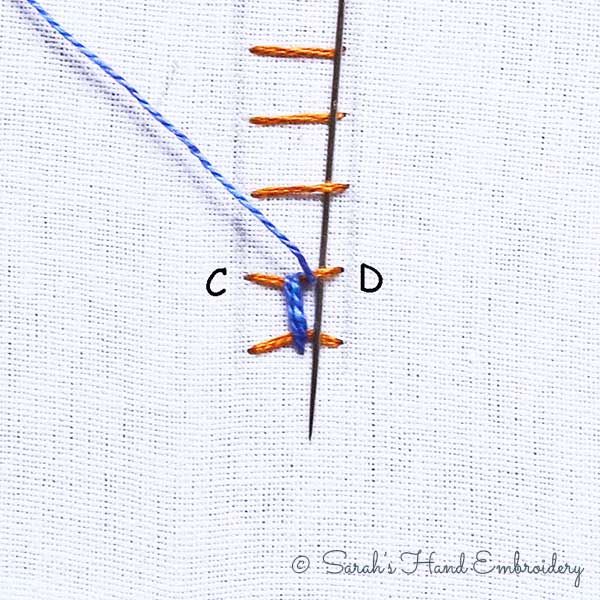
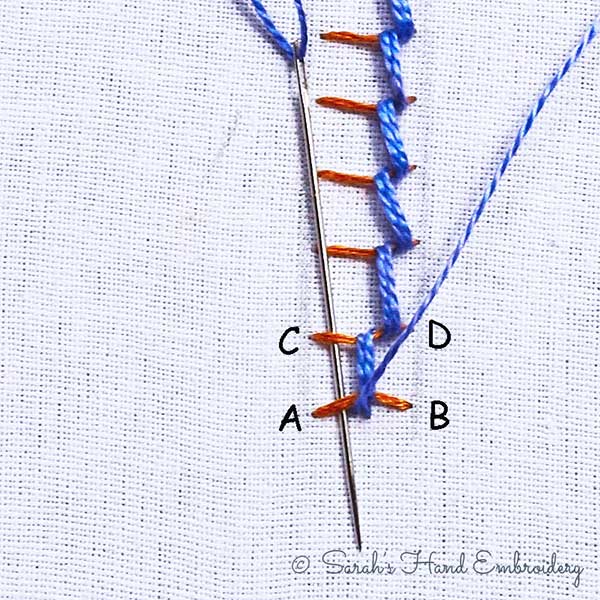
| Fig 1: Start by laying many short Straight Stitches, as shown. I will be working the weave from bottom to top. | Fig 2: So, bring the needle out from just below the first Straight Stitch form the bottom. Pass it under the two straight Stitches A-B and C-D from the top, as shown. |
 |
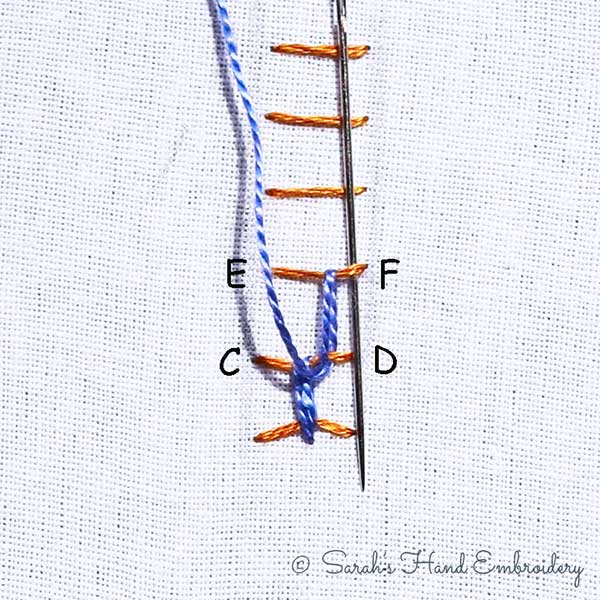 |
| Fig 3: Next, pass it under just one Straight Stitch C-D. Do not pluck the fabric underneath. Use a tapestry needle to weave, if it helps. | Fig 4: Now, pass it again, under two Straight Stitches C-D and E-F. Then, pass it under just the one stitch E-F. |
 |
 |
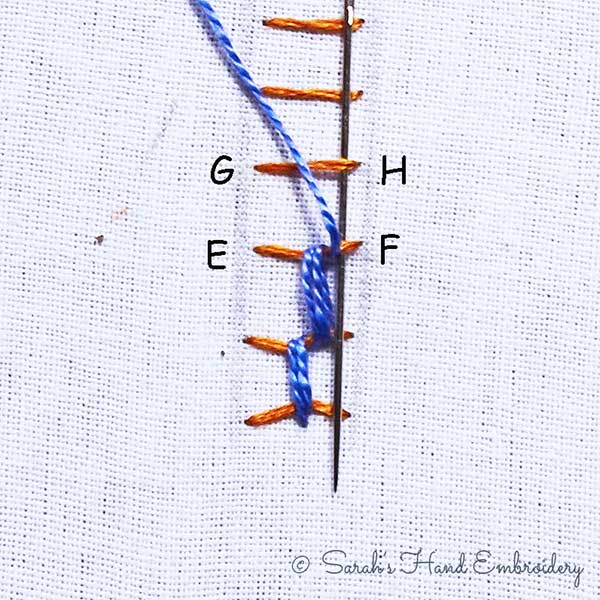
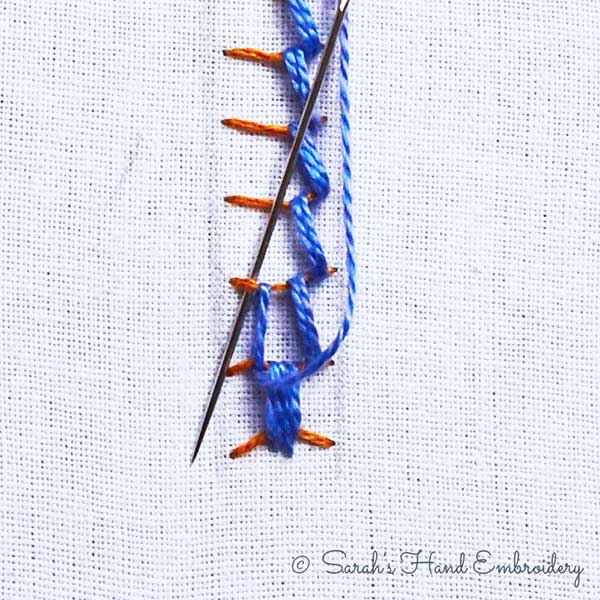
| Fig 5: Continue with the procedure to finish up the row. | Fig 6: When you reach the top, take the needle through the fabric to finish up the weaving on the right side. |
 |
 |
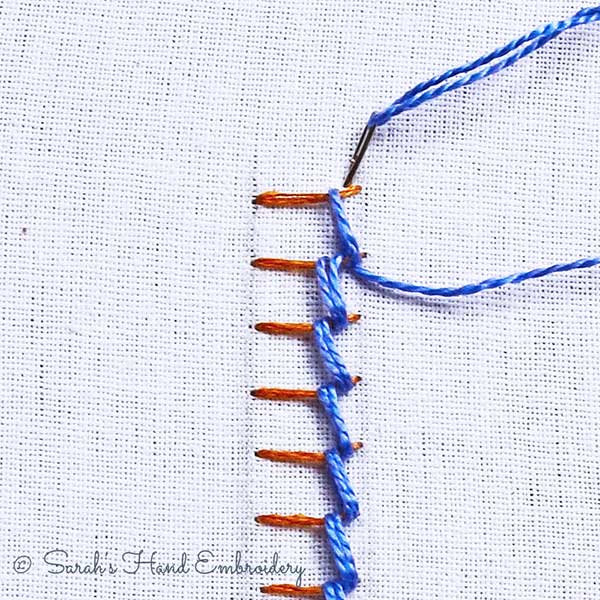
| Fig 7: Start again from the bottom near the stitch A-B. Follow the same process of passing under two stitches, then one stitch while moving upwards. | Fig 8: Only this time, you will keep it to the left of the Straight Stitches. |
 |
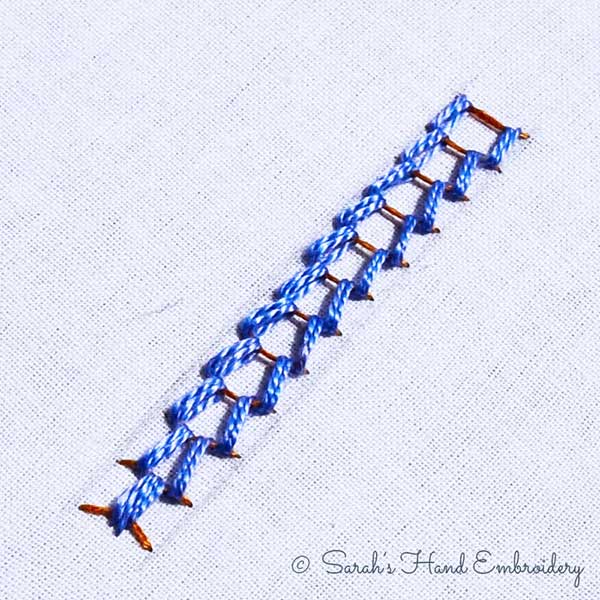 |
| Fig 9: So, all the stitches will be inclined towards the left this time. When you reach the top, finish up by taking the needle through the fabric and knotting it. | Fig 10: A finished row of the Portuguese Border Stitch will look like this. |
Learn this stitch and 305 more in our 600-page eBook!

 Sarah has been researching and sharing hand embroidery lessons for over 18 years, making it accessible to everyone around the globe.