Also known as
Puntada Mountmellick [ES], Point Mountmellick [FR], Mountmellick-Stich [DE], Ponto Mountmellick [PT]
About the Mountmellick Stitch
The Mountmellick Stitch can add a beautiful texture to the fabric. As the name indicates, this stitch is used in the Mountmellick Embroidery to make stems, outlines and filling effects in floral patterns. It can take curves easily. Let’s work between two parallel curved lines.
How to do the Mountmellick Stitch
 |
 |
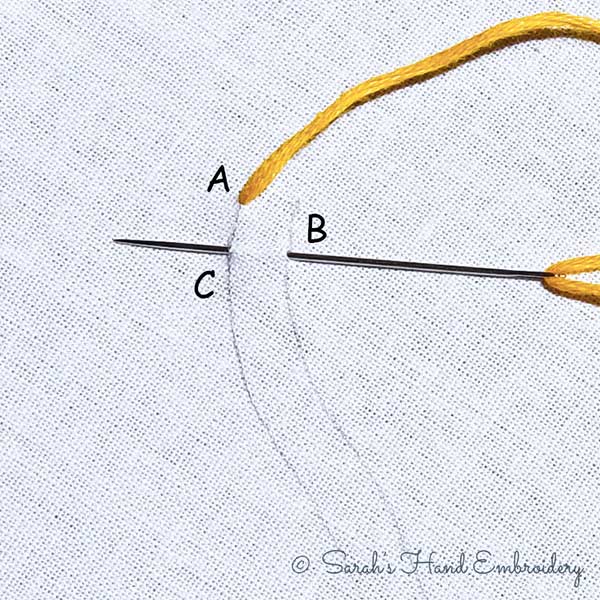
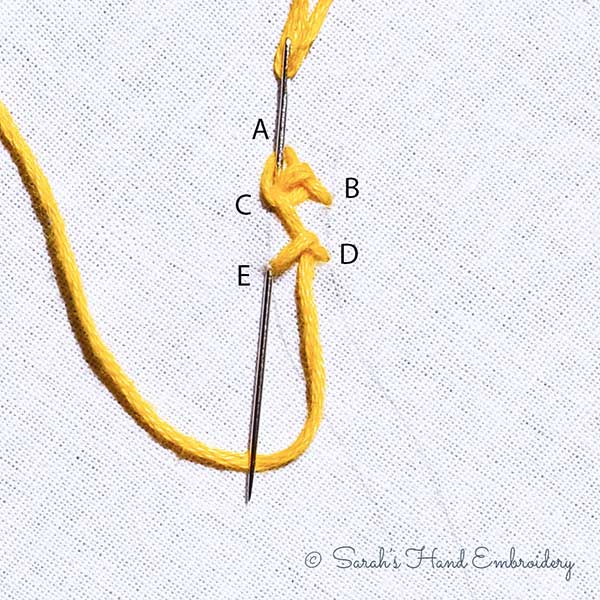
| Fig 1: Follow A,B,C to draw the needle in and out of the fabric. Note that B lies at an angle to A and C lies right above B. | Fig 2: Pass the needle under the stitch A-B. Do not pluck the fabric underneath. Pull out the needle. |
 |
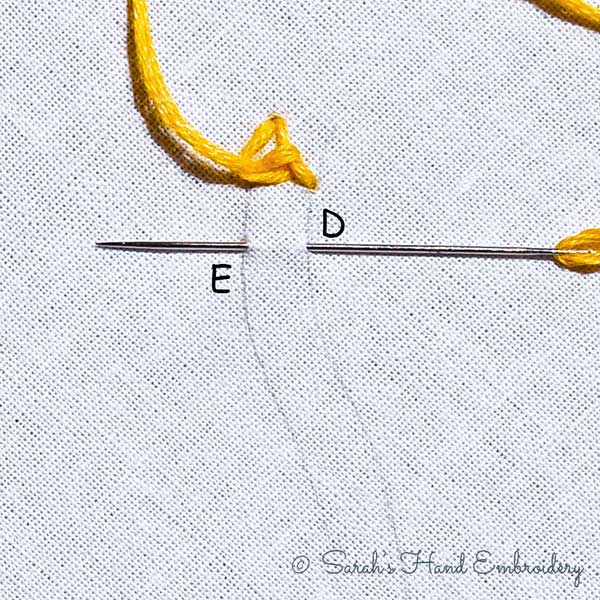 |
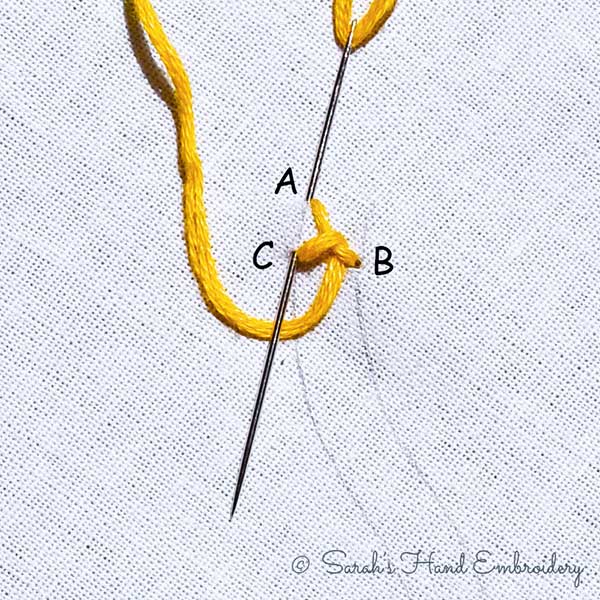
| Fig 3: Now, take the needle in through A, and come out through C. Keep the needle above the working thread, as shown. | Fig 4: Pull out the needle to form a piece in the sequence. Now, repeat the process by going in through D and out through E. E lies right above D. |
 |
 |
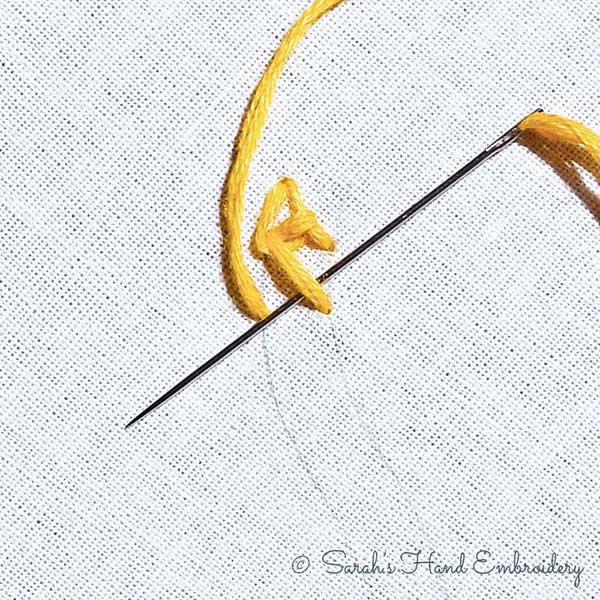
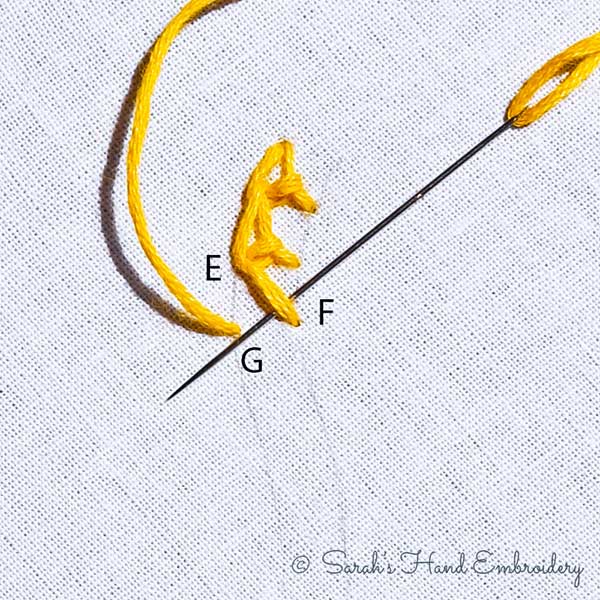
| Fig 5: Again, pass the needle under the stitch C-D. Pull the needle out. | Fig 6: Now, go in through C and come out from E while keeping the working thread under the needle, as shown. |
 |
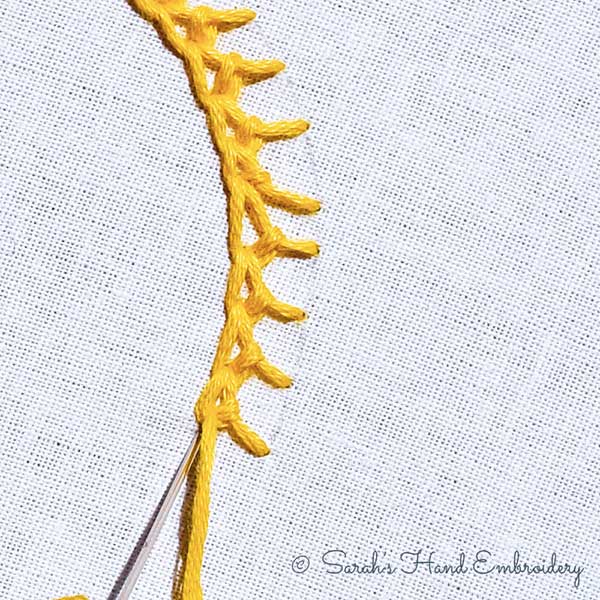 |
| Fig 7: Repeat the process for the entire length of the line. | Fig 8: When you reach the end, anchor down the last stitch with a small stitch, as shown, and knot the thread behind the fabric. |
 |
|
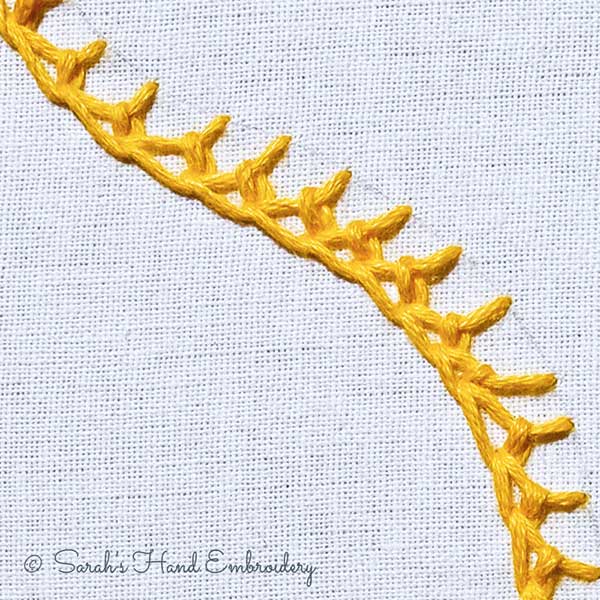
| Fig 9: A finished portion looks like this. |
Learn this stitch along with 305 other stitches from our 600-page eBook.

 Sarah has been researching and sharing hand embroidery lessons for over 18 years, making it accessible to everyone around the globe.