Stitch flowers using the Oyster Stitch.
|
|
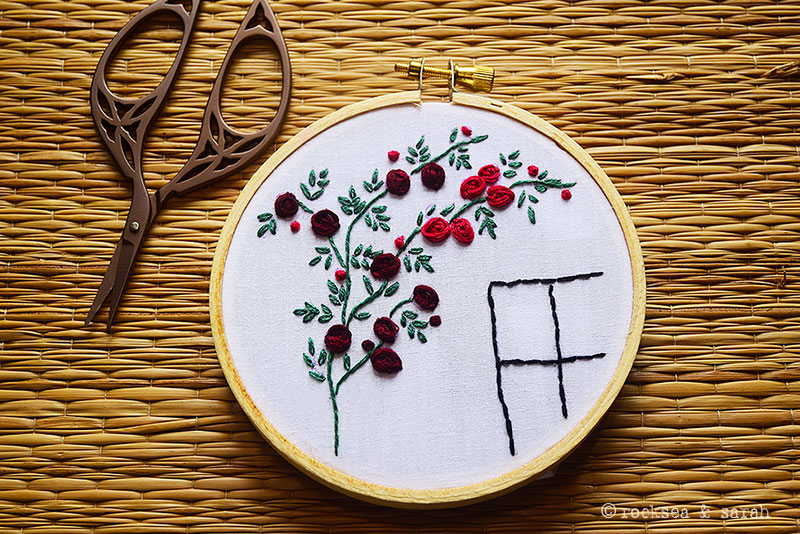
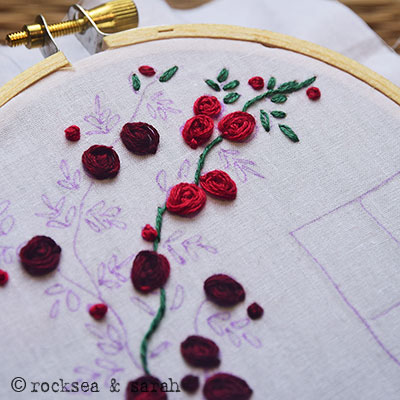
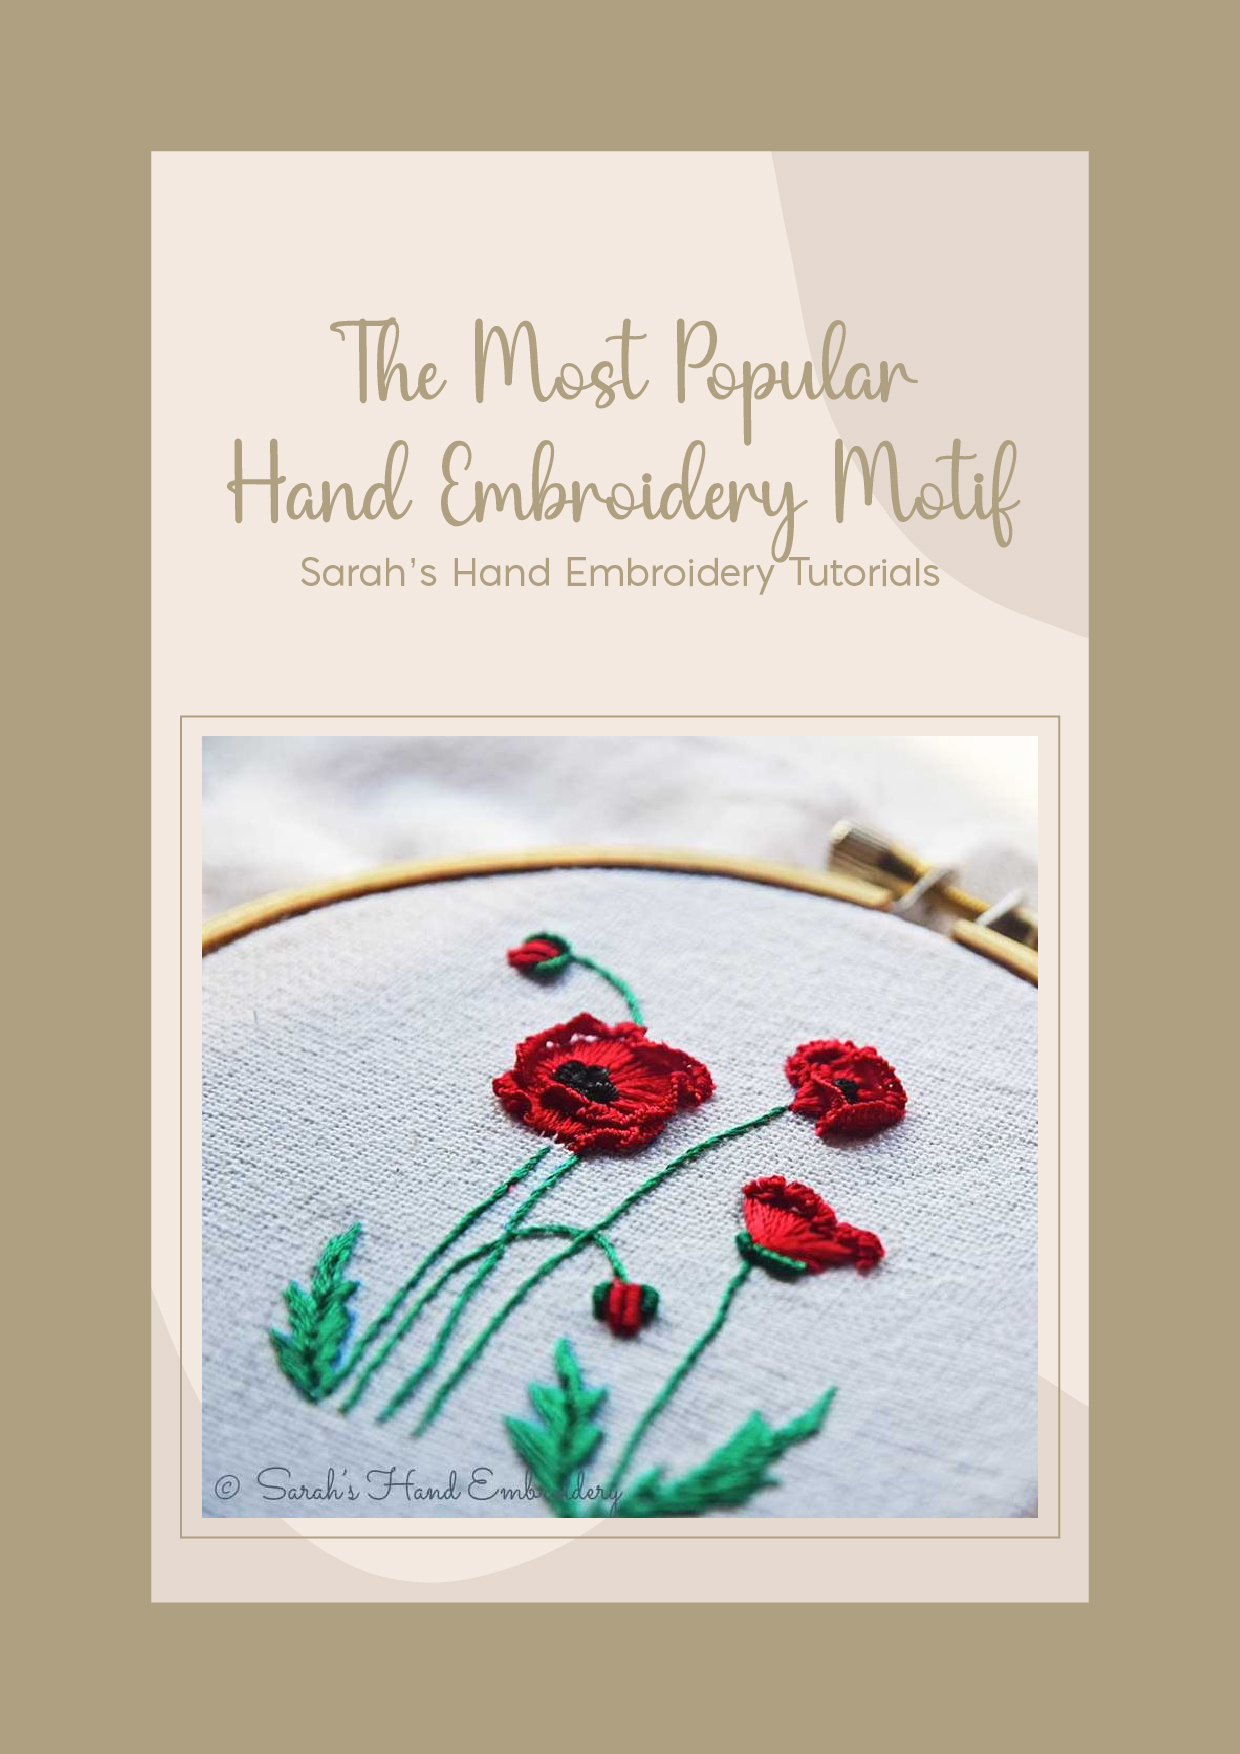
The charm of climbing roses is something of dreams. It is also fun to stitch them for a beautiful project. The Oyster Stitch was just perfect to make the small roses. These small roses are perfect for miniature flower embroidery. If you are looking for something to add to your wreath embroidery, this stitch can work as fillers too. Create your own embroidery patterns and designs to accommodate these easy small roses! I have made a small variation to the stitch to add layers of ‘petals’ to each flower. I have used variegated red thread for this sample. To show density, I have used all 6 strands of the embroidery floss. And, to give a perspective, I have included a small window. I hope you enjoy making these roses!
How to embroider flowers using the Oyster Stitch
 |
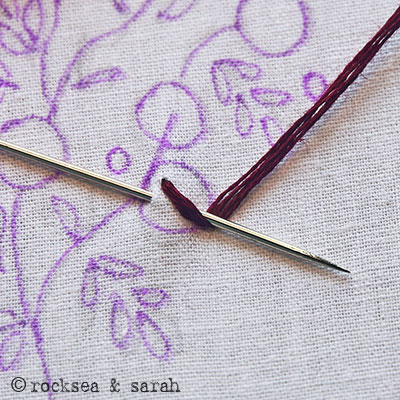 |
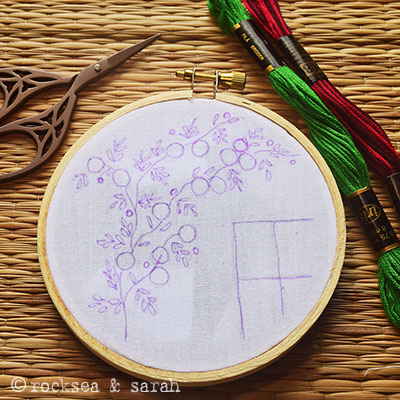
| Fig 1: Get your fabric, hoop, and threads ready. I have marked small circles in areas where I want to see the flowers. This is a 4″ hoop. | Fig 2: Start working the Oyster Stitch in a circle. Note that I am making my first stitch inside the circle to allow space for the layers of threads to fall and cover the circle. |
 |
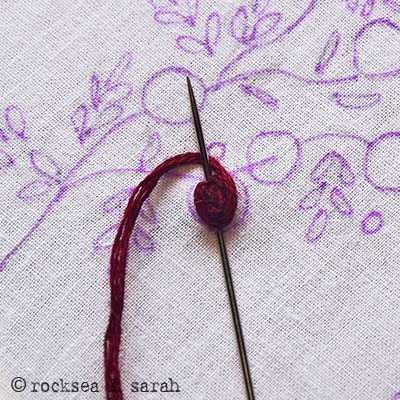 |
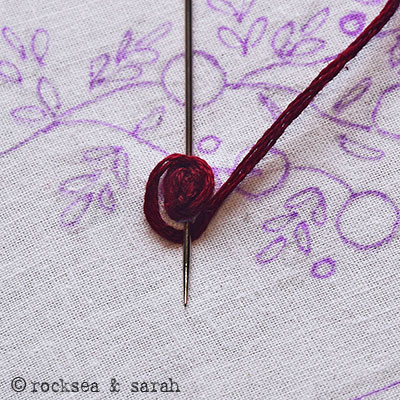
| Fig 3: Finish the Oyster Stitch, but do not take the needle in the fabric to anchor the stitch yet. To add more layers to my stitch, I am going to make a variation. | Fig 4: Instead of taking the needle down into the fabric and finishing off the stitch, I will take the needle in through the fabric and come out through the other end of the stitch, as shown. Loop the thread under the needle. This will add an extra layer to the stitch. |
 |
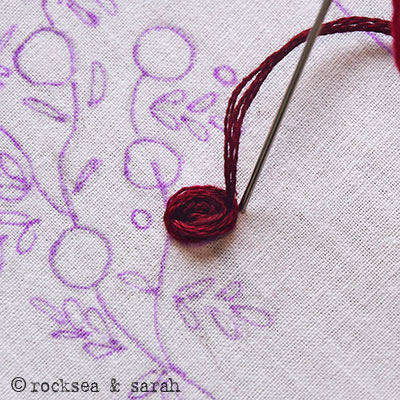 |
| Fig 5: Again, take the needle in and come out from the other end and loop the thread under the needle. Make sure the thread lays flat on the fabric. If it helps, hold down the stitch with your thumb while pulling out the needle. | Fig 6: Now, you can finish off the Oyster Stitch by anchoring down the final stitch. You may add a many layers as you want this way, but I suggest to keep it to two extra layers only. |
 |
 |
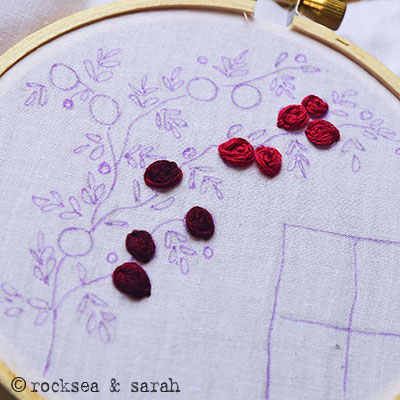
| Fig 7: I noted that if you make the very first stitch as round as possible, the layers added will snug to it and make a round rose instead of an elongated one. So, keep the very first stitch small and to the center of the circle. | Fig 8: I did some Oyster Stitches with three strands of thread to cover the small buds. |
 |
 |
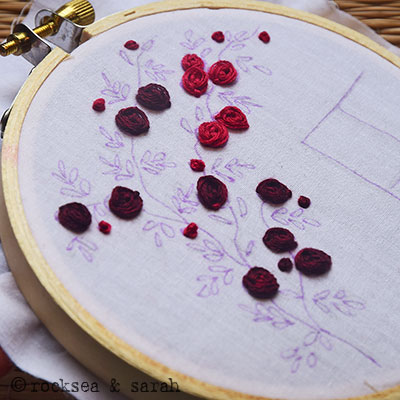
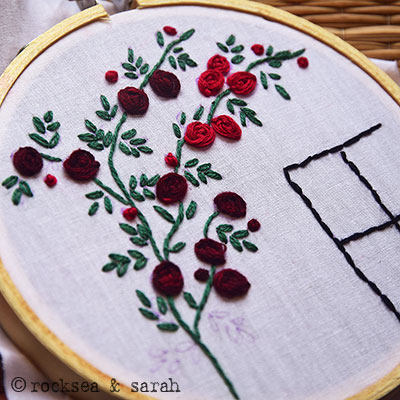
| Fig 9: The stems are done in Outline Stitch and leaves are made using Lazy Daisy. | Fig 10: I finished climbing rose bush! I realized doing the stem and leaves first could have been much easier and better to avoid damage to the little roses. |
 |
 |
| Fig 11: I finished the windows with the Back Stitch. | Fig 12: You can gently pluck and nudge the layers of thread on each rose to give it a dimension and shape. |
TIPS to make your flowers beautiful:
- Keep the flowers small. Oyster Stitch makes small roses.
- Use 6 strands of thread to make the rose look fuller and denser.
- Start the stitch from inside the circle marking to allow space for the layers.
- To keep the rose flowers round, make the very first stitch small, and not long. The layers will then snug around this center stitch forming a beautiful round rose.
- Hold the stitch down with your thumb while pulling out the needle while making the layers.
- To avoid damage to the flowers, try to make the stems and leaves first and then add the Oyster Stitch flowers.
- Pluck, tug and nudge the layers of each rose ever so gently with the back of the needle to give it a dimension and shape.
Related Projects
|
Flower Embroidery
|
Leaf Embroidery
|

Learn how to make different kinds of roses- big, small, dimensional, flat, delicate, sturdy- all from our 12 Roses project eBook! Make something beautiful today.❤️

 Sarah has been researching and sharing hand embroidery lessons for over 17 years, making it accessible to everyone around the globe.

Hi Sarah! I love your website. It has taught me everything I know about embroidery, and I’m getting pretty good! This was my attempt at the Oyster Stitch flowers (on the left you can see where I practiced twisted chain stitch to learn it). Do you have any suggestions for larger flowers? I’d like to embroider the border and center of a large tablecloth for my apartment.

Hi Sarah. Thank you! It is so nice to hear that you have learned so much from our pages. 🙂 Love what you have stitches. It has come out pretty.
To stitch large flowers, I would suggest that you use more sturdy stitches that can stand the usage of the cloth. So, avoid dimensional stitches like the Woven Wheel. Stitches like the Back Stitch for the outline and Running Stitch or Chain Stitch for the filling can work beautifully. Your choice of stitches will depend highly on the pattern you choose. For borders, variations of any linear stitch like the Stem Stitch, Blanket Stitch, Chevron Stitch, Chain Stitch will be good. You can also explore adding embellishments like small beads to add some dimension and glitz, too. I hope to have set you out in the right direction. Don’t hesitate to contact me back. Enjoy your project!
Well now isn’t that a beautiful stitch. Sarah you are a marvel for bringing this sweet little rose bud to us. I always love seeing that I have an email from you in my in-box.
Thank you, Patty. 🙂 I love these little roses too, and they are fun to make!