

Palestrina Stitch is also known as
Double knot stitch, Tied coral stitch, Old English knot stitch, Twilling stitch, Purl stitch [EN], Punto de Palestrina [ES], Point de Palestrina [FR], Palestrinastich [DE], Punto Palestrina [IT], Ponto de Palestrina [PT].
About the Palestrina Stitch
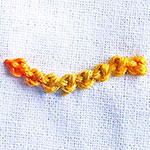
Palestrina stitch has its origin in the village of Palestrina in Italy and was initially called Praeneste, an Etruscan town near Rome that was built upon the ruins of the ancient Temple of Fortuna. This temple was revealed during the Second World War when Allied bombing destroyed Palestrina’s city center. Many embroidery styles from Italy have Palestrina stitch and there is even an embroidery style called the Palestrina. This style of embroidery uses thick threads, usually white or natural-colored thread on dark linen or dark red, russet, or blue thread on white or light-colored linen. The village women still stitch and sell this type of embroidery. This stitch is usually used for outlining or bordering purposes with a few additional stitches such as the Stem Stitch, French Knot, and Bokhara couching. Today, this stitch is popular in surface embroidery, Crewel Work and Crazy Quilting. Filling an area with the Palestrina Stitch can give a beautiful bumpy texture. This stitch can be used over edges and adding a bead between the stitches adds a certain richness to it!
How to do the Palestrina Stitch
There are two variations of Palestrina stitch: The long-armed Palestrina stitch and the long-legged Palestrina stitch, both of which I have shown below.
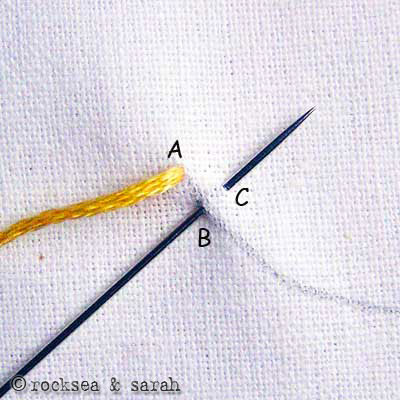 | 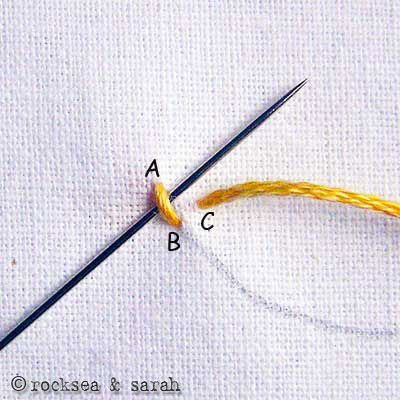 |
| Fig 1: Bring the needle out through point A, which lies on the stitch line. Then, take the needle in through B, which lies on the stitch line too. Bring out the needle through C, a point straight above and not too far from B. | Fig 2: Now, take the needle below the stitch A-B, without plucking the fabric underneath, as shown. The needle will be angled above or towards the left of the point C. |
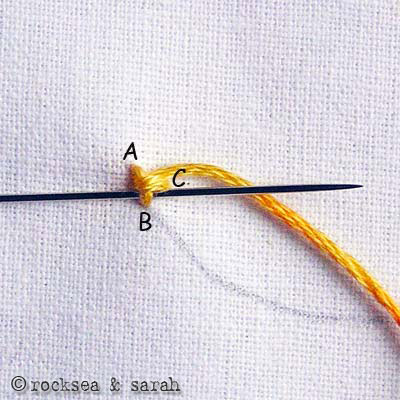 | 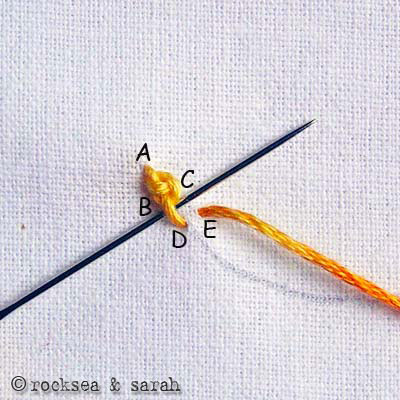 |
| Fig 3: Again, take the needle under the stitch A-B. Only, this time, the needle is angled below or towards the right side of point C. Then, loop the thread around the needle as shown in the illustration. | Fig 4: When you pull out the needle, the first Palestrina knot is formed. Start for the next knot by putting in the needle through D on the stitch line and bringing it out from E, just above the point D. Continue with the procedure as we did for the first knot. |
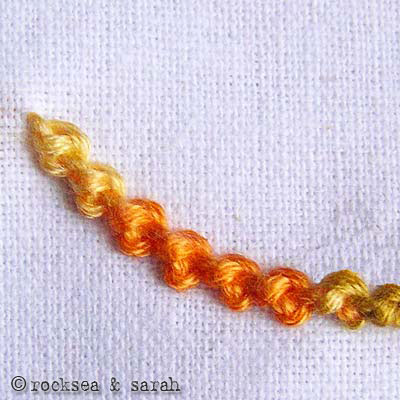 | |
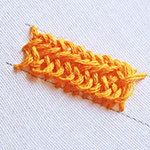
| Fig 5: The finished portion of the Palestrina knot would look like this. | |
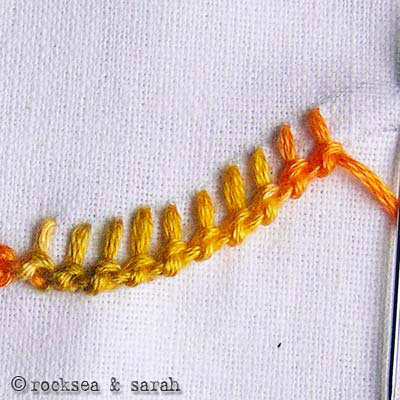 | 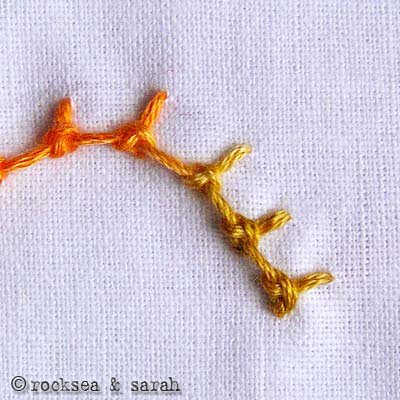 |
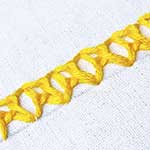
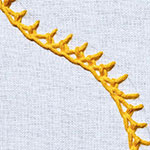
| Fig 6: This is a variation of the Palestrina stitch. The technique followed is the same. The only difference is that stitch B-C (Fig 1) is taken a bit longer to give it a long ‘arm.’ And so this variation is called the ‘long-armed Palestrina.’ | Fig 7: Another variation is when the stitch A-B (Fig 1) is extended, giving the stitch a long ‘leg’. Such variation is called a ‘long-legged Palestrina’. It would look like the Coral Stitch with bolder knots. This illustration shows a long-legged and long-armed Palestrina. |
Learn to do Palestrina Stitch in 2 minutes!
Use this stitch on a pattern
Visit and Subscribe to Sarah’s YouTube Channel
Related Stitches in the Palestrina Stitch Family
Mountmellick |
Eastern Stitch |


Learn this stitch and 305 other stitches from our 600-page eBook.


