

This stitch is beautiful, made by weaving over the Double Herringbone stitch with another thread of same or different color. Interlaced Herringbone Stitch forms one of the main stitches for two traditional embroideries called the Kutch Work and the Armenian Marash Work.
You need to know the Double Herringbone Stitch Variation 2 to be able to continue with this tutorial. This tutorial is best understood by following the illustrations, without much dependence on the description.
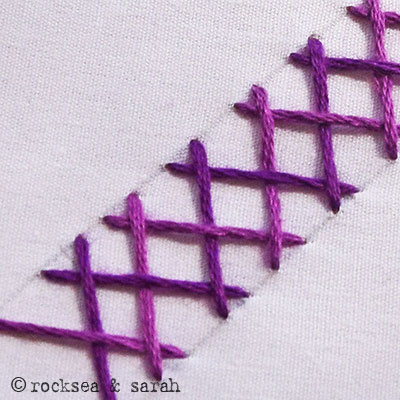 | |
| Double Herringbone Stitch Variation 2: First, make a row of the Double Herringbone Stitch- Variation 2 as the base. | |
 |  |
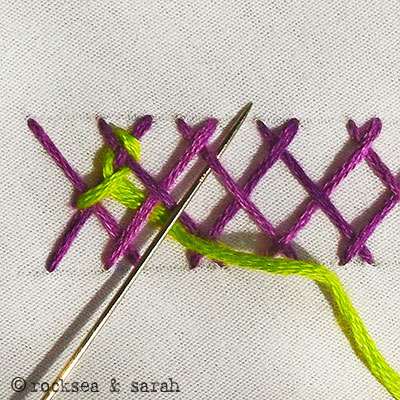
| Fig 1: Bring the needle out with a contrasting colored thread from the left corner of the double herringbone stitch row. Take the thread over and then under the Herringbone Stitch as shown. | Fig 2: Go around the intersection as shown. |
 |  |
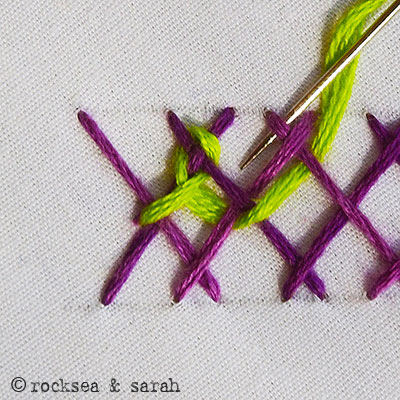
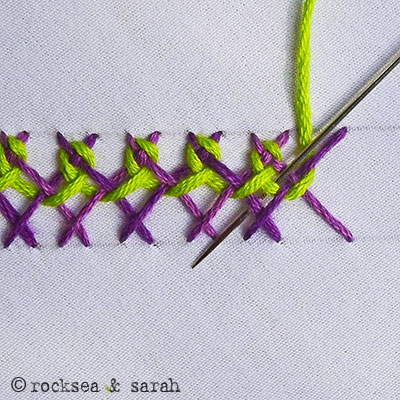
| Fig 3: Make a note that the needle has been going over and under the herringbone stitches alternately. When you reach this step, you have to go under both the working thread and the herringbone base. | Fig 4: You turn and repeat the process. Go over and under the herringbone base threads alternately. |
 |  |
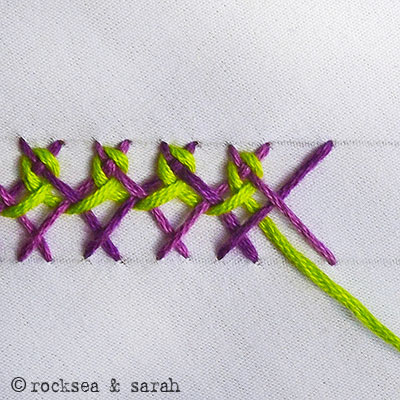
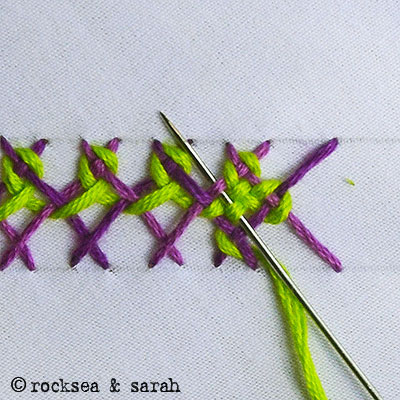
| Fig 5: Turn around and keep with the weaving motion. | Fig 6: Again, pass the needle under the working thread and the base. |
 |  |
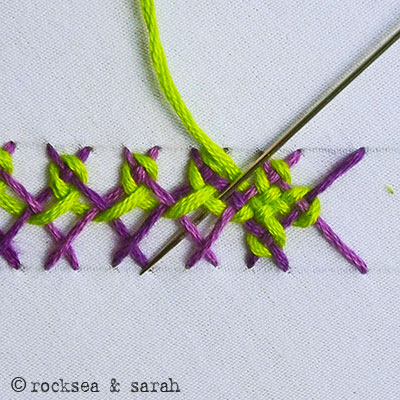
| Fig 7: Keep up with this process until you reach the end of the row. You have been filling the top of the row so far. Now, you will be turning around and weaving around the bottom. | Fig 8: To turn around, pass the needle over and under the herringbone base stitches as shown. |
 |  |
| Fig 9: Now, note that you will pass the needle over the herringbone base stitch, and then under both the working thread and the base stitch. | Fig 10: Next, turn around taking the needle over and under the intersection as shown. |
 |  |
| Fig 11: At this point, you will simply take the needle over and under all the stitches along the path to complete the weave for that small section, before moving on. | Fig 12: Repeat the process by taking the needle over the herringbone base, and then passing under the working thread and the herringbone base stitch. |
 |  |
| Fig 13: Keep repeating the process until the row is all woven. When you reach the end, you pass the needle into the same point from where you began and knot it up on the reverse of the fabric. | Fig 14: The weavings will look like this. |
 | |
| Fig 15: This stitch might take some patience at first, but it is totally worth it! |


