
This stitch is similar to the fishbone stitch, with a requirement to divide the pattern into two. The difference is that the stitches in the center of the pattern do not fall on the stitch line but on its either sides. This helps to make the stitches far spaced to create the open fishbone effect.
It is good to know the fishbone stitch to understand this stitch. I will work on a leaf shaped pattern. I have marked the centre with a stitch line. The lines are named X, Y and Z for the ease of the lesson.
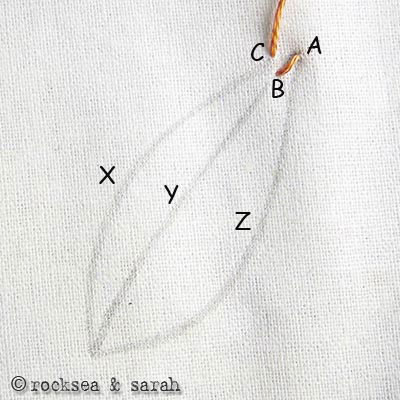 | 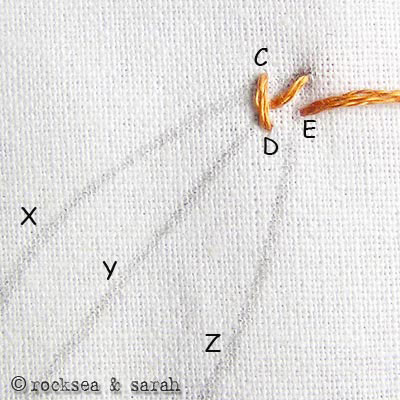 |
| Fig 1: Like in fishbone stitch, first, bring out the needle through A, which is the top tip of the leaf. Take it in through B, a point on line Y. Then, bring it out through C, a point on line X. It is not essential to do the stitch A-B. You have the option of starting the stitch from the point C. | Fig 2: Now, put in the needle through D, which is a point just outside the line Y. Bring out the needle through E, a point on line Z. |
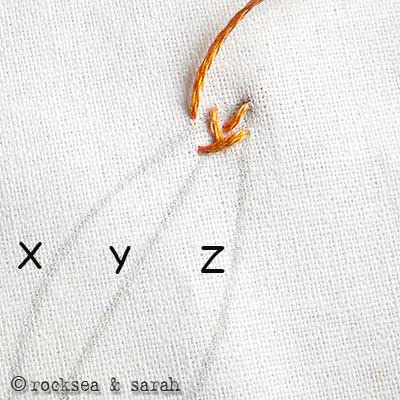 | 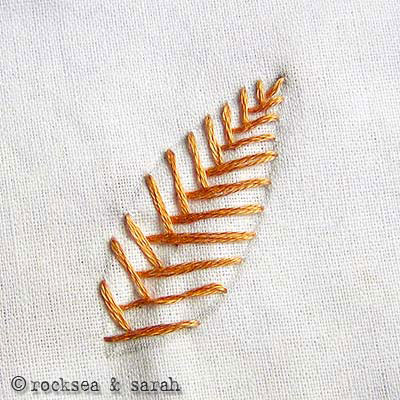 |
| Fig 3: Follow this pattern of stitching alternatley on the lines X and Y. Be careful that no stitch will fall on the line Y, but only on its either sides. | Fig 4: A completed leaf pattern will look like this. |


thank you
where do we get hand embrodiery pattern books in blore
My pleasure,Saramme…
Sarah,
Are you sure this is open fishbone stitch? I think the technique for open fishbone is slightly different. What you’ve shown is regular fishbone which is open. 🙂
“The stitching sequence is a little different from the Fishbone Stitch. Half of the stitches are worked from a center line to the outer edge, and half are worked from the outer edge to the other center line”
Check this out.
http://www.fruncesybordados.com.mx/Open%20Fishbone%20Stitch.htm
Regards,
Deepa
Dear Deepa,
Thanks for expressing your doubt over the technique used here. I had searched and researched quite a bit over the fishbone family before doing this lesson. Yet, there could be a possibility of mistake. Give me some time (a couple of weeks) before I check back on it and come up with a clarification. Pratya and I are still on our travels and away from my laptop and researched material. 🙂
cheers!
Dear Deepa,
Just returned from some ‘never-ending’ trips. I had a look into the stitches and realised that it was a naming mistake done by me. Thanks for keeping a watch on it. 🙂
Like some stitches have ‘closed’ versions, some others have ‘opened’ versions. This is an opened version I had learnt when I first got introduced to embroidery, ages ago. I don’t know how much it is used in common practice, but I thought it is a good idea to include it (easy as it might be) to teach the beginners the techniques in which an ‘opened’ effect can be created by spacing the stitches in the middle.
Am renaming and re-posting this page. Opened fishbone stitch is different from Open fishbone stitch