

Reverse Chain Stitch is also known as
Punto de cadeneta inverso [ES], Point de chaînette inversé [FR], Rückwärtiger Kettenstich [DE].
How to do the Reverse Chain Stitch
This stitch is visually not very different from the usual chain stitch. The difference is the direction in which these stitches are done. If a Chain Stitch is done from bottom to top, reverse chain stitch is done from top to bottom. You would require to know the Lazy Daisy Stitch to be able to start the Reverse Chain Stitch.
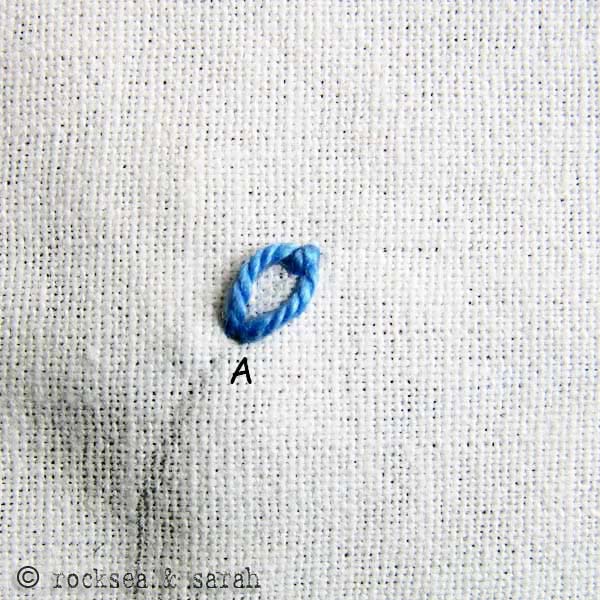 | 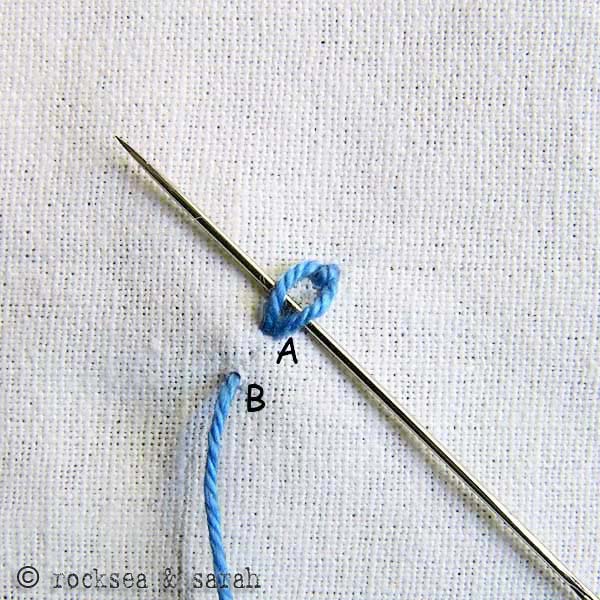 |
| Fig 1: Lay the base for this stitch by doing a Lazy Daisy Stitch, with A as the base point. | Fig 2: Bring the needle out through B. Take the needle under the first lazy daisy stitch without plucking the fabric below. The distance between B and A is just enough to make another chain in the sequence. |
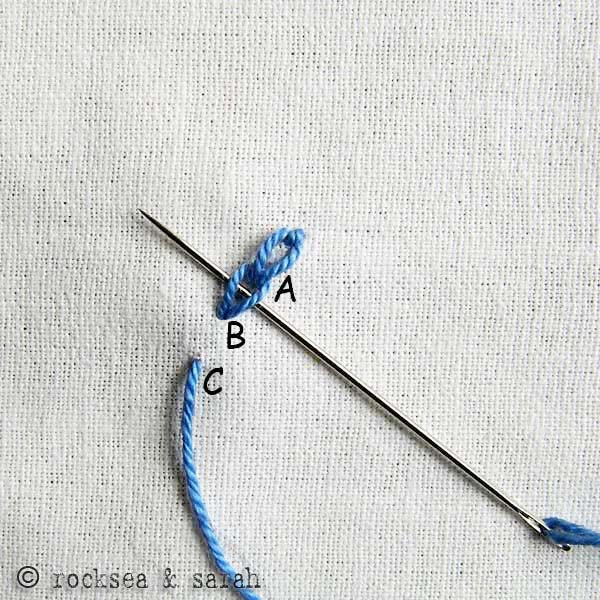 | |
| Fig 3: Take in the needle through B to finish up with the next chain in the sequence. Bring out the needle through C and take it under the second chain without plucking the fabric below. | |
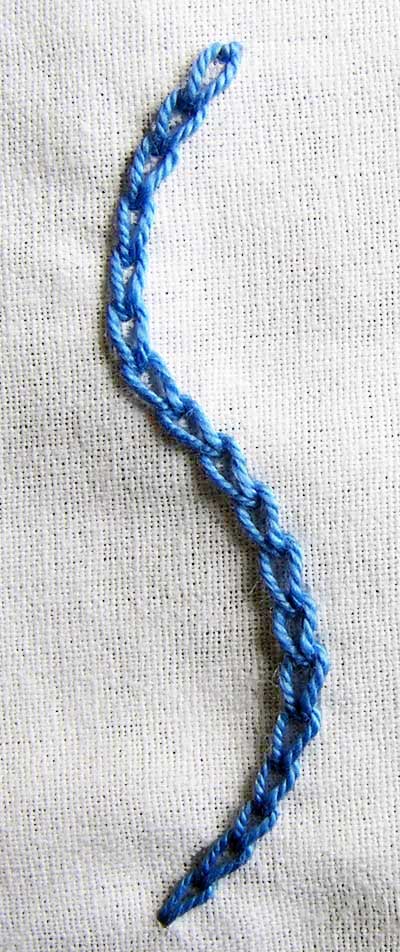 | |
| Fig 4: Continue this pattern of stitching to finish the sequence of Reverse Chain Stitch. |
Learn to do the Reverse Chain Stitch in 2 minutes!
So, what is the difference between the Chain Stitch and the Reverse Chain Stitch? Watch to learn more!
Use this stitch on a pattern
Visit and Subscribe to Sarah’s YouTube Channel
Learn this stitch and 305 other stitches from our 600-page eBook.


I find this makes a much more even chain than regular chain stitch. Heavy chain stitch is also worked this way and makes a nice raised border.
And it is economical thread-wise too? 😀
Is there any differnce between the regular chain stitch & the reversed one in the finished work?
Great stitch and explanation. I like it more than the regular chain stitch. Thank you 🙂
Hello Sarah,
Thanks for the beautiful posts.
My boyfriend’s birthday is coming and everytime I give him something created by me.
This time I am planning to gift him a frame with the words “Happy Birthday” embroided on a piece of cloth.
I am very new to embroidery and was trying to learn simple stitched from your site … but I failed 🙁
Can you please help me, what kind of stitch will be best suited to embroide alphabets.
I have purchased a marron coloured cloth and black thread.
Hey Roopali!
It is a a beautiful thought of you to gift your dear boyfriend something made by you always. 🙂
Thanks for going thru the embroidery section. Did you find the instructions difficult to follow? Do let me know if so.
Certainly let me suggest you a few stitches that can be good for embroidering alphabets…
–I feel ‘raised chain band stitch’ is good for doing alphabets. But it would require you to use two colors of thread. Since you already have black, you can use a lighter color like cream or off-white along with it.
–My second suggestion is the ‘rope stitch’. If the your thread is thick, this stitch will come out really well I suggest not to do this stitch if your thread is thin.
–Now, if these two stitches seem difficult for you, (understandably, since you are very new to embroidery), you can try the ‘running stitch (variety 1)’. For this you can use a single color or two colors, as per your wish. 🙂 I would recommend two colors, one black and the other a lighter one.
–If you would like, you can make little ‘lazy daisy stitch’ flowers around ‘happy birthday’ to beautify it. It is a very easy stitch to do.
All these stitches are listed on the right hand side bar for you to follow.
Hope this has helped. Wishing your boyfriend a very happy birthday and both of you happiness always! 🙂