
This stitch is a little complicated, but not too difficult to learn. Here, we use two different threads to make chain stitches over a foundation row of straight stitches. So, the visual effect would be an embossed magical chain stitch. Multiple rows of checkered chains can be done over a broader foundation of straight stitch to give a chessboard appearance or a filling effect. For the sake of this lesson, though, I will be doing only one row over a narrow foundation of straight stitches.
The knowledge of magic chain stitch could be helpful, though not a must. This stitch requires more patience I feel since we are dealing with two colors of thread using two needles, alternately, in the same journey. I will work the straight stitch foundation from top to bottom, but the chain stitches will be worked from bottom to top for the sake of this lesson. You would require two needles with two contrasting threads. The threads need to be doubled in each needle, unlike the single threads we generally work with. This makes the making of chain easier to manage.
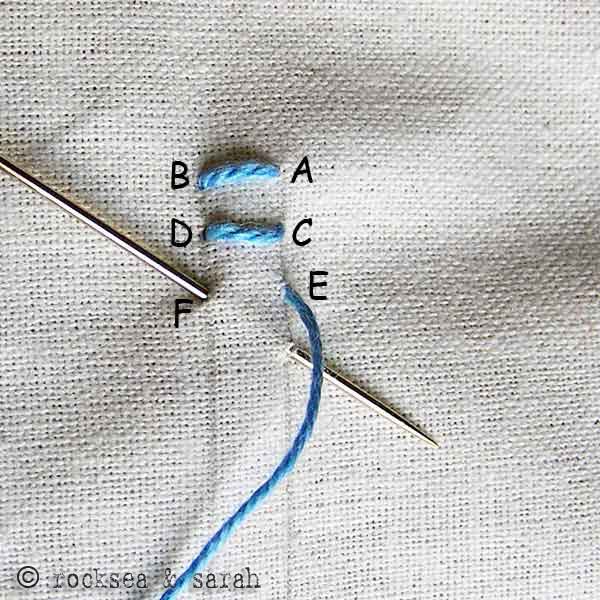 | 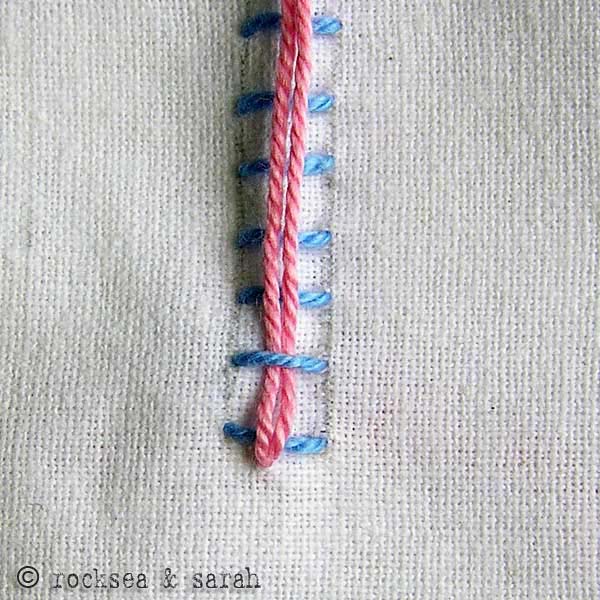 |
| Fig 1: We start by making a foundation row of straight stitches. The stitches are done between two parallel stitch lines. We draw the thread from A-B, C-D, E-F and so on. | Fig 2: No, I take my first doubled thread and bring it out from the bottom of the first straight stitch bar. Then, I take the needle over the first stitch bar, and beneath the second stitch bar. This makes the first ‘loop’ of the checkered chain. The chain will become clearer as we bring in the next thread. |
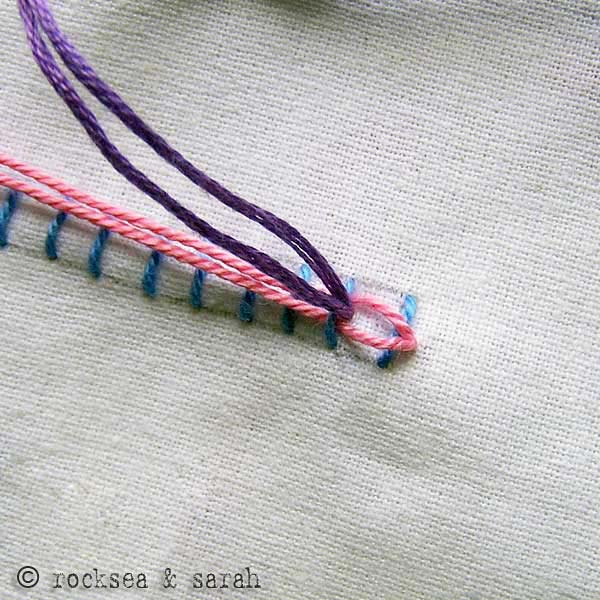 | 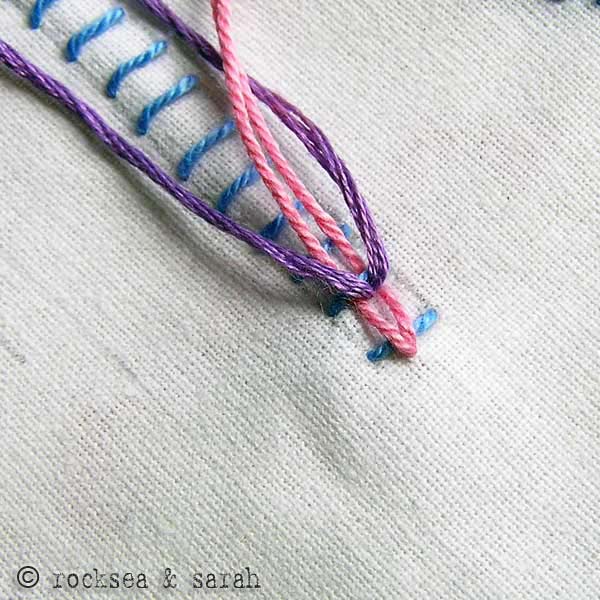 |
| Fig 3: Bring out the next thread from the bottom of the second straight stitch bar. When you bring it out, split the first thread. It is this splitting that gives the loop effect. | Fig 4: Next, we have to make a loop with the second thread, so, now, we split the second thread with the first one. |
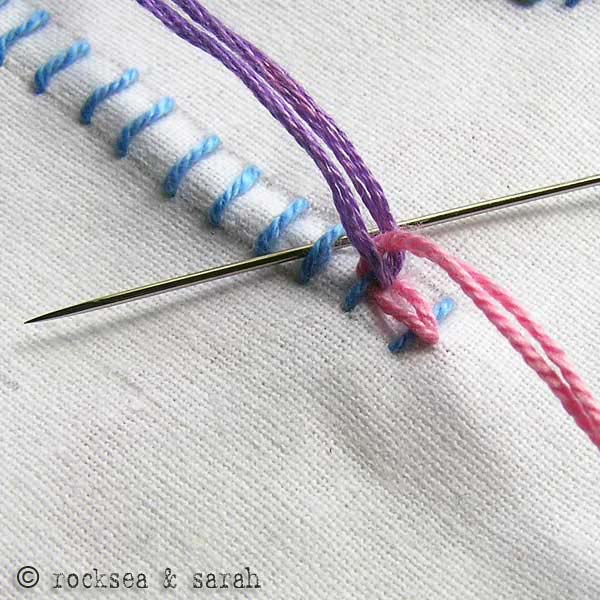 | 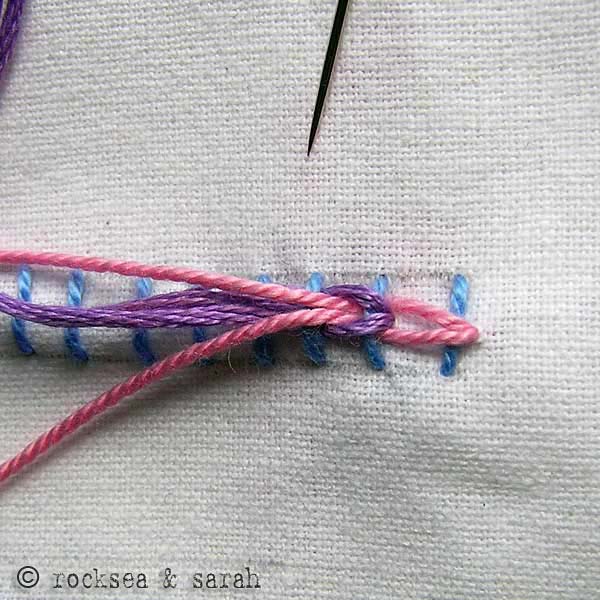 |
| Fig 5: Then, we take the second thread beneath the third straight stitch bar. This ‘locks’ or tightens the new ‘loop’ in place. | Fig 6: We continue this procedure of spliting the threads alternately and locking them by taking it beneath the next straight stitch bar. Once you get the idea of the stitch, it is not difficult to do. Just remember nto to pluck the fabric beneath when you work with the two needles. |
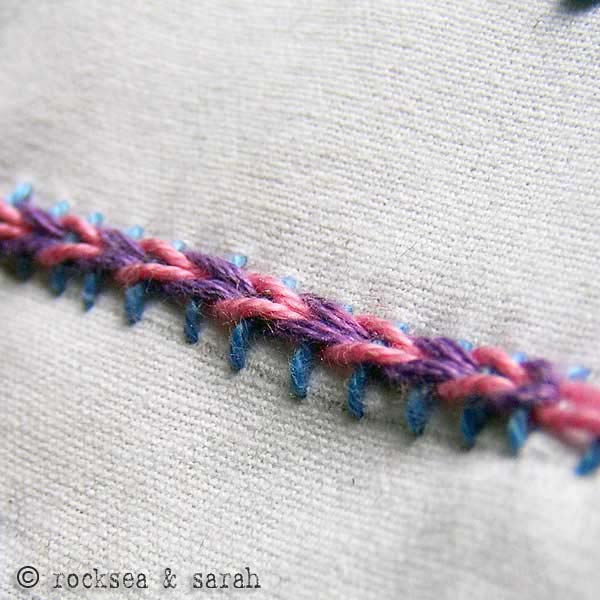 | |
| Fig 7: When finished, you should get a pattern like this. |


