How to make patterns in Kasuti
This lesson will deal with the basics of Kasuti. It will give an overview of what stitches are used and how to stitch them. It will also deal with some basic technical aspects required to design a pattern and how to transfer the designs to the fabric.
Stitches used in Kasuti
Kasuti uses four kinds of stitches for its embroidery. Though three of these four stitches are reversible, Kasuti itself is not essentially a reversible form of embroidery. The use of all these four stitches in a single pattern is not a must.
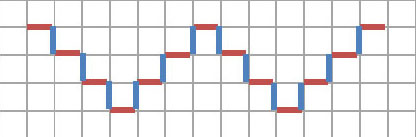
The red lines represent stitches made one way (left to right), and the blue lines represent stitches made on the return journey. Click on the stitch names given in the description to go to their tutorials.
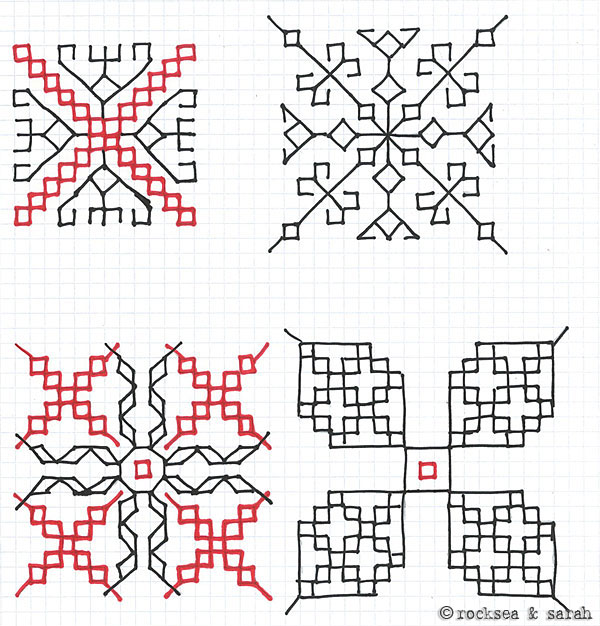
1. Ganti or Gavanti
 | Ganti means knot. It is the typical Holbein stitch style done in a straight line, either vertically or horizontally or even diagonally. This stitch is reversible and shows up the same on the front and back of the fabric. |
2. Muragi
 | Muragi means twisted. It is a variation of Holbein stitch. It has a ‘zig-zag’ nature. This can be made vertically, horizontally, or diagonally. The diagonal pattern, with a ladder-like appearance, is used most popularly. Muragi is also used to fill up patterns. This stitch is reversible and shows up the same on the front and reverse of the fabric. |
3. Neygi or Negi
 | Neygi means to weave. It is the typical pattern darning stitch. It uses running stitch to make patterns and gives a weaved effect. Neygi is now no longer popularly used in Kasuti hand embroidery, thanks to the weaving machines that do the job. This stitch is reversible, but they tend to be like mirror images of each other. |
4. Menthi
 | Menthe means fenugreek. It uses the typical cross stitch to fill in the patterns or motifs. This stitch is not reversible. While it shows up like cross fillings on the front of the fabric, the reverse will be just vertical or horizontal, or even diagonal lines. |
Designing the patterns
1. Enlarging and shrinking patterns
 | It is easy to enlarge or shrink a pattern to suit our requirement, thanks to the geometrical nature of Kasuti.A very simple pattern has been used to illustrate this. Notice that each line in the second pattern is twice the length of the lines in the first pattern. So, my second pattern is double the size of the first pattern. Mathematically, I have used 1:2 proportion. Similarly, you can use any kind of proportion. This method can be used to shrink the pattern as well. |
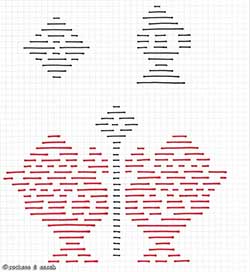
2. Making borders from ‘buti’
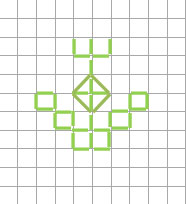 | A ‘buti’ is a small single stand-alone pattern. Often, in Kasuti, many ‘buti’ is used to sprinkle over a large area. We can also make borders from ‘buti’. |
 | The illustration shows how a series of ‘buti’ can be connected to make a border. You can use your imagination to use patterns to connect the ‘buti’. The ones shown here is just examples for you to get an idea. |
 | |
 |
3. Making corners from borders
 |  |
 |  |
| Creating a neat corner is important for Kasuti. Here are some examples of how we create borders from the earlier illustrated buti borders. | |
Transferring the design
We have to keep in mind that Kasuti is a form of counted thread work that can easily be done over even weave fabric today. We can do it over regular fabric too, but with some aid. The three ways of transferring designs from graph to fabric will be dealt with in the subsequent lessons.
1. Tracing from the graph paper
The designs can be traced using a tracing paper directly onto the cloth to be worked on. We need to be careful while stitching so that each corner of the stitch is neatly done and maintained.
2. Even weave cloth
Working on even-weave cloth does not require transferring of the design directly. The graph can be used as a referral to replicate the design onto the even weave cloth.
3. Voile net
This is a cloth net that is used as a replicate for an even weave cloth. We need to attach the net to the pain fabric to work on. The stitch can be now done over this net and cloth with the design on the graph as a referral to replicate. Once the design is done, the voile net can be carefully cut and pulled out leaving the stitched pattern on the plain fabric.
Reference: KASUTI skill training presentation by Avni Varia to Sampark.
Next, go to the other detailed Kasuti lessons: