
This lesson will illustrate how to do, probably, the most common pattern in chicken scratch : the heart.
It is advised to go through the thread-fabric-and-stitch section of the chicken scratch page before beginning this lesson. It will help you to understand the logic and techniques used in this embroidery.
The stitches used are mentioned with each illustration. To go to the instruction page of each stitch, you just need to click over them.
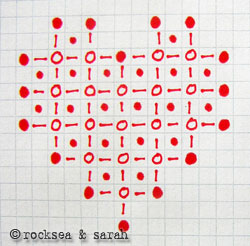 | 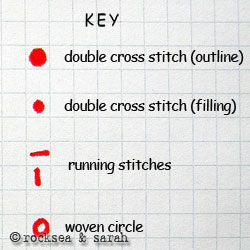 |
| This is the heart shape I intend to stitch. The key will help me to decode the symbols on the graph and use the stitches on the gingham cloth. Each cell on the graph represents each cell on the cloth. Unlike, in lesson 1, I try to get a bit experimental with the shades of threads I will be using here. | |
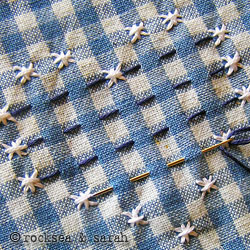 | Double cross stitch: I begin the pattern, the traditional way, that is, by doing the outline first. This helps me in demarking the pattern and containing all the stitches inside this parameter. I plan to do the heart in a dark shade, and so, the outline will be done in white over the dark cells. |
 | Running stitch: Next, I plan to do the woven circle for the filling. So, I prepare by doing running stitch horizontally, in the light colored cells. Then, I do the running stitch vertically over the rest of the tinted or light colored cells. Note that, traditionally, light colored cells are used only for straight stitches to anchor woven circles or woven ovals. |
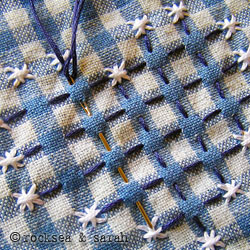
 | Woven circle: Between these straight stitches, I weave circles in the same dark shade of blue. This encircling of the dark cells will make it stand out giving it a lacy effect. |
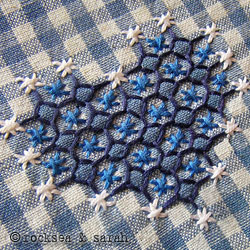 | Double cross stitch: Though, ideally, I am supposed to finish the double cross stitches before the woven circles, I chose to use them for filling in the end. This gave me a chance to experiment using a different shade of blue as shown. |
| This is a sample of how different effects can be created by using chicken scratch embroidery. | 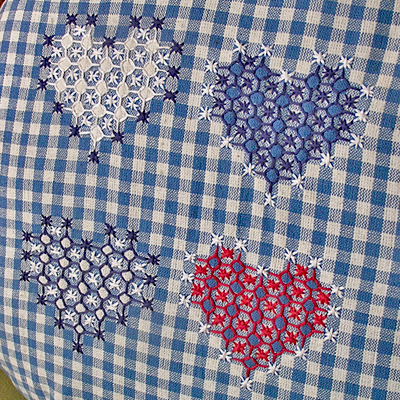 |
Other Lessons:


